Cross-References and Links
Links and cross-references are used for different purposes in Paligo:
-
Cross-references are usually a type of link that points inside the publication. This means that the source topic and the target topic are both included in the publication. However, a cross-reference can also reference Paligo content outside the publication (cross-publication links) when supported by outputs like Zendesk or Fluid Topics.
-
Link points outside the publication, like a website or documents stored on the web.
We recommend that you only use cross-references where necessary. This is because with cross-references, you create dependencies. If one topic links to another, both of those topics need to be included in a publication, otherwise the link will not work. As a result, the topics are dependent on each other and this makes it more difficult to reuse them independently.
Tip
If you already have a cross-reference and you need to change it, see Edit a Cross-Reference.
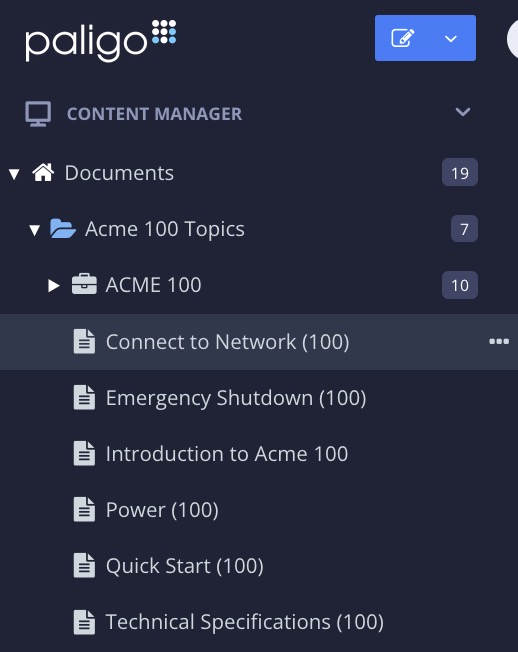
In a publication, there is a structure that references all of the topics (and sub-publications) that exist in the publication. Each reference to a topic or sub-publication is called a "fork" and has its fork:id. This is just for identifying the connection between the publication and
the topic / sub-publication and pointing out its position. It is not the same as the topic's xml:id.
For example, if you have a "Safety" topic that appears three times in the same publication, you can link to the fork for the second instance and the link will go to the second "Safety" topic. If you linked to the topic instead of the fork, the link would always go to the first instance of that topic.
Note
It is possible to add cross-references to elements inside other topics, see Link to Element in Other Topic.
To add a cross-reference:
-
Select the topic or component in the Content Manager to open it in the Editor.
Alternatively, you can Create a Topic and edit that.
-
Position the cursor where the link is to be inserted.
Tip
Alternatively, highlight the text that you want to use as link label.
-
Select the Insert tab in the Toolbar.

-
Select Link and choose Cross-reference.


Tip
Or use the keyboard shortcut Alt + R (Windows) or Option ⌥ + R (Mac) to add the cross-reference.
-
Enter a text as Link Label. Leave it blank if you want the link text to be the same as the topic title, see Auto-Text for Cross-References.

-
Locate the target in the tree structure or use the quick search.

Tip
Make your search more efficient by selecting which resource types to search for.

-
Select whether to make the cross-reference towards the topic or a fork.
-
Topic

If the target topic for the link only appears once in the publication, then you can link to the topic. This creates a link that uses the
xml:idof the topic. To add a topic reference, select the topic with the black icon. Paligo recommends this approach because the links will work when content is reused in other publications and also for topic branches. -
Fork

If the target topic appears multiple times in the same publication, you should link to the fork instead. By linking to the "fork" you link to the position of the topic in the publication structure by using the
fork:id. To add a "fork" reference, expand the publication and select the "fork" with the grey icon. It is important to know that fork links only work within the publication they originate from.

Paligo adds a cross-reference to the title of the selected topic or fork.
-
-
Select Save.

Note
If you want to change the cross-reference text or apply auto-text, select it to display the cross-reference editor. You can use that to enable or disable auto-text and change the text of the label, see Auto-Text for Cross-References.
To add a cross-reference to an element that is elsewhere in the same topic:
-
Select the topic or component in the Content Manager to open it in the Editor.
Alternatively, you can Create a Topic and edit that.
-
Position the cursor where the link is to be inserted.
Tip
Alternatively, highlight the text that you want to use as link label.
-
Select the Insert tab in the Toolbar.
-
Select Link and choose Cross-reference.
Tip
Or use the keyboard shortcut Alt + R (Windows) or Option ⌥ + R (Mac) to add the cross-reference.
-
Enter a text as Link Label. Leave it blank if you want the link text to be the same as the topic title, see Auto-Text for Cross-References.
Note
If you are linking to a procedure step or a list number, leave the Link Label field empty. Make sure that the auto box is checked, as this is needed for the link to show the list item or step number.
Also note that when you add the cross-reference, it will appear as a code reference. When you publish, this will be replaced by the step number. You can preview it before publishing, see Preview a Topic.

-
Select the Internal target tab to select an element inside your topic that currently have an
xml:id.Any elements that do not have an ID are not listed. You can generate an ID manually, see IDs for Cross-References).
Note
To link to a subsection heading in a topic, choose the
sectionelement of the subsection. Do not choose thetitleelement as the link should be to the section as a whole, not just thetitle.
-
Select Save.
To provide downloadable files in your content, you need to add external links pointing to those files on your server, and a script that turns external links into downloadable files.
A download link is an external link with the role attribute set to download. Download links will not work without a script that turns them into downloadable files.
To add a download link in a topic:
-
Select the topic or component in the Content Manager to open it in the Editor.
Alternatively, you can Create a Topic and edit that.
-
Position the cursor where the link is to be inserted.
Tip
Alternatively, highlight the text that you want to use as link label.
-
Select the Insert tab in the Toolbar.
-
Select Link and choose External link.

-
Enter a Link label and Link target.
-
Select Insert.
-
Select the
linkin the Element Structure Menu and choose Go to element.
-
Add the
roleattribute in the Element Attributes Panel and set its value todownload.
-
Select Save.
Download links will not work unless you add a script that turns them into downloadable files:
-
Use a text editor or code editor for creating (or updating) the JavaScript file.
-
Add the following script:
$(document).ready(function () { var link = document.getElementsByClassName('link download')[0]; $(link).attr("download", true); }); -
Save your JavaScript file making sure it has a
.jsfilename extension.
You can insert a link to a website or documents hosted on the web by using the URL of the website or document.
The link label is what the reader will see as the link text in the topic. If you want the link text to be the same as the URL, leave the Link Label field empty (blank).
Tip
By default, external links are opened in a new browser tab in HTML and HTML5 output.
If you want external links to be opened in the same tab, add the xlink:show attribute in the Element Attributes Panel and set the
value to replace.
-
Select the topic or component in the Content Manager to open it in the Editor.
Alternatively, you can Create a Topic and edit that.
-
Position the cursor where the link is to be inserted.
Tip
Alternatively, highlight the text that you want to use as link label.
-
Select the Insert tab in the Toolbar.
-
Select Link and choose External link.
-
Enter a Link label and Link target.
Leave the link label field empty to show the URL.
-
Select Insert.
-
Select Save.
You can add a link to an email address in your content. When the reader selects the link, their default email application will open and a new email is created, with the link email as the address in the To: field.
-
Select the topic or component in the Content Manager to open it in the Editor.
Alternatively, you can Create a Topic and edit that.
-
Enter the email address or other text that will act as the email link.
-
Highlight the text.

-
Select the Insert tab in the Toolbar.
-
Select Link and choose Email address.
-
Enter the Email address that will be added to the To: field in a new email.

-
The Label shows the link text you have entered and highlighted in your topic.
If you want to change it, you can edit it in the Label field.
-
Select Insert to add the link.
-
Select Save.
When you are creating step-by-step procedures and numbered lists, you may need to reference another step or list item. For these references, it is often better to have the link appear as the step or list item number, and have that managed automatically. Then, if the order of the steps or list items changes, Paligo will automatically update the reference to use the appropriate number.
Select the Auto box for the cross-reference make it look like this (where n is the number):
-
Step n for steps in a procedure.
-
n for list items in a numbered list.
To link to a list item or procedure step within a topic, see Add Cross-Reference Within the Topic.
To link to a list item or procedure step in another topic, you have to make sure that that step or list item has an xml:id and use that xml:id in your cross-reference.
To link to a list item or procedure step in another topic:
-
Open the topic that contains the list item or procedure step that you want to link to.
-
Position the cursor in the list item or step that you want to link to.
-
Select the
listitemelement or thestepelement in the Element Structure Menu and choose Go to element.
-
Check if an
xml:idis added in the Element Attributes Panel:-
If an
xml:idis already added, skip the next step. -
If there is no
xml:id, you will need to add it, continue with the next step.

-
-
Select the
listitemelement or thestepelement in the Element Structure Menu and choose Generate ID.Paligo will generate an xml:id attribute for the list item or step automatically.

-
Copy the
xml:idvalue for the list item or step element in the Element Attributes Panel. You need this for the cross-reference.
-
Open the topic that is going to contain the cross-reference.
-
Position the cursor where the link is to be inserted.
Tip
Alternatively, highlight the text that you want to use as link label.
-
Select the Insert tab in the Toolbar.
-
Select Link and choose Cross-reference.
Tip
Or use the keyboard shortcut Alt + R (Windows) or Option ⌥ + R (Mac) to add the cross-reference.
-
Add a cross-reference to the topic that contains the list item or procedure step that you want to reference.
-
Select the cross-reference in the Element Structure Menu and choose Go to element.
-
In the Element Attributes Panel the cross-reference has an
xlink:hrefattribute and the value of the attribute is a reference to the target topic. -
Add a forward slash / at the end of the
xlink:hrefattribute value and then paste in the id you copied in step 6.For example: urn:resource:component:28836/step-idm73263043573356
Where the text before the forward slash is the reference to the topic and the text after the forward slash is the id for the step.
-
Select Save.
When you are writing your topics in Paligo, you can add links to external files that will be stored locally, rather than stored on the web. For example, you might want to link to a PDF file that you store in a folder that is added to your output files after publishing.
To link to a local file, use the external website link feature and edit the link:
-
Select the topic or component in the Content Manager to open it in the Editor.
Alternatively, you can Create a Topic and edit that.
-
Position the cursor where the link is to be inserted.
Tip
Alternatively, highlight the text that you want to use as link label.
-
Select the Insert tab in the Toolbar.
-
Select Link and choose External link.
-
Enter a Link label and Link target.
Leave the link label field empty to show the URL.
Note
If you want to use a relative link, edit your Layout so that the Use a short and flat URL structure for output files option is enabled. This will create an output with a flat structure, where all HTML files are in one folder.
-
Select Insert.
-
Remove the
http://prefix to link to a local file, not a web address in the Element Attributes Panel.Paligo automatically adds the prefix
http://to thexlink:hrefattribute entered in the previous step.

To the left - The initial
xlink:hrefwith http:// prefix. This should be removed to link to local files. To the right - The prefix removed to link will to a local file. -
Select Save.
-
Publish the topic.
-
After publishing, add the local files (such as PDF) to the location that you defined as the link target.
You can use an external link to forward the user to a phone app with the number automatically entered. This is done in two steps:
-
Add script to Forward the Phone Number
Important
If the HTML5 layout already uses a customized JavaScript file, you should add your changes to that file instead of creating a new one.
If you upload a new JavaScript file, the existing one will be replaced and you will lose the functionality in the old JavaScript file.
A phone number link is an external link with the role attribute set to tel. To forward it to a phone app, you need a script to fetch it, see Forward the Phone Number.
To add a phone number link in a topic:
-
Select the topic or component in the Content Manager to open it in the Editor.
Alternatively, you can Create a Topic and edit that.
-
Position the cursor where the link is to be inserted.
Tip
Alternatively, highlight the text that you want to use as link label.
-
Select the Insert tab in the Toolbar.
-
Select Link and choose External link.
-
Add a Link label and use the phone number as Link target.

-
Select Insert.
-
Select the
linkin the Element Structure Menu and choose Go to element. -
Remove http:// in front of the phone number in the Element Attributes Panel.
-
Add the
roleelement in the Element Attributes Panel and set its value totel.
-
Select Save.
To add a script that forwards the user to a phone app with the number automatically entered:
-
Use a text editor or code editor for creating (or updating) the JavaScript file.
-
Add the following script:
$(document).ready(function () { for (const phoneLink of document.getElementsByClassName("link tel")) { phoneLink.href = `tel:${phoneLink.getAttribute('href')}` } }); -
Save your JavaScript file making sure it has a
.jsfilename extension.
With cross-references, you can enter your own text (referred to as a label) or, for some elements, you can use Paligo's auto-text feature. The auto-text that Paligo adds varies depending on the type of element you are cross-referencing.
If you cross-reference any of the following elements, the auto-text uses the text from the title of the element:
-
table -
equation -
example -
procedure -
figure
If these elements do not have a title element, enter your own text and do not use the auto-text feature for the cross-reference.
For most other elements, the auto-text will use the title of the parent section. For example, if you cross-reference a paragraph in a topic, the auto-text will use the title for the topic.
If you cross-reference a step in a procedure, auto-text will come out as "Step n", where n is the number. We recommend that you also add a cross-reference to the target topic's title so that the user has more context about where the step is located.
Note
The text shown in the Paligo editor is not necessarily what you will see in the published output. For example, cross-references to a step in a procedure appear as a link to the target topic in the editor but are converted to "Step n" as part of the publishing process.
To change the text for a cross-reference, select it to display the cross-reference editor. There, you can edit the label in the field and use the Auto checkbox to enable or disable auto-text. You can only edit the label if Auto is disabled.
 |
Tip
You can customize the auto-text generated for cross-references and links, see Cross-Reference Styling.
You can set Paligo to create automatic links to other related topics. The links appear at the bottom of a topic and help readers to find other relevant information. Using automatic links is much easier and quicker to set up and manage than using manually-entered links.
There are two types of automatic links:
-
TOC-based automatic links appear below an "In this section" heading. These are links to topics that are "children" of the topic, see Enable Section TOC.
-
Taxonomy-based automatic links give you control over the relationships between topics. By default, these links appear below a "See also" heading.
You can use taxonomy tags to get Paligo to create automatic references between topics. The references appear in a "See also" section at the bottom of a topic.

Note
Taxonomy tags also have other purposes. To find out more, see Taxonomies.
To setup taxonomy-based "See also" references:
-
Set up the Layout(s) to enable the "See Also" references:
-
Use the Layout(s) you edited in step 2 to publish your content.
We have a video that shows "See Also" references being set up for an HTML5 Help Center output (see Example of "See Also" links in an HTML5 Help Center).
The first task to complete is setting up the taxonomies for your "See Also" references.
-
Select the Taxonomy Manager in the Content Manager to open the structure.


-
Select the dotted menu (...) for the Taxonomies and choose Create taxonomy tag.

-
Enter a name for your parent taxonomy tag .
It will be the top-level taxonomy tag, also known as the parent. We recommend that you call this tag "See Also Links", but you can give it any name.
-
Select the dotted menu (...) for the new "parent" taxonomy tag and choose Create taxonomy tag.
Paligo creates a taxonomy tag at a lower level. This is a "child" tag to your "parent" tag.
-
Enter a name for your "child" taxonomy tag .
You will use the "child" tag to associate related topics, so use a name that represents them as a collection. For example, if all of the topics are about charging or replacing a phone battery, you could name the tag "battery".

-
Create as many child taxonomy tags as you need.
You now have a "parent" tag and one or more "child" tags.
-
Select the the dotted menu (...) for the "parent" tag and choose Floating Content Panel.
Paligo displays the Floating Content Panel for the taxonomies.
-
Drag your "child" taxonomy tags from the Floating Content Panel on to the relevant topics in the Content Manager.
Note
Do not drag the top level "parent" tag on to a topic as this will stop the "see also" links from working.

Note
You can find out which topics are associated with a taxonomy by double-clicking on a taxonomy tag. Paligo displays details for that taxonomy tag, including the names of the topics that use it.
Now that the taxonomies are in place and associated with your topics, the next step is to set up your Layout:
If you are going to publish your content to an HTML5 Help Center, set up your Layout for "See Also" links:
-
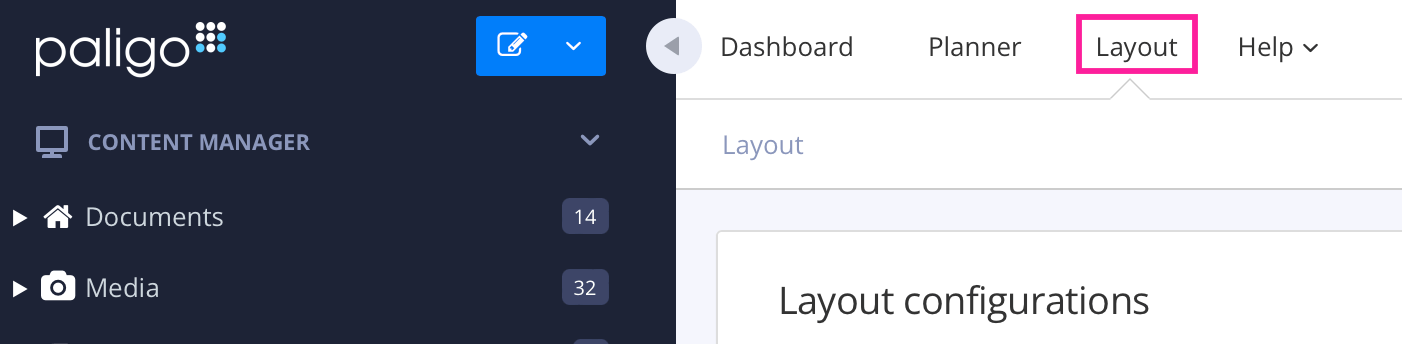
Select Layout in the top menu.
Paligo displays a list of Layouts. The list is empty if there are no custom Layouts in your Paligo instance.
-
Select the Layout you want to update or Create a Layout.
Tip
You can copy the URL of the Layout Editor and paste it into a new tab in your browser. This can be useful if you frequently switch between your Paligo content and the Layout settings.
-
Select Classes and attributes in the sidebar.

-
Select Enable for Output taxonomies.

-
Enter the name of the parent taxonomy tag with a semicolon in the Relationship taxonomy.

-
Select Enable for Output 'role' attribute as class names.

-
Select TOC and chunking in the sidebar.

-
Make sure that Use section TOC is set to Default, Before or After.

-
Select Save.
-
Publish your content using the Layout you edited. Paligo will create the "see also" links automatically and add them to the bottom of the relevant topics.
If you are going to publish your content to PDF, set up your PDF Layout to support "See Also" sections:
-
Select Layout in the top menu.
Paligo displays a list of Layouts. The list is empty if there are no custom Layouts in your Paligo instance.
-
Select the Layout you want to update or Create a Layout.
Tip
You can copy the URL of the Layout Editor and paste it into a new tab in your browser. This can be useful if you frequently switch between your Paligo content and the Layout settings.
-
Expand the General category and select Filtering and taxonomies.
-
Set Output taxonomies to Enable.
-
In the Relationship taxonomy section, enter the name of your "parent" taxonomy tag for "see also" tags. For example, if you gave the "parent" tag the name "See Also Links" then you should enter "See Also Links" in the Relationship taxonomy field.
-
Select Relationship Topics Section and use the settings there to style the "See Also" section and links (optional).
-
Select Save.
-
Publish your content using the Layout you edited. Paligo will create the "see also" links automatically and add them to the bottom of the relevant topics.
The following video shows "See Also" links being set up for an HTML5 Help Center output. If you are unable to view the video, you can follow the steps described in Set Up the Taxonomies for "See Also" References and Set Up your HTML5 Help Center Layout for "See Also" Links.
By default, external links are opened in a new browser window in HTML / HTML5 output. To change the default value for all external links the layout settings have to be updated. There are four available options:
-
_blank - Will open the link in a new browser window. Default setting
-
_self - Will open the link in the same browser window.
-
_parent - If the link is nested inside other frames, it will open the closest frame (one level up) in the browser window.
-
_top - If the link is nested inside other frames, it will open the initial webpage (the topmost / outermost frame) in the browser window.
 |
The following instruction describes how to change the default link behavior for external links to be opened in the same browser window.
-
Select Layout in the top menu.
Paligo displays a list of Layouts. The list is empty if there are no custom Layouts in your Paligo instance.
-
Select the Layout you want to update or Create a Layout.
Tip
You can copy the URL of the Layout Editor and paste it into a new tab in your browser. This can be useful if you frequently switch between your Paligo content and the Layout settings.
-
Select Cross-references in the sidebar.

-
Scroll down to Open external website links in new tab or window section.
-
Select _self from the menu.
-
Select Save.
You can use Insert > Link > Cross-reference to add a cross-reference to a specific element in another topic. But this is only possible if the element being linked to has an XML ID. If it does not have an XML ID, you will need to edit the target topic and give the element an XML ID.
Tip
We recommend that you use cross-references between topics only where necessary, to avoid dependencies. Cross-references only work if the source topic (that contains the cross-reference) and the target topic are both included in the publication. For this reason, using cross-references between topics can affect the reuse possibilities for your topics.
To add a cross-reference to an element in another topic:
-
Open the topic that contains the element that you want to link to.
-
Position the cursor in the element that you want to link to.
-
Select the element in the Element Structure Menu and choose Go to element.
-
Check if an
xml:idis added in the Element Attributes Panel:-
If an
xml:idis already added, skip the next step. -
If there is no
xml:id, you will need to add it, continue with the next step.
-
-
Select the element in the Element Structure Menu and choose Generate ID.
Paligo will generate an xml:id attribute for the list item or step automatically.
-
Select Save.
-
Open the topic that is going to contain the cross-reference.
-
Position the cursor where the link is to be inserted.
Tip
Alternatively, highlight the text that you want to use as link label.
-
Select the Insert tab in the Toolbar.
-
Select Link and choose Cross-reference.
Tip
Or use the keyboard shortcut Alt + R (Windows) or Option ⌥ + R (Mac) to add the cross-reference.
-
Enter a text as Link Label. Leave it blank if you want the link text to be the same as the topic title, see Auto-Text for Cross-References.

-
Select whether to make the cross-reference towards the topic or a fork.
Select the arrow next to the topic to expand it and reveal its elements.

-
Select the element you want to cross-reference.
Note
Cross-references to
listitemelements inside bullet lists and ordered lists (numbered lists) may produce unusual results or be excluded from your published output completely. For these, we recommend that you reference a title element instead and explain which step you are referring to.Paligo does support cross-references to steps in procedures, and these will come out as "Step n" in the published output. We recommend that you also add some text with a cross-reference to the title of the target topic, so that your readers have more context. For example, "see Step 4 in Installing the battery", where "Step 4" is a cross-reference to the step and "Installing the battery" is a cross-reference to the target topic's title.
Paligo adds the cross-reference to your topic.

Note
Cross-references to procedure steps do not show as "Step n" in the editor. The link to the target topic and element is converted into "Step n" when you publish.
-
Select Save.
Tip
If you want to change the cross-reference text or apply auto-text, select it to display the cross-reference editor. You can use that to enable or disable auto-text and change the text of the label, see Auto-Text for Cross-References.
When you have inserted the link, you have a popup toolbar to edit it when the link is selected.
If the checkbox auto is:
-
Checked (default) - The link will automatically get the target topic title as link text.
-
Unchecked - If you want another link text, just uncheck it and type directly in the link.
 |
Tip
You can customize the auto-text generated for cross-references and links, see Cross-Reference Styling.
To edit the link target:
-
Select the blue pen to the right to open the Content Manager browser.

It will show the currently selected target.
-
Select another link target from the browser.

Tip
If you want to go to the target topic, just click the icon on the left.
-
Select Save.
You can embed a Google Doc or OneDrive document by using a special type of link. You need to make your document available for embedding.
-
The way to do this varies depending on the type of document:
-
For a Google Doc, select File > Publish to the web in your Google Doc. Next, copy the Link URL.
-
For Google Slides, select File > Publish to the web in your Google Slides. Next, copy the Embed link. You will need to edit this link before you use it in step 4. When editing, remove the frame information. For example, let's say your embed link looks like this:
<iframe src="https://docs.google.com/presentation/d/e/long_string_of_characters/embed?start=false&loop=false&delayms=3000" frameborder="0" width="960" height="569" allowfullscreen="true" mozallowfullscreen="true" webkitallowfullscreen="true"></iframe>
You should remove
<iframe src=" at the start and everything after /embed, so that the link looks like this:https://docs.google.com/presentation/d/e/long_string_of_characters/embed
-
For OneDrive:
-
Pick the file you want to embed by selecting the check box in the upper-right corner of the file.
-
Select Embed at the top of the page, and then choose Generate.
Note
This feature is only suitable for documents and cannot be used for images.
-
-
-
Insert a
linkelement in your topic where you want to embed the document. It needs to be in apara, but the para should only contain that link.Tip
You can add link text to make it easier to see what it links to, but that text will not be used in the output.
-
Add a
roleattribute. For a Google Doc, set it togdoc, and for a OneDrive document, set it toonedrive. -
Add an
xlink:hrefattribute and set the value to the embed URL.
Note
-
The document will not be embedded in the topic inside the editor, it will only show that there is one embedded. The embedding itself happens when you publish.
-
Embedding is only available for HTML5 or Zendesk output. For other formats a regular link will be created.
By adding the role attribute to an external link and setting the value to external, the webpage appears as an iframe element in your output as below.
Note
Paligo cannot validate external links, therefore it is necessary for you to test and verify that it works.
To embed an external link:
-
Select the topic or component in the Content Manager to open it in the Editor.
Alternatively, you can Create a Topic and edit that.
-
Position the cursor inside a para.
-
Select the Insert tab in the Toolbar.
-
Select Link and choose External link.
-
Enter a Link label and Link target.
Leave the link label field empty to show the URL.
-
Select Insert.
-
Select the
linkelement in the Element Structure Menu and choose Go to element.
-
Add the
roleattribute in the Element Attributes Panel and set the value toexternal.
-
Add the
xlink:hrefattribute and enter the URL as value. -
Select Save.
-
Select the Preview tab in the Toolbar.

-
Publish to HTML5 to test that the embedded page works.
Paligo content is stored in a database and each element can have its own unique ID. Certain types of content, such as paragraphs, images and variables have a special type of ID called xinfo and this is always generated by Paligo. Other elements can have an optional ID called
xml:id and these can be generated automatically by Paligo or manually by you.
Cross-references in Paligo use the id to identify the target of the cross-reference. Paligo creates the id automatically for some types of cross-reference, primarily those to components that can have a title. It is added as an xml:id attribute. But you may need to add an xml:id attribute manually for cross-references to other types of content. This applies to cross-references between topics and also cross-references to content inside the same topic, for example, to a subsection.
In most cases, we recommend that you cross-reference to a:
-
Section -
Subsection - a
sectioninside anothersection -
A structure that can have a
title, such as atable.
Note
If you want to cross-reference to a different type of content, that is only possible if that content has an xml:id. So you may need to Manually Generate IDs for Cross-references before you can link to it.
It's also possible to set Paligo to auto-generate xml:ids , see Auto-Generate IDs for
Cross-References .
You can only add cross-references to elements that have an xml:id. If the element you want to reference does not have an xml:id, you can generate one manually. Paligo has a feature in the editor that generates a suitable id for you. It's not a good idea to make up your own id
values, as ids should be unique.
Tip
You can set Paligo to auto-generate the xml:ids, see Auto-Generate IDs for
Cross-References.
To generate a unique xml:id for an element:
-
Select the topic or component in the Content Manager to open it in the Editor.
Alternatively, you can Create a Topic and edit that.
-
Select the target element In Element Structure Menu and choose Generate ID.
For example, if you want to link to a procedure, select the
procedureelement.
Paligo generates an
xml:idfor the element in the Element Attributes Panel
-
Select Save.
Note
You should now be able to add a cross-reference to the element, see:
You can only add cross-references to elements that have an xml:id. This is an attribute that you can add manually, but to save time and effort, it is usually better to let Paligo auto-generate them for you.
To set up automatic xml:id generation, use the Editor settings. There, you can choose which elements should get auto-generated xml:ids. Your choices will apply to all topics in your Paligo instance, and for all users.
-
Select the topic or component in the Content Manager to open it in the Editor.
Alternatively, you can Create a Topic and edit that.
-
Select the cog icon in the Toolbar.


-
Select the Global settings tab in the Editor Settings.

-
Add the names of elements that should get auto-generated
xml:idsin the Autogenerate ID field.Typically, we find that auto-generating
xml:idsfor the following elements is sufficient for most users (if needed, you can add more elements to the list):section figure table example equation procedure bridgehead sidebar note warning caution tip important
Use a space to separate each element name and make sure to add the element names in lower case.
Note
We recommend not remove any of the default elements and only add to them if needed. In many cases, linking to a
sectionelement is sufficient to guide the reader to the relevant information.Caution
If you change the default settings for which elements should get an auto-generated
xml:id, we recommend you only include the larger block element structures.Do not include elements such as
paraandtitle, as that could cause issues with duplicate ids when you reuse text fragments. -
Select Save Settings.
When you, or other users, add a new element to a topic, Paligo checks to see if it is listed in the Autogenerate ID field. If it is listed, Paligo will give that element an xml:id. But it will only give an xml:id to new elements, not elements that previously existed in the topic.
Tip
It is also possible to manually generate xml:ids via Element Structure Menu, see Manually Generate IDs for Cross-references
 |
If an element is reused several times in a publication and you want to link to the element in a specific topic to provide context to the reader, you have to manually create a fork link for your PDF output.
You can add cross-references to About Elements (images, paras, procedures, tables) reused in components or topics, but it will point to where the element was initially created, see Cross-References and Links.
When a topic or component is included in a publication, it gets a unique fork:id for that specific instance in the publication. By adding the element xml:id to the fork:id, you get a fork link that leads to the element in the reused position. The fork link will by default show the page number within square brackets for PDF output. To style the cross-reference, see Cross-Reference Styling.
 |
Note
A manually created fork link only works in the publication it originates from.
To manually create a fork link:
-
Generate an
xml:idfor the target element, see Manually Generate IDs for Cross-references. -
Open the topic that will have the cross-reference.
-
Select Link and choose Cross-reference in the toolbar.
-
Enter a Link label. (Optional).
-
Navigate to the publication.
Note
The cross reference dialog shows the targets both as part of the publication and as topic (outside the publication tree). It is important to select the one in the publication tree to get the
fork link!Learn the difference between topics and forks, see Topic or Fork.
-
Select the arrow in front of the topic to see linkable elements.

-
Select the element to make it appear as a link in the topic. It will lead directly to the element origin.

-
Copy the element
xml:id(from the front slash "/" and forward) from the created link. -
Redirect the cross-reference to point to the topic containing the reused component.
In our example it is "Battery disposal".
Note
The cross reference dialog shows the targets both as part of the publication and as topic (outside the publication tree). It is important to select the one in the publication tree to get the
fork link!Learn the difference between topics and forks, see Topic or Fork.
-
Paste the element
xml:idafter the topicfork:idin the Element Attributes Panel.In our example, the Battery disposal
fork:idis "urn:resource:fork:37742".
This
fork linkwill now show the table in the reused position. -
Select Save.
-
Publish the topic as PDF to test the link.

The preview is not able to visualize
fork links.
There may be times where you want to edit a regular topic and add information that is stored in a publication topic. For example, you may want to add the copyright year and holder to a topic.
One way to do this is to use a dynamic variable. This is a reference to another element.
-
Edit your regular topic.
Note
The topic needs to be part of at least one publication. When you publish, Paligo will take the information from the publication's topic and insert it into the dynamic variable.
-
Use the keyboard shortcut to add a dynamic variable.
The keyboard shortcut is:
-
Windows: Ctrl + Alt + Shift + I
-
Mac: Control ^ + Option ⌥ + Shift ⇧ + I
Alternatively, you can add a phrase element and give it the role attribute with a value of
dyntextvarFor more details, see Insert a Dynamic Text Variable.
-
-
Enter the reference in the dynamic text variable. For a reference to the publication topic, use this syntax:
${//d:article/d:info/d:<element>/d:<child element>}$This structure applies for referencing the various info elements in a publication topic.
-
d:article references the article element in the publication topic
-
d:info references the info element inside it
-
d:<element> references an info element, for example, d:pubdate
-
d:<child element> references a child element of the previous element, for example, d:copyright/d:year is a reference to the year element that is a child of the copyright element.
For example:
${//d:article/d:info/d:copyright/d:year}$You can add text as well, for example, a common use of dynamic variables is to include the copyright information. That could be a dynamic variable with text at the start and then the reference to the copyright year and copyright holder elements.
Copyright © ${//d:article/d:info/d:copyright/d:year}$ ${//d:article/d:info/d:copyright/d:holder}$Note
The information from the publication topic does not appear when you view a topic in the Paligo editor. It is added when the topic is processed during publishing.
-
-
Select Save.
When you publish the publication, Paligo will find the referenced elements and insert the values from those into the dynamic variables.
When you add a cross-reference, you can use the New Cross Reference dialog to browse to the topic or elements you want to link to. Alternatively, you can use its search feature.
-
Select the topic or component in the Content Manager to open it in the Editor.
Alternatively, you can Create a Topic and edit that.
-
Position the cursor where you want the cross-reference.
-
Select the Insert tab in the Toolbar.
-
Select Link and choose Cross-Reference.
-
Browse to the topic you want to link to or use the Search field.

-
Select the arrow button on the search field to display the search filters.

-
Use the checkboxes to filter your search.
-
Document - If you check the box, Paligo will only search in topics, informaltopics, and other "documents". If you clear the box, Paligo will search in "documents" and also folder names, which is useful if you know the name of the folder that contains the content, but not the name of the "document".
-
Content - Check the box to search in the main body content of your topics. Clear it to exclude the content from your search.
-
Title - Check the box to search in the title element of your topics. Clear it to exclude the title elements from your search.
-
Filename - Check the box to search for the topic name or the publication name, rather than its title.
-
Enable autosearch - Check the box to turn on the autosearch feature. When you start typing in the search field, Paligo will automatically find matches as you type. Clear the box to disable this feature.
-
Wildcard search - Check the box to allow wildcard characters such as * in the text that you will enter in the search field. Wildcard characters can represent any other character. Clear the box if you want Paligo to match by specific characters only.
Use an asterisk (*) to represent one or many characters, or use a question mark to represent any single character. You can use these symbols anywhere in the search string.
For example,
automati*would find both "automation" and "automatic", andautomo?i?ewould find both "automobile" and "automotive".
-
-
Enter the text you want to search for in the Search field.
Paligo will find the nearest matching results and you can choose which one you want to link to.
-
Select Save.
You can also make images work as links. There is however no selection dialog to insert that type of link. You do it by adding the link target as an attribute on the image itself:
-
Select the
mediaobjectorinlinemediaobjectelement. -
Add an
xlink:hrefattribute. -
Add the target value using the following syntax:
urn:resource:component:31214.The first part is always the same, and the last part (the numbers) is the id of the target topic.
Tip
You can get the id of the target topic by opening the Structure View for that topic, where you find it at the top of the metadata.
Another way to get the entire link value is to simply make a regular ("dummy") cross-reference, and then copy the value from there and then delete the dummy cross-reference.
It is possible to override the default link behavior for individual links by adding the attribute xlink:show. The following values can be selected for this attribute:
-
New - Will open the link in in a new browser window. This is similar to the effect achieved when using _blank in the Layout settings.
-
Replace - Will open the link in the same browser window. This is similar to the effect achieved when using _self in the Layout settings.
-
Embed - This value specifies that instead of linking to the resource, it will be loaded and shown within the document. This is similar to the effect achieved by an HTML Image tag. Only for customizations
-
Other - This value indicates that other markup is present in the link, which means that the target attribute determines its behavior. Only for customizations
-
None - This value specifies that there is no indication for how to refer to the linked resource. Only for customizations
The following instruction describes how to change an individual link to be opened in a new browser window.
-
Select the link in the topic.
-
Add the
xlink:showin the Element Attributes Panel. -
Select new from the menu.

-
Select Save.