Editor Settings
The Editor Settings are global for the Paligo Editor and will apply to all the topics and publications that you work with. However, the settings will only be applied to your user account. Other Paligo users can set up their own preferences.
Control which elements gets automatic IDs from Paligo, see Auto-Generate IDs for Cross-References. Change the color scheme for the source code editor, see Set Source Code Editor Theme. Select math editor, see Mathematics. Enable or disable automatic validation against the three different sets of validation rules, see Validation.
Tip
To enable the usage of more than 9 subsections in a topic, the checkbox Save can be cleared under Paligo Recommended Rules. However the best way is to Use Components to Create Subsections.
 |
The Editor Settings dialog is divided in five tabs.
Tip
To learn how to:
-
Control the highlights in the editor, see Enable or Disable Highlights.
-
Hide parts of the editor so that it is more minimalistic, see Switch to Distraction-Free Mode.
-
Select the topic or component in the Content Manager to open it in the Editor.
Alternatively, you can Create a Topic and edit that.
-
Select Editor settings in the toolbar.


-
Paligo displays the Editor Settings dialog.
The editor settings are global and will apply to all the topics and publications that you work with. The settings will only be applied to your user account.
When you open a topic or publication in the editor, Paligo prevents other users from being able to edit it. This is called "checking out". Other users can still view a checked-out document, but they cannot edit it. When you have finished editing, you can check the document back in so that other users can edit it if needed.
By default, Paligo is set to check in documents automatically when you:
-
Open a different topic in the Editor
-
Navigate to a different display in Paligo, such as the Dashboard or Planner
-
Close the tab that is showing the document
-
Close the browser
Depending on how you work, you may prefer to disable this behavior so that documents are only checked in when you check them in manually.
To control the automatic check-in behavior:
-
Select the topic or component in the Content Manager to open it in the Editor.
Alternatively, you can Create a Topic and edit that.
-
Select Editor settings in the toolbar.
-
Paligo displays the Editor Settings dialog.
The editor settings are global and will apply to all the topics and publications that you work with. The settings will only be applied to your user account.
-
Select the General tab.
-
Select Automatically check-in the current document box to control whether Paligo checks in topics and publications.

-
Check the box to make Paligo automatically check in topics and publications.
-
Clear the box to prevent automatic check-in of topics and publications. You will have to check in your documents manually.
Note
The choice you make here applies to your user account only. Paligo may still check in documents automatically for other users.
-
-
Select Save Settings.
DocBook XML allows para elements to contain other block elements, such as other para elements, procedures, and admonitions. This structure can cause problems when translating content. To avoid these translation issues, Paligo can automatically
convert your content so that block structures are not positioned inside para elements.
Note
If your content has block structures inside para elements and it has been translated previously, please contact customer support before enabling this feature.
To turn the automatic fix feature on or off:
-
Select the topic or component in the Content Manager to open it in the Editor.
Alternatively, you can Create a Topic and edit that.
-
Select Editor settings in the toolbar.
-
Paligo displays the Editor Settings dialog.
The editor settings are global and will apply to all the topics and publications that you work with. The settings will only be applied to your user account.
-
Select the General tab.
-
Select Automatically fix problematic element structures box to control whether Paligo adjusts your content structure.

-
Check the box to set Paligo to automatically adjust your content structure so that para elements do not contain other block elements.
-
Clear the box to turn off the automatic structure fixing feature for the Editor (and Source Code Editor).
Note
The settings you make here will only apply to your user account only.
-
-
Select Save Settings.
When you edit topics that contain links, you can select a link to display the link tools. The link tools is a pop-up that has options for:
-
Opening the link target in the editor
-
Making the link label (text) automatically use the title of the target topic
-
Editing the link target
 |
The link tools pop-up is enabled in Paligo by default. But you can disable it if you prefer.
To enable or disable the link tools pop-up:
-
Select the topic or component in the Content Manager to open it in the Editor.
Alternatively, you can Create a Topic and edit that.
-
Select Editor settings in the toolbar.
-
Paligo displays the Editor Settings dialog.
The editor settings are global and will apply to all the topics and publications that you work with. The settings will only be applied to your user account.
-
Select the Editing tab.

-
Select Automatically show link tools in the editor box to control whether you can access the link tools.

-
Check the box to enable link tool access.
-
Clear the box to prevent access to the link tools.
Note
The choice you make here only applies to you. Other Paligo users will still be able to access the link tools (as long as they have the box checked in their editor settings).
-
-
Select Save Settings.
Paligo has an autosave feature that stores your content automatically at regular intervals. The autosaving is performed in the background without validation, to avoid interrupting your editing. We recommend that you also save your content manually at regular intervals and also use the validation feature to make sure your content is valid, see Validate Content Manually.
Via the Editor Settings you can set how often Paligo performs an autosave and to turn autosave on or off.
Caution
If you enable the autosave feature, do not open the same topic in multiple browser windows. This is because it is possible to accidentally overwrite your content.
For example, let's say you open an "Introduction" topic in two different tabs. You edit the topic in tab 2 and so Paligo autosaves tab 2. You switch back to tab 1 to see how the topic looked originally. If Paligo autosaves while you are on tab 1, the content on tab 1 is saved to the topic in the database. As a result, you lose your progress from tab 2 as the content from tab 1 overwrites it.
-
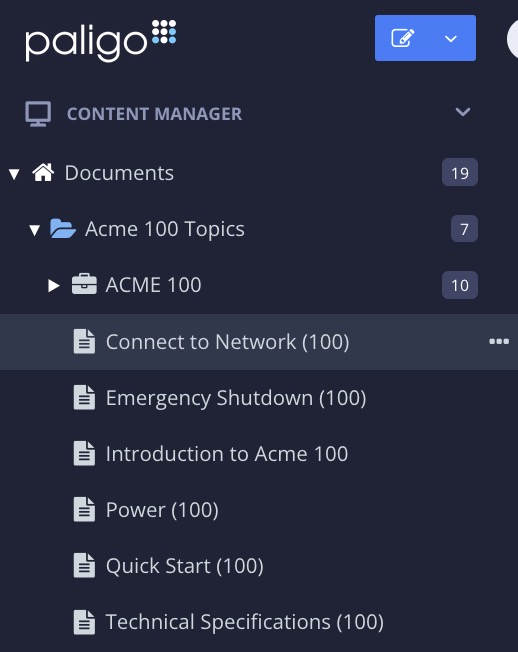
Select the topic or component in the Content Manager to open it in the Editor.
Alternatively, you can Create a Topic and edit that.
-
Select Editor settings in the toolbar.
-
Paligo displays the Editor Settings dialog.
The editor settings are global and will apply to all the topics and publications that you work with. The settings will only be applied to your user account.
-
Select the Editing tab.
-
Select a setting from the menu In the Autosave Document section.

You can choose from:
-
Turn off autosave - Disables the autosave feature. You will need to save your content manually.
-
1 minute - Paligo saves your content automatically every minute.
-
5 minutes - Paligo saves your content automatically every five minutes.
-
10 minutes - Paligo saves your content automatically every ten minutes.
-
30 minutes - Paligo saves your content automatically every thirty minutes.
Note
The choice you make here only applies to you. Other Paligo users can set up their own autosave preferences.
-
-
Select Save Settings.
When you are editing in Paligo, there may be a time where you close the Editor without saving. For example, you could have a power outage or the browser could crash. In these cases, Paligo can restore most, if not all, of the content you were working on. It does this by using a restore capability that is available in the most leading browsers.
To recover a topic that was closed without being saved, you need to have the restore unsaved content feature enabled. It is enabled by default, in the Editor settings, but you can turn it off if you prefer.
-
Select the topic or component in the Content Manager to open it in the Editor.
Alternatively, you can Create a Topic and edit that.
-
Select Editor settings in the toolbar.
-
Paligo displays the Editor Settings dialog.
The editor settings are global and will apply to all the topics and publications that you work with. The settings will only be applied to your user account.
-
Select the Editing tab.
-
Select Remember when content hasn't been saved box to enable or disable the restore feature.

-
Check the box if you want Paligo to present you with the option to restore unsaved content.
-
Clear the box if you do not want Paligo to restore unsaved content.
Note
The choice you make here only applies to you. Other Paligo users have their own editor settings that control whether the restore content feature is available.
-
-
Select Save Settings.
By default, you can give your topics different names to their titles. For example, you could create a topic in the Content Manager and name it "Introduction" but then when you edit the topic, you could set its title to "Introduction to Acme 100". If you prefer, you can set Paligo to
match the topic names and titles so that they are the same.
Note
We recommend that you disable the Autoupdate title feature if you have several publications that need topics with the same name, but different content. For example, if you have three different publications, each with their own unique "Introduction" topic, then it is a good idea to disable Autoupdate title. This is because if the title and topic name are the same, you would get three "Introduction" topics and it could be confusing for authors.
With the Autoupdate title feature turned off, you can have three different topics with "Introduction" as their title, but you can name the topics differently, such as "Introduction Acme 100", "Introduction Acme 200", and "Introduction Acme 300". If the feature is turned on, all three topics are named "Introduction".
-
Select the topic or component in the Content Manager to open it in the Editor.
Alternatively, you can Create a Topic and edit that.
-
Select Editor settings in the toolbar.
-
Paligo displays the Editor Settings dialog.
The editor settings are global and will apply to all the topics and publications that you work with. The settings will only be applied to your user account.
-
Select the Editing tab.
-
Select Automatically update the document title on save box to enable or disable the topic name and title matching.

-
Check the box to set Paligo to change the topic name to match the topic title.
Paligo applies the name change when you open a topic in the editor and then save it. It does not apply the name changes to all topics at once, you need to edit the topics manually.
-
Clear the box if you want Paligo to allow topics to have names that are different from their titles.
Note
The choice you make here only applies to you. Other users have their own editor settings that control whether Paligo uses matching topic names and titles.
-
-
Select Save Settings.
If you write in French, you may find that Paligo inserts English double quotes when you are trying to add guillemets. To avoid this issue, you can force Paligo to use guillemets instead.
-
Select the topic or component in the Content Manager to open it in the Editor.
Alternatively, you can Create a Topic and edit that.
-
Select Editor settings in the toolbar.
-
Paligo displays the Editor Settings dialog.
The editor settings are global and will apply to all the topics and publications that you work with. The settings will only be applied to your user account.
-
Select the Editing tab.
-
Select Force use guillemets instead of quotation marks box to control what happens when you use your keyboard to insert a quotation mark.

-
Check the box to make Paligo insert guillemets instead of quotes.
The guillemets are only used for new content that you add. They do not replace any quotation marks that already exist.
-
Clear the box to insert quotes instead of guillemets.
Note
The choice you make here only applies to you. Other users have their own editor settings that control whether Paligo uses quotations or guillemets.
-
-
Select Save Settings.
Paligo uses, by default, the keyboard shortcut Shift ⇧ + Alt + W (Windows) or Shift ⇧ + Option ⌥ + W (Mac) for inserting a warning admonition. However, this shortcut is also used for other purposes in some regions. To avoid a clash, you can stop Paligo from using this keyboard shortcut for warnings.
To enable or disable the shortcut for warning admonitions:
-
Select the topic or component in the Content Manager to open it in the Editor.
Alternatively, you can Create a Topic and edit that.
-
Select Editor settings in the toolbar.
-
Paligo displays the Editor Settings dialog.
The editor settings are global and will apply to all the topics and publications that you work with. The settings will only be applied to your user account.
-
Select the Editing tab.
-
Select Disable the warning admonition keybind shortcut box to enable or disable the shortcut.

-
Check the box to stop using the keyboard shortcut to insert a warning admonition.
-
Clear the box to start using the keyboard shortcut to insert a warning admonition
Note
The choice you make here only applies to you. Other Paligo users have their own editor settings that control whether Paligo uses the shortcut for warning admonitions.
-
-
Select Save Settings.
You can generate a preview of the content as PDF, HTML or HTML5 from the Toolbar. For example, you can preview it both as HTML5 and PDF output.
The preview initially uses the default layouts for each type of output and might differ from your customized layout. But you can set Paligo to use your customized layouts instead. This will give you a preview that is closer to how your content will look when you publish it using your own layouts.
 |
To choose the layouts that are used for your previews:
-
Select the topic or component in the Content Manager to open it in the Editor.
Alternatively, you can Create a Topic and edit that.
-
Select Editor settings in the toolbar.
-
Paligo displays the Editor Settings dialog.
The editor settings are global and will apply to all the topics and publications that you work with. The settings will only be applied to your user account.
-
Select the Preview tab.

-
Use the menus to choose the layouts that Paligo should use when generating previews:
-
Preview option for PDF - Choose from any of the PDF layouts that exist in your Paligo instance.
-
Preview option for HTML - Choose from any of the HTML layouts that exist in your Paligo instance.
-
Preview option for HTML5 - Choose from any of the HTML5 layouts that exist in your Paligo instance.
Note
The choice you make here applies to your entire Paligo instance. For example, if you enable the feature, Paligo will remove white space whenever you or any other user opens or saves a topic in Paligo.
-
-
Select Save Settings.
If you import content into Paligo from other systems, it can sometimes contain unwanted gaps in the content called "whitespace". They are usually caused by consecutive spaces in the text or "soft returns" for new lines. For example, you could have a badly formatted Word document where the writer has used the spacebar repeatedly to move the text to the center of a page instead of using Word's styles to align the text properly.
We recommend that you let Paligo automatically remove unnecessary whitespace. If you enable automatic whitespace removal, Paligo will also remove any consecutive spaces that you may type accidentally in the Paligo editor.
Note
Paligo will not remove white space from verbatim elements such as programlistings (code) as in these cases, the extra spaces may be needed.
To set Paligo to remove white space:
-
Select the topic or component in the Content Manager to open it in the Editor.
Alternatively, you can Create a Topic and edit that.
-
Select Editor settings in the toolbar.
-
Paligo displays the Editor Settings dialog.
The editor settings are global and will apply to all the topics and publications that you work with. The settings will only be applied to your user account.
-
Select the Global settings tab.
-
Select Automatically normalize whitespace when opening or saving a topic box to control whether Paligo removes consecutive spaces.

-
Check the box to make Paligo automatically remove whitespace whenever a user opens or saves a topic.
-
Clear the box to make Paligo leave whitespace when a user opens or saves a topic. The whitespace can be removed manually.
Note
The choice you make here applies to your entire Paligo instance. For example, if you enable the feature, Paligo will remove white space whenever you or any other user opens or saves a topic in Paligo.
-
-
Select Save Settings.
By default, Paligo highlights certain parts of your content to indicate comments, translation status, profiling (filtering) and the currently selected element. You can enable or disable these highlights individually or collectively via the Editor Highlight Settings.
 |
To update the Editor Highlight Settings:
-
Select the topic or component in the Content Manager to open it in the Editor.
Alternatively, you can Create a Topic and edit that.
-
Select the arrow to the right of Distraction-free mode .

-
Use the menu options to show or hide the various highlights.
-
Select the Focus element box to manage the highlight for the currently selected item.
-
Check the box to show the light blue highlight for the currently selected element.

-
Clear the box to hide the highlight.
-
-
Select the Comments box to manage the highlight for comments.
-
Check the box to show the yellow highlight for elements that have a comment from another user.

-
Clear the box to hide the highlight.
-
-
Select Translation status box to manage the highlight for translated content.
-
Check the box to show the light green highlight for elements that have been translated.

-
Clear the box to hide the highlight.
-
-
Select Profiled Elements box to manage the highlight for content with a filter condition applied to it.
-
Check the box to show the funnel icon next to elements that have a filter condition.


-
Clear the box to hide the funnel icon.
-
-
Select Switch all settings to check or clear all the checkboxes.

Paligo has a distraction-free mode which provides a more focused interface, where the Content Manager is hidden, the right side panels are minimized and the comments sidebar is shown. You can toggle the distraction-free mode on and off as you choose.
 |
To switch to distraction-free mode:
-
Select the topic or component in the Content Manager to open it in the Editor.
Alternatively, you can Create a Topic and edit that.
-
Select Distraction-free mode in the Toolbar to toggle on or off.
-
Select Show Comments in the Toolbar to toggle the comments sidebar on and off.


-
Select the sidebar panel icons to toggle between minimized and expanded view.


To the left - minimized side panels. To the right - expanded side panels.
One of the benefits of working in XML is that you can validate your content against established Validation Rules. So you can be confident that your topics have a valid XML structure that is consistent and can be exported easily if needed.
Depending on your preferences, you can either:
-
Set Paligo to validate your content automatically whenever you save a topic,Turn Validation On or Off.
-
Manually validate your content by using the manual validation feature in the Toolbar.
When you validate your content, Paligo examines the structure of your topic and checks that it complies with the validation rules. If the content:
-
Complies with the validation rules, you can save the topic.
-
Breaks the rules, Paligo displays an error message and also provides information in the Validation section in the side panel. You will need to fix the errors before the topic can be saved (or disable the validation rules that are being broken). If you have tried to save a topic, but Paligo has detected a problem and displayed a validation error message, see Invalid Content.
 |
The Validation Panel provides information about the error to help you solve it.
Paligo has three different sets of rules that you can apply:
-
The content must be valid XML and comply with the Paligo XML Schema Validation. Always have this enabled as a minimum, as this will help to make sure your topics are valid XML at least.
-
The content must also comply with the Paligo Recommended Rules.
-
The content must also comply with some Schematron Rules. To use your own Schematron file to apply extra validation rules, see Upload Schematron Files to Paligo.
By default, Paligo checks that a topic complies with the Paligo Recommended Rules and Paligo XML Schema Validation before it saves the content.
You can choose to use all three sets of rules, any combination of the rules or no rules at all (not recommended). The option to disable these features is designed for those occasions where you need to save the content and will fix the validation problems later. For example, if an import produces invalid content or the person who encounters the validation error is not the person who will fix it.
If you have validation turned on, Paligo will not save the topic until it complies with the rules. To choose which rules should be used and when they should apply, either when you try to save and / or when you validate manually, see Turn Validation On or Off.
Important
We strongly recommend that you have Paligo XML Schema Validation and Paligo Recommended Rules enabled in your topics. Disabling them could mean that features in Paligo do not work as intended and Paligo may run slowly.
Paligo XML is based on DocBook 5.1 XML, which is a well-established XML standard for technical documentation. You can find out about it, and its rules, at www.docbook.org. There is a reference section where you can look up elements and find out where they can be used. However, be aware that Paligo XML is not identical to DocBook XML.
The Paligo XML schema rules specify what elements can be used, where they can be used, and what order they need to appear in. For example, they define that a <step> element has to be a child (descendant) of a list element, such as <itemizedlist>. There are also rules about the element attributes.
The Paligo editor is designed to guide you so that you only insert elements where they are valid. For example, you cannot add a table inside a paragraph. However, if you turn validation off, it is possible to create invalid structures that will break the Paligo XML rules.
Typically, if you have a topic that will not save due to a Paligo XML validation error, it is because the structure of the topic is invalid or there are Invalid Content. To save the topic, you will need to either:
-
Edit the topic and fix the problems
-
Turn off Paligo XML schema validation (not recommended).
The Paligo recommended rules are an extra set of validation rules that you can use. They are enabled by default, and are designed to help writers avoid creating topics that are too long. This is more in line with best practice for topic-based authoring. But the Paligo recommended rules are not hard rules and you can disable them if needed (see Turn Validation On or Off).
However, please be aware that topics containing an excessive amount of content in one topic could result in performance issues in the browser.
The Paligo recommended rules are:
-
A topic should contain a maximum of 10 sections.
This rule helps to ensure best practice for topic-based authoring, as well as browser performance issues if you were to create extremely long topics.
Note
This rule only applies to
sectionelements created directly in the topic. If you create subsections by inserting other topics as embedded components, they do not count against these rules.
If you have the Paligo recommended rules turned on, and your content breaks the rules, Paligo will display an error message when you try to save the topic. You will only be able to save your topic if you:
-
Edit your topic so that it complies with the rules
-
Turn the Paligo recommended rules validation off. You can also do this temporarily and then turn them back on later. But if your topic breaks these rules, it is a sign that your content could be better structured by nesting smaller components in the structure view or as embedded components.
Schematron is a language that you can use to create customized validation rules for your Paligo topics. This is useful when you want to add extra rules, for example, you could create a rule that each topic can only contain one procedure.
So the rules of Schematron are up to you! You can define the rules to suit your content requirements, and you can use them in addition to, or instead of, the Paligo XML schema rules and Paligo recommended rules.
To find out about creating a Schematron file, uploading it to Paligo, and enabling Schematron validation, see Custom Validation Rules with Schematron.
If you are trying to save a topic and get a Schematron error, it means the topic's content is breaking the rules set in a Schematron file. You can either:
-
Edit your topic and fix the problem that is breaking the rules in the Schematron file. To do this, you will need to find out what rules are set in the Schematron file.
You could ask whoever is responsible for uploading and maintaining the Schematron file. If that is not possible, you can ask someone with Schematron experience to view the Schematron file and figure out what rules are in place. The location of the Schematron file is explained in Upload Schematron Files to Paligo.
Note
It is possible to have multiple types of validation enabled at the same time, for example, Paligo XML Schema validation and Schematron validation. In this scenario, a topic will only save when it complies with all of the rules.
Your content is validated by Paligo when you save a topic or when you Validate Content Manually. If Paligo detects that your content breaks the applied rules, it displays an error message, adds a red highlight to the elements and a description is displayed in the Validation panel. The most common reasons for a topic being invalid are described in this section.


An error message appears to inform about the validation errors. Paligo also adds a red highlight to the elements that contain invalid content and a description is displayed in the Validation panel to the right.
Paligo XML schema validation errors are usually due to the incorrect positioning or ordering of elements. To make your topic valid, check that the content follows the Paligo XML Schema Validation which is based on DocBook, see DocBook.
Invalid attributes and attribute values can also result in Paligo XML schema validation errors. To check for those, see Breaks the Rules for Attribute Values.
Paligo's recommended rules are an extra set of rules that are included as a Schematron file. They are optional, and you can Turn Validation On or Off.
To make the topic valid so that it can be saved, edit the topic so that it complies with the Paligo Recommended Rules. Alternatively, you can turn the rules off.
If you have a Schematron validation error, it means that there are custom rules in place in your Paligo instance. These rules are set in a Schematron file. To find out what rules your content is breaking, you will need to find out what rules the Schematron defines.
You could ask whoever is responsible for uploading and maintaining the Schematron file. If that is not possible, you can ask someone with Schematron experience to view the Schematron file and figure out what rules are in place. The location of the Schematron file is explained in Upload Schematron Files to Paligo.
A topic can be invalid because it contains attributes that have values that are not supported. This can happen when:
-
An attribute value is added in the source code editor
-
Unsupported characters in your attribute values.
For example, if you have an orderedlist element, you can add a continuation attribute. In the Paligo editor, you can only select valid values for this, either: continues or restarts. But in the source code editor, you could set the value to "stop", which is invalid.
Note
Invalid attribute values are part of the Paligo XML Schema Validation.
To fix invalid attribute values:
-
For each attribute, use the Paligo editor to look at the values that are in place, and also the options that can be selected for the values. These are valid values for the attribute.

-
Use the Source Code Editor to look at the values that are set for your attributes.
If there are any invalid values, remove them and then use the Paligo editor to add a valid value.

-
Select Save.

Schematron is a language that you can use to create customized validation rules for your Paligo topics. This is useful when you want to add extra rules, for example, you could create a rule that each topic can only contain one procedure.
Note
Schematron rules are additional rules that you can apply to the Paligo XML content model, which is based on DocBook. You cannot use it to add custom elements that are not supported by Paligo XML/DocBook.
To use Schematron rules in Paligo:
-
Create a Schematron file named:
custom.schYou can do this in any code editor or text editor, but you will need an understanding of how Schematron works. You can find out more at the official Schematron website. Note that the file must be named
custom.schor it will not work in Paligo.When you create a "custom.sch" Schematron file, you should consider:
-
The structure of your Paligo content and the patterns in that content
-
The Schematron rules you create are applied to each topic individually in Paligo.
-
When Schematron validation is enabled, Paligo checks the content of a topic against the rules in the Schematron file. This happens when the you attempt to save the topic. If the topic's content breaks the rules, Paligo will display an error notification and will not save. You can then:
-
Edit your topic and fix the problem that is breaking the rules in the Schematron file. To do this, you will need to find out what rules are set in the Schematron file.
You could ask whoever is responsible for uploading and maintaining the Schematron file. If that is not possible, you can ask someone with Schematron experience to view the Schematron file and figure out what rules are in place. The location of the Schematron file is explained in Upload Schematron Files to Paligo.
Note
It is possible to have multiple types of validation enabled at the same time, for example, Paligo XML Schema validation and Schematron validation. In this scenario, a topic will only save when it complies with all of the rules.
If you have created a Schematron file, you can upload it to your Paligo instance. When it is in place, your Paligo authors will be able to open a topic, enable Schematron validation and Paligo will use the custom rules from your Schematron file.
If the topic's content breaks the Schematron rules, a notification message is displayed and the topic will not save. The Validation side panel shows details about why the content breaks the rules, see Invalid Content.
It is a good idea to document the rules of your Schematron file so that writers can refer to it. If they create topics that break the rules, Paligo will generate an error message. The writers will then need to correct the topic so that it complies with the rules but to do that, they will need to know what the rules are.
The first time that you upload a Schematron file, you have to create a folder structure for it. Once the folders are in place you only replace the existing file.
Note
It is important that both the schematron file and folders are named with lowercase letters.
To create and upload a schematron file to Paligo for the first time:
-
Connect to your Paligo instance via WebDAV, see WebDAV Access to your Paligo Instance Folders.
-
Create a new folder in the root folder called schematron.
-
Inside that folder, create a folder called editor
-
Upload your
custom.schSchematron file into the editor folder.
-
Let your Paligo writers know that the Schematron file is uploaded and they can now Turn Validation On or Off.
Paligo can check that your content is valid either manually or before the topic is saved to the database. But these checks will only take place if one or more of the validation features are turned on for your topics.
If you want to enable validation (recommended), you can choose which Validation Rules Paligo should use. You can also choose when the rules are applied, either when you save a topic, during a manual validation or both.
To turn validation on or off and choose which rules are used:
-
Select the topic or component in the Content Manager to open it in the Editor.
Alternatively, you can Create a Topic and edit that.
-
Select Editor settings in the toolbar.
-
Paligo displays the Editor Settings dialog.
The editor settings are global and will apply to all the topics and publications that you work with. The settings will only be applied to your user account.
-
Select the General tab.
-
Set your validation rules In the Documentation Validation section.

The options are:
-
Paligo XML schema validation
Complies with the validation rules, you can save the topic.
-
Breaks the rules, Paligo displays an error message and also provides information in the Validation section in the side panel. You will need to fix the errors before the topic can be saved (or disable the validation rules that are being broken). If you have tried to save a topic, but Paligo has detected a problem and displayed a validation error message, see Invalid Content.
The content must also comply with the Paligo Recommended Rules.
-
Schematron validation
The content must also comply with some Schematron Rules.
For each type of rule:
-
Check the Save box to turn the type of validation on when saving a topic. Paligo will test that your content complies with the selected rules whenever you try to save a topic. Clear the box to turn the validation off when saving a topic.
-
Check the Validate box to use that type of validation when you Validate Content Manually. Paligo will test whether your content complies with the selected rules whenever you use the validate option in the Editor's toolbar. Clear the box to turn the validation off.
-
Clear the Save and Validate boxes to disable validation. We strongly recommend that you have Paligo XML schema validation enabled as this will prevent you from saving invalid content. Paligo can only publish content that has a valid structure. To learn more, see Validation Rules.
Note
You can use any combination of these validation rules or you can disable validation completely if you want. We recommend that you always have Paligo XML schema validation enabled as a minimum, as this will help to make sure your topics are valid XML at least.
-
-
Select Save Settings.
Paligo validates your content automatically when you save a topic, but you can also start the validation process yourself, at any time. The rules that are used for the validation vary, depending on what you have in place in the editor settings. You can use the same rules for validation on save and manual validation, or you can apply different rules for each, see Turn Validation On or Off.
 |
The Save checkboxes are for the rules that apply when saving a topic.
Note
If you want to save your topic and come back to fix the problems later, you will need to turn the validation off. You cannot save a topic that has invalid content while the validation rules (that it has broken) are turned on.
To find out more, see Turn Validation On or Off.
To validate your content manually:
-
Select the topic or component in the Content Manager to open it in the Editor.
Alternatively, you can Create a Topic and edit that.
-
Select Validate the document in the Toolbar.


Paligo will check that your content is valid based on the rules that are set for manual validation (in the topic editor settings). These are the rules that have Validate checked.
If your content has broken any of the validation rules, Paligo displays an error message. It also provides information about the problems in the Validation panel, so that you know what parts of the content you need to fix. Learn more, see Invalid Content.