eLearning
Learn how to use Paligo to create single-source eLearning content that you can publish to a Learning Management System.
With Paligo's eLearning support, you can author content in Paligo and publish it as an eLearning package (zip file). You can then upload the zip file to your Learning Management System (LMS).
 |
An LMS containing a course that was created in Paligo.
There are many benefits to this approach to creating and managing eLearning content:
-
Your documentation and eLearning content are stored in one place as one "source of truth"
-
Avoid unnecessary duplication with Paligo's content reuse features. There's no need for content creators to make multiple versions of the same content for different outputs. Instead, you can easily reuse your documentation content in your eLearning content.
-
You can use Paligo's advanced authoring features with your eLearning content, such as variables, profiling (filters), and branching.
-
Paligo content is pure XML (Paligo XML) so is more future-proof.
To create an eLearning course in Paligo that you can use in a Learning Management System (LMS):
-
Create an eLearning Publication that acts as a "table of contents" for your eLearning course.
-
Add Information Topics for eLearning and add them to your eLearning publication. You can create new topics and reuse topics that already exist in Paligo. When you edit your topics, you can also reuse structures that already exist in Paligo, such as informal topics, admonitions, and text fragments such as paragraphs.
-
Quiz Topic that contains questions with a numerical answer or questions with multiple-choice answers. There are several variations of multiple-choice questions, including trick questions.
-
Organize the eLearning Publication so that the course topics and quizzes are in the correct order.
-
Create a Layout with eLearning Layout Editor Options and set your publishing preferences.
-
Publish to LMS using your eLearning layout.
-
If required, use CSS and JS to style your eLearning and modify its behavior, see eLearning Styling.
-
Republish your eLearning publication with your custom CSS and JS in place.
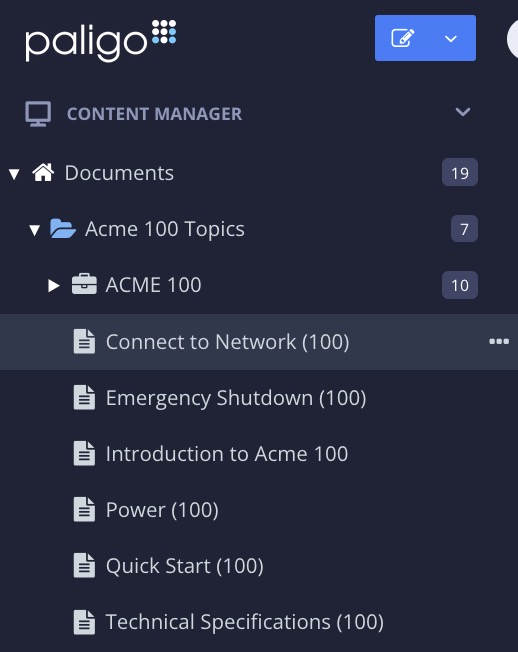
To set up an eLearning course in Paligo, we recommend that you start by creating a publication. The publication acts like a "table of contents" for your eLearning topics and is where you will choose which topics are included and the order they should appear.
Create a publication for your eLearning:
-
Select the Dotted menu ( ... ) for a folder in Content Manager and choose Create Content and Publication.

The new publication appears in the selected folder. For details, see Create a Publication.
-
Select the new publication in the Content Manager to open its structure.

Paligo opens the publication structure.
-
Select Save.

You now have an eLearning publication to contain your course. The next step is to add information topics and quiz topics to it.
The default minimum passing score in Paligo is set to 70 % correct answers, regardless if they are distributed into multiple quizzes or a single quiz.
This can be adjusted in two different ways:
-
Publication level lets each quiz publication have its own settings.
-
Layout level will result in a general setting for all quizzes.
On the publication level it is possible to set a basic passing score or to profile it with different minimum scores depending on for example user level, product or market. This can be set when the publication is created or adjusted afterwards.
Tip
By including questions for different user levels and profiling them, you will only need one publication.
-
Select the Dotted Menu (...) for the publication in Content Manager.

-
Select Edit and choose Open in editor.

Paligo opens the publication topic.
-
Use the keyboard down arrow ⬇️ to position the cursor at the bottom of the article.
-
Press Alt + Enter ⏎ (Windows) or Command ⌘ + Enter ⏎ (Mac) to display the Element Context Menu.
-
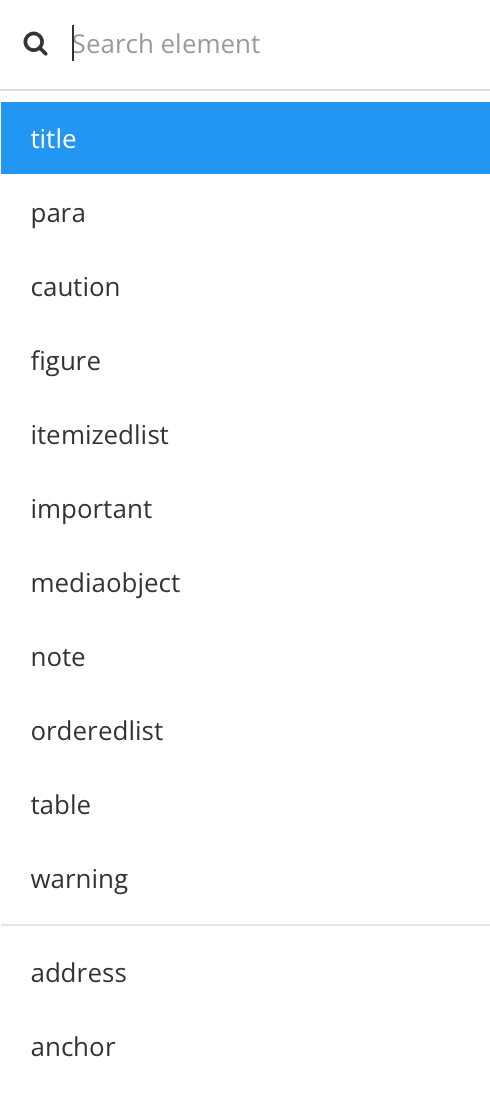
Enter
Remarkand select it from the menu.
-
Enter the minimum passing score in percentage, but exclude the percent sign.

-
Add the attribute
Rolein the Element Attributes Panel. -
Add the value
elearning.min.score.This value collects the minimum passing score stated in the
Remarkelement.
Note
The three following steps shows how to separate different passing scores depending on user level.
Read more about profiling information, see Filtering / Profiling.
-
Add the attribute
userleveland select a filtering to a specific group of questions (for example Basic user). -
Add an extra remark, below the first one, with a different minimum passing score.
-
Add the attribute
userleveland select a filtering to a different group of questions (for example Advanced user).
-
Select Save.
If you want to have a general passing score, that overrides the Paligo default value, it must be adjusted on a layout level. At this level there is no possibility to use profiling / filtering. Using this method will also override any values set on the publication level.
To do this the following line must be added to your custom JavaScript file:
...
var minScore = 65;
...
eLearning courses usually consist of a series of "information topics" followed by a quiz. The information topics provide facts and explain concepts, and the quiz topics test the user's knowledge.
Here, we are going to focus on the information topics. These are regular topics, and are no different to the topics you might create for HTML help centers or PDFs. Each topic has a title and you can add paragraphs, images, notes, and other types of content as needed.
For your information topics, you can create new topics and / or reuse topics that already exist. For example, let's say you have an "Introduction to Acme 100" topic that was created for a PDF output. Rather than duplicating the same content for your eLearning course, you can reuse the same topic.
 |
Example of an information topic. It contains text and images.
To create new eLearning topics:
-
Select the eLearning publication in the Content Manager to open its structure.
-
Select New topic.

Paligo adds a new topic. It is added to the publication structure automatically and is also added as a topic in the Content Manager.
-
Enter a name for the new topic.
-
Select Save.
Note
Alternatively, you could add a new topic in the Content Manger and then manually drag and drop it into the publication structure. To learn more, see Create a Topic.
To reuse topics that already exist in Paligo, you have to open the eLearning publication.
-
Select the eLearning publication in the Content Manager to open its structure.
-
Find the topic that you want to reuse in the eLearning. You can explore the folders manually or use the search at the bottom to find topics by name.
-
Drag and drop the topic into the structure of the publication.

-
Select Save.
You can edit new and existing information topics in the same way as other Paligo topics. For details, see About Authoring and About Reusing Content.
Tip
To learn how to add quiz topics to your eLearning publication, see Create a Quiz Topic.
Quizzes are a fun way to test your audience's knowledge at various stages of your eLearning course. You can create your quizzes in Paligo and add questions with numerical answers and multiple-choice questions, see Question Types.
When you upload your eLearning to a Learning Management System (LMS), users will be able to take the quizzes and the LMS will track their progress and scores, see Upload the eLearning Output to your LMS.
To create a quiz:
-
Add the answers to your questions, see:
 |
Example of a multiple choice question with multiple correct answers.
Note
If you did not create the quiz topic from the publication structure, you will need to manually add the topic to the publication, see Organize the eLearning Publication.
Before you add a question to your quiz, consider what type of answer formats are available. Paligo supports answers that require the user to:
-
Enter a numerical value into a field, see Set Up a Numerical Question/Answer

-
Choose one answer from a list of potential answers, see Set Up a Multiple Choice Question/Answer.

-
Choose several answers from a list of potential answers, see Set Up a Multiple Choice Question/Answer.
It is also possible to create a "trick" multiple choice question. This is where the question looks like a multiple choice question with multiple correct answers, but there is only one correct answer. The "trick" question has checkboxes.

To create a quiz in Paligo, you create a topic and add a role attribute with the value set to: quiz. Then you add a qandaset element to contain the quiz structure.
The qandaset element is a container for all of the questions and answers you include in your quiz. When you add a qandaset, Paligo automatically adds some extra structure for the first question and one potential answer. The structure
consists of:
-
qandaentry- Each question has to be inside its ownqandaentryelement. For example, if you have a quiz with 5 questions, the quiz is represented by theqandasetelement and inside that you will have 5qandaentryelements (1 for each question). -
questionandpara- Thequestionelement represents a question in the quiz and it has to be inside aqandaentryelement. Theparainside thequestionis where you enter the text for the question. -
answerandpara- Theanswerelement represents a possible answer to the question. It has to be inside the sameqandaentryelement as thequestion. Theparainside the answer is where you enter the text for the answer.


To the left the structure in the Editor. To the right the structure in the XML Tree View.
To create a quiz topic:
-
Select the topic or component in the Content Manager to open it in the Editor.
Alternatively, you can Create a Topic and edit that.
-
Select the
sectionelement in the Element Structure Menu.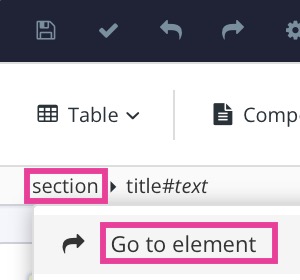
-
Select Go to element.
-
Add the
roleattribute in the Element Attributes Panel and set the value toquiz.
-
Position the cursor where the quiz is to be inserted.
-
Press Alt + Enter ⏎ (Windows) or Command ⌘ + Enter ⏎ (Mac) to display the Element Context Menu.
-
Enter
qandasetand select it from the menu.Tip
You can add extra
paraelements inside aquestionoranswerto create multi-paragraph questions and answers. Add any extra para elements after the previousparaelement, inside thequestionoranswer.If you have multiple
paraelements, the first one will be styled like a heading in the output. The otherparaelements will be styled as regular text.You can also insert other content structures inside a
questionoranswer, such asmediaobjectfor an image andprogramlistingfor code. -
Select Save.
You now have the basic structure for a quiz, with one question and a single answer. This will be a numerical question and answer unless you add additional answers to turn it into a multiple-choice question / answer.
Tip
To learn how to add more questions, see Add More Questions to a Quiz.
We have included Example Quiz Topic that contains multiple questions and answers. You can use this example to see how the question and answers need to be structured in your quiz topic.
Numerical question/answers are quiz questions that require the user to enter a number for the answer. There is a question in text and below it, a field for entering the answer.
|
To set up a numerical answer for a quiz:
-
Make sure your topic has the
qandasetstructure that is needed for a quiz (see Create a Quiz Topic). You also need to add the question structure for your numerical question (see Add More Questions to a Quiz). -
Enter the body text of the question inside the
parathat is inside thequestionelement.
-
Enter the correct answer (a number) inside the
paraelement that is inside theanswerelement.
-
Select Save.
When you publish your eLearning, Paligo will detect that this is a numerical answer and make it a question with a text-entry field in the output.
There are three types of multiple choice question that you can create:
-
A multiple choice question with one correct answer. The user is presented with a list of options and each one has a radio button.
-
A multiple choice question with more than one correct answer. The user is presented with a list of options and each one has a check box.
-
A trick multiple choice question. It presents the user with a list of options that have check boxes so it appears as if there are multiple correct answers. But there is only one correct answer.

The following instructions explain how to create all three types:
-
Make sure your topic has the
qandasetstructure that is needed for a quiz (see Create a Quiz Topic). You also need to add the question structure for your numerical question (see Add More Questions to a Quiz). -
Enter the body text of the question inside the
parathat is inside thequestionelement. -
Enter the text for a possible answer inside the
paraelement that is inside theanswerelement.
-
Position the cursor after the previous
answerelement but still inside theqandaentryelement.
-
Press Alt + Enter ⏎ (Windows) or Command ⌘ + Enter ⏎ (Mac) to display the Element Context Menu.
-
Enter answer and select it from the menu.

Note
If the
answerelement is not available in the list, then the cursor is in an incorrect position. Check that it is after the question but inside theqandaentryelement. The correct structure should look like this in the XML tree:
-
Enter the text for a possible answer in the para inside the answer element that you have added.

Tip
You can add extra
paraelements inside aquestionoranswerto create multi-paragraph questions and answers. Add any extra para elements after the previousparaelement, inside thequestionoranswer.If you have multiple
paraelements, the first one will be styled like a heading in the output. The otherparaelements will be styled as regular text.You can also insert other content structures inside a
questionoranswer, such asmediaobjectfor an image andprogramlistingfor code. -
Repeat steps 5 and 6 to add more possible answers, including the correct answer(s). The completed structure should look something like this in the XML tree:

Notice how the question and the potential answers are all inside the
qandaentryelement. Each question should have its ownqandaentryelement, with the question and potential answers inside it. -
Select the correct answer in the Editor.
-
Select its
answerelement in the Element Structure Menu at the top and choose Go to element from the menu.
-
Add the
roleattribute in the Element Attributes Panel and set the value to correct.

When you set an answer to correct, a green box and checkmark appear for that answer in the Paligo editor.
-
If a question has multiple correct answers, repeat steps 9 and 10 for each correct answer.
-
This step only applies if you want to make your multiple choice question a "trick" question. A trick question is where it looks like there is more than one correct answer but actually only one answer is correct.
To turn a multiple choice question into a trick question:
-
Select the
questionelement for the trick question. -
Add the
roleattribute in the Element Attributes Panel and set the value to multi-choice.
-
-
Select Save.
When you publish your eLearning, Paligo uses the role attributes to determine what type of multiple-choice questions you have added. It then creates those in the published output.
To add more questions to a quiz topic:
-
Make sure your topic contains the structure for a quiz (as described in Create a Quiz Topic).
-
Position the cursor so that it is after the previous
qandaentryelement but inside theqandasetelement.Note
If you cannot find the
qandaentryelement in the element context menu, it is because the cursor is in an incorrect position. Try repositioning the cursor so that the selection point is after the previousqandaentryelement but still inside theqandasetelement.When the cursor is in the correct position, the Element Structure Menu shows
section>qandaset. You will then be able to addqandaentryfrom the element context menu. -
Press Alt + Enter ⏎ (Windows) or Command ⌘ + Enter ⏎ (Mac) to display the Element Context Menu.
-
Enter
qandaentryand select it from the menu to add another question.
You have now added the structure for an additional question. By default, the structure contains one
answerelement. You can add moreanswerelements to turn it into a multiple-choice question. Alternatively, you can use a singleanswerfor a numerical question.
-
Repeat step 2 to 4 for as many questions as you need.
-
Select Save.
To remove a question and its answers from a quiz:
-
Open the quiz topic in the Editor.
-
Select the question that you want to remove.

-
Select the
qandaentryelement In the Element Structure Menu and choose Delete.
Paligo removes the structure for the question and its answers (
qandaentry,questionandpara, and eachanswerandparapair). -
Select Save.
To remove an answer from a question in a quiz:
-
Open the quiz topic in the Editor.
-
Select the answer that you want to remove.

-
Select the
answerelement in the Element Structure Menu and choose Delete.
-
Select Save.
This example shows the underlying structure of a Paligo quiz topic called "Quiz - Creating Content in Paligo". It contains multiple choice questions with single correct answers, multiple choice questions with several correct answers, a trick multiple choice question, and a numerical question too.
By looking at the code, you can see the valid structure for the quiz and the various question types. If you have problems setting up your own quiz, referring to this example may help you spot any structural problems.
Note
We have removed the database IDs to make the code simpler, but in your topics the IDs will be included in the code, for example, xinfo:text="1169436".
The following source code shows the structure for a valid quiz.
<?xml version="1.0"?>
<section xmlns="http://docbook.org/ns/docbook" xmlns:xinfo="http://ns.expertinfo.se/cms/xmlns/1.0" version="5.0" xinfo:resource="UUID-9921a762-7cd2-093a-3583-c1f8206fcf0d" xinfo:resource-id="1169399" xinfo:resource-type="component" xinfo:resource-title="Quiz - Creating Content in Paligo copy 1" xinfo:resource-titlelabel="" xinfo:version-major="1" xinfo:version-minor="0" role="quiz" xml:id="UUID-9921a762-7cd2-093a-3583-c1f8206fcf0d" xml:lang="en">
  <title>Quiz - Creating Content in Paligo</title>
  <qandaset>
    <qandaentry>
      <question>
        <para>When you check out a topic in Paligo, can another Author edit that topic at the same time?</para>
      </question>
      <answer>
        <para>Yes, Paligo supports simultaneous editing by multiple authors.</para>
      </answer>
      <answer role="correct">
        <para>No, the topic is locked for editing by others when it is checked out.</para>
      </answer>
    </qandaentry>
    <qandaentry>
      <question>
        <para>What is an informal topic?</para>
      </question>
      <answer>
        <para>A selection of content or images that must have a title</para>
      </answer>
      <answer role="correct">
        <para>A selection of content or images that do not need a title</para>
      </answer>
      <answer>
        <para>A special type of admonition that the user can select to ignore</para>
      </answer>
    </qandaentry>
    <qandaentry>
      <question>
        <para>What is a fork?</para>
      </question>
      <answer>
        <para>A container where you organize your topics into a table of contents</para>
      </answer>
      <answer role="correct">
        <para>A reference to a source topic, reused in a publication</para>
      </answer>
      <answer>
        <para>A building block for a section of content</para>
      </answer>
    </qandaentry>
    <qandaentry>
      <question>
        <para>What interface is shown when you open a publication?</para>
      </question>
      <answer>
        <para>The Editor View</para>
      </answer>
      <answer role="correct">
        <para>The Structure View</para>
      </answer>
    </qandaentry>
    <qandaentry>
      <question>
        <para>To open a topic and work on it, which interface would you use?</para>
      </question>
      <answer role="correct">
        <para>The Editor View</para>
      </answer>
      <answer>
        <para>The Structure View</para>
      </answer>
    </qandaentry>
    <qandaentry>
      <question role="multi-choice">
        <para>What is a topic?</para>
      </question>
      <answer>
        <para>A container where you organize your topics into a table of contents</para>
      </answer>
      <answer>
        <para>A reference to a source topic, reused in a publication</para>
      </answer>
      <answer role="correct">
        <para>A building block for a section of content</para>
      </answer>
    </qandaentry>
    <qandaentry>
      <question>
        <para>Which of the following statements are true?</para>
        <para>Topic-based authoring ...</para>
      </question>
      <answer>
        <para>... is similar to document writing and formatting in Microsoft Word</para>
      </answer>
      <answer role="correct">
        <para>... encourages breaking down documents into smaller pieces of content</para>
      </answer>
      <answer role="correct">
        <para>... makes it possible to reuse content as building blocks in multiple publications</para>
      </answer>
      <answer role="correct">
        <para>... enables you to update content in one place, and the update applies wherever the content is used</para>
      </answer>
      <answer>
        <para>... does NOT encourage the reuse of content</para>
      </answer>
    </qandaentry>
    <qandaentry>
      <question>
        <para>What is the correct order (from largest to smallest, left to right) of the following Paligo structures?</para>
      </question>
      <answer>
        <para>Topic, Publication, Element, Section</para>
      </answer>
      <answer>
        <para>Section, Publication, Element, Topic</para>
      </answer>
      <answer role="correct">
        <para>Publication, Topic, Section, Element</para>
      </answer>
      <answer>
        <para>Publication, Section, Topic, Element</para>
      </answer>
    </qandaentry>
    <qandaentry>
      <question>
        <para>How many floating content panels can you have open at once?</para>
      </question>
      <answer>
        <para>4</para>
      </answer>
    </qandaentry>
  </qandaset>
</section>
Notice that:
-
The entire quiz is inside one
qandasetelement -
Each question is inside a
qandaentryelement -
Each question has a
questionelement with aparaelement for its text -
Each answer is in an
answerelement with aparaelement for its text -
role="correct"is added to the answer element for each correct answer. Paligo does this automatically when you give ananswerelement theroleattribute and set its value to correct. -
role="multi-choice"is added to thequestionelement for a trick question. This tells Paligo to make this multiple choice question look like it has several correct answers (it presents the options as check boxes) but it actually only has one correct answer. Paligo applies this code when you give aquestionelement theroleattribute and set its value to multi-choice. -
The
answerelement for a numerical question contains the answer in theparaelement. Paligo detects that this is a numerical question/answer automatically. When you publish, the question will have a text box for the user to enter a number. They will not see the correct answer.
When you have added your information topics and quiz topics to your publication, you can organize them to create the flow of your course. Typically, eLearning courses consist of several information topics followed by a quiz.
To organize your eLearning course:
-
Select the eLearning publication in the Content Manager.
-
Select a topic and drag and drop it into a new position in Structure View.
Alternatively, select a topic and use the directional arrows to move the topic in the structure.

-
To add other topics to your publication, drag and drop the topics from the Content Manager into the publication structure.
-
To remove a topic from the publication, select the topic and then select the cross icon X.
-
Use the arrow buttons to arrange your topics and reused publications into the order you want. You can set them to display as a flat structure or you can "nest" topics and publications so they have a more complex structure, with multiple levels of content, see Organize a Publication.
-
Select Save.
When you have finished organizing your eLearning course, and it contains all of the content you need, you can publish it.