Image Sizing
There are several image attributes that you can use to control the size of images in your Paligo topics. You can add the attributes to the imagedata element, and the following sections explain how to set the size values and what results to expect.
Note
What would commonly be called the "height" of an image is called depth as an attribute in Paligo. This is a legacy from DocBook, which Paligo uses as the foundation for the Paligo content model.
For vector images, such as SVG, you should only use contentwidth and contentdepth. These can also be used for certain other use cases, such as if you want spacing around an image, see Examples of Image Sizing.
In most cases, it is better to use the width and depth attributes as they are easier to predict. The contentwidth and contentdepth can produce unexpected (but accurate)
results with bitmap images. This is because it is not always possible to determine the intrinsic image size of a bitmap image when processing the output.
Define the image size by using one of the following attributes to the imagedata element:
-
width- sets the width value in relation to the viewport. -
depth- sets the depth (height) value in relation to the viewport. -
contentwidth- sets the width value of the image and has no effect on the viewport. -
contentdepth- sets the depth (height) value of the image and has no effect on the viewport. -
scalefit- allows an image to be scaled up or down to fit within available space. Ifscalefit="1"the image is scaled (with the same factor in both dimensions) so that the graphic will just fit within the available height or width (whichever is more constraining). If any other image size attribute is specified, those attributes determine the graphic size andscalefitwill be ignored.
The viewport is the available space for the imageobject on the page. Depending on which element that is used on the imagedata element the result will differ. If you set the image:
-
widthto 50% - the image will be sized so that it takes up half of the available space on the page. -
contentwidthto 50% - the image will be reduced to 50% of its original size.


To the left - The image (2) uses 50% of the viewport (1) To the right - The image (2) is reduced to 50% of its original size (1)
Use the Image Size setting to control the resolution of the images in your published HTML5 output. For example, you may want to reduce the resolution so that the image file size is smaller and so the page will load more quickly. The Image Size setting is available when you edit an HTML5 layout.
There are several image attributes that you can use to control the size of images, see Image Sizing.
Note
The Image Size setting affects the resolution (image quality and file size) of the image. It does not change the physical size of the image on the page. For that, you can use the width and contentwidth attributes,
which can be set on the mediaobject element of an image.
-
Select Layout in the top menu.
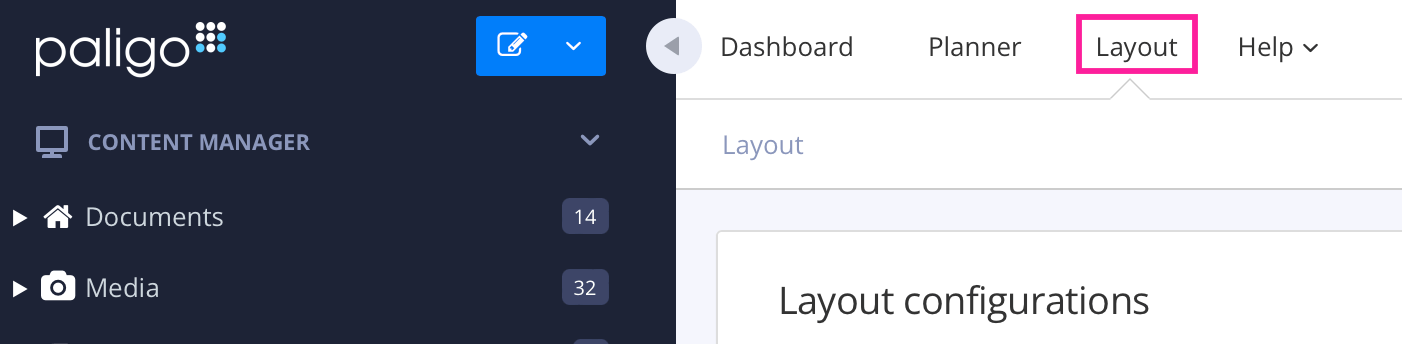
Paligo displays a list of Layouts. The list is empty if there are no custom Layouts in your Paligo instance.
-
Select the Layout you want to update or Create a Layout.
Tip
You can copy the URL of the Layout Editor and paste it into a new tab in your browser. This can be useful if you frequently switch between your Paligo content and the Layout settings.
-
Select Images in the sidebar.

-
Scroll down to Image size.

-
Select Save.
When you About Publishing the content, the images will be sized based on added attributes and values. You can Preview a Topic to see what the sizing will look like in your different outputs.
Typically, you should only set the width or contentwidth of an image. The depth or contentdepth (height) will automatically be calculated, to keep the image dimensions as the
original image file. If you set both width and depth the smallest value of the two is used, and the image is scaled according to that.
There are several other attributes to control width and height. If you want to learn more about the possibilities, see DocBook image sizing reference.
For HTML5 output, you can combine the features Thumbnail Images and Lightbox for Images to get small image versions that are enlarged when selected.
Tip
To keep the SVG functionality in HTML and HTML5:
-
Add the
formatattribute in Element Attributes Panel and select svg in the dropdown menu. -
Use
contentwidthandcontentdepthinstead of width and depth.
 |
To set the image sizing attributes:
-
Select the topic or component in the Content Manager to open it in the Editor.
Alternatively, you can Create a Topic and edit that.
-
Select the image that you want to size.
-
Select the
imagedatain Element Structure Menu and choose Go to element.
-
Add the
widthorcontentwidthattribute in the Element Attributes Panel. -
Set its value to the desired width in combination with any of the Measurement Units for Image Sizing.

By default, if no measurement unit is specified, the sizes are in pixels (px).
-
Select Save.

By default, Paligo uses a nominal width and height when precalculating the percentage scaling of images. This might cause layout shifts for HTML5 Help Center outputs and result in Search Engine Optimization (SEO) issues.
If you enable the Image size attribute for your HTML5 output, Paligo will instead use the actual width and height when precalculating the percentage scaling of images. This makes the webpage load faster and provides a smoother user experience, as it allows the browser to precalculate the page layout more accurately.
To improve Search Engine Optimization (SEO) and the user experience, this setting can be used in combination with the Image size setting to boost site visibility, see Adjust Image Resolution.
Caution
Before you enable Image size attribute, you have to investigate if you have used contentwidth and / or contentdepth when scaling images, see Search for Attributes.
If you have, it is important to consider whether to:
-
Update the scaling for all images after enabling this setting.
-
Replace the above-mentioned attributes with the
widthattribute before enabling this setting.
-
Select Layout in the top menu.
Paligo displays a list of Layouts. The list is empty if there are no custom Layouts in your Paligo instance.
-
Select the Layout you want to update or Create a Layout.
Tip
You can copy the URL of the Layout Editor and paste it into a new tab in your browser. This can be useful if you frequently switch between your Paligo content and the Layout settings.
-
Select Images in the sidebar.
-
Scroll down to Image size attribute.

-
Select Enable from the menu.
-
Select Save.
Here are some examples of different image sizing combinations, designed to show you the different effects the sizing attributes can have:

Attribute contentwidth = 400px. Sets the width of the image itself.
(The value could be 400 or 400px, as "px" is the default if no unit is set.)
Attribute contentdepth = 400px. Sets the height of the image itself.
|
Attribute width = 400px. Sets the width of the viewport of the image, which scales to fit to that area. (The border is not added normally, it is just added here to illustrate the viewport.)
This is the most commonly used attribute for image size.
|
Attribute contentdepth = 400px, width = 420px. If the contentdepth or contentwidth is set, and a width
or depth attribute is also set, with a higher value, it creates an area around the image.
In your HTML5 output, you can show diminished images that are enlarged when selected. The enlarged version of the image is shown in a "lightbox", which is a separate display that overlays your content.
This is especially useful when you have large images that would provide a better experience for users if they were smaller. This is achieved if you resize the images by using the width attribute or enabling Thumbnail Images and then enable the Lightbox feature.

Diminished images are shown on the page

With the Lightbox feature enabled, the images are enlarged when selected.
To use Lightbox for Images you have to activate the feature in the Layout Editor. Lightbox can be used on Thumbnail Images as well as images resized with the width attribute. Click the
image below to test this feature.
 |
This image is resized with the width attribute and the value is set to 50%.
To enable or disable the Lightbox feature for all of the images in your HTML5 output:
-
Select Layout in the top menu.
Paligo displays a list of Layouts. The list is empty if there are no custom Layouts in your Paligo instance.
-
Select the Layout you want to update or Create a Layout.
Tip
You can copy the URL of the Layout Editor and paste it into a new tab in your browser. This can be useful if you frequently switch between your Paligo content and the Layout settings.
-
Select Images in the sidebar.
-
Set the Use lightbox for images to:
-
Enable if you want all block images to use the Lightbox feature.
-
Disable to turn off the Lightbox feature.

Note
If you enable the lightbox feature, you can either set all block images to use thumbnails or you can set thumbnails individually. To find out more, see Thumbnail Images.
-
-
Select Save.
Tip
The lightbox feature is also available for Zendesk outputs, but it is set up differently.
For Zendesk, Paligo has asset files that are included in the zip file that is downloaded in your browser when you publish. You can upload those asset files to the Assets section in Zendesk guide, and then add the following code to the Document head section:
<link href="{{asset 'lightbox.min.css'}}" rel="stylesheet" type="text/css" />
<script src="{{asset 'lightbox.min.js'}}"></script>
<script src="{{asset 'paligo-zd-lightbox.js'}}"></script>
You only need to do this once, the first time you publish to Zendesk, see Customize Zendesk Articles Using Javascript.
When you set the value for a width, depth, contentwidth, or contentdepth attribute, you can use any of these units:
- px
-
Pixels are the default unit if none is specified.
- pt
-
Points equals 1/72 of an inch.
- cm
-
Centimeters
- mm
-
Millimeters
- pc
-
Picas equals 1/6 of an inch.
- in
-
Inches
- em
-
Ems (the font size of the current surrounding element)
- %
-
Percentage of the available page area for
widthanddepthOR original image size forcontentwidthandcontentdepth.
You may have content that needs to have large images, but these images take up too much space on the page and make it more difficult to read the text. One way to handle this for HTML5 outputs is to use "thumbnails". This is where large images are shown at a much smaller size on the page. If you use Lightbox for Images, readers can click on the thumbnail image to display a larger version.
In Paligo, you can Set All Images as Thumbnails from the HTML5 layout or you can Set Thumbnails for Individual Images.
Thumbnail images are shown at a smaller size on the page
If lightbox is enabled, a user can select a thumbnail image to view it at a larger size
Note
By default the thumbnail will get a rounded border and a max width and height of 200 pixels (px). This can be customized in your CSS.
Tip
If you are publishing to other outputs, such as PDF, you may need to have a specific width on the image too. For this, use the contentwidth attribute instead of width, otherwise the thumbnail feature may not work as intended.
If you want all block images to appear as thumbnails in your HTML5 output, use the Use thumbnails for all mediaobject (block) images setting. This is in the HTML5 layout. This can be useful when you have large images that take up too much space on the page. By setting them as "thumbnail" images, they will appear much smaller. You should also enable the lightbox feature so that end users can select the images to display a larger version.
When you enable the setting and publish, the images will appear as smaller "thumbnail" images. We recommend that you also enable Lightbox for Images so that your readers can select the "thumbnail" images to display a larger version.
Tip
If you only want certain images to appear as thumbnails, see Set Thumbnails for Individual Images.
-
Select Layout in the top menu.
Paligo displays a list of Layouts. The list is empty if there are no custom Layouts in your Paligo instance.
-
Select the Layout you want to update or Create a Layout.
Tip
You can copy the URL of the Layout Editor and paste it into a new tab in your browser. This can be useful if you frequently switch between your Paligo content and the Layout settings.
-
Select Images in the sidebar.
-
Set the Use thumbnails for all mediaobject (block) images to:
-
Enable if you want all block images to appear as thumbnails.
-
Disable if you do not want all block images to be thumbnails.

-
-
Select Save.
You can set individual images to be shown as a thumbnail image instead of at full size. This is useful if you only want to use the thumbnail feature for certain images, such as images that are especially large.
Tip
If you want most, but not all, images to use thumbnails it may be quicker to Set All Images as Thumbnails
and exclude some images from using thumbnails by adding a role attribute to the mediaobject element and with the value set to img-thumbnail-reset.
To use the thumbnail feature for individual images:
-
Select Layout in the top menu.
Paligo displays a list of Layouts. The list is empty if there are no custom Layouts in your Paligo instance.
-
Select the Layout you want to update or Create a Layout.
Tip
You can copy the URL of the Layout Editor and paste it into a new tab in your browser. This can be useful if you frequently switch between your Paligo content and the Layout settings.
-
Select Images in the sidebar.
-
Set Use thumbnails for all mediaobject (block) images to default or Disable.

-
Enable Use Lightbox for images to allow users to click on your thumbnail image to display it at a larger size.
-
Select Save.
-
Select the topic or component in the Content Manager to open it in the Editor.
Alternatively, you can Create a Topic and edit that.
-
Select the image in the content.
-
Either:
-
Select Insert.
-
Select Image.
-
Select Make thumbnail.
Paligo will resize your image in the editor, although it may not be shown as a thumbnail. When you publish, it will be shown as a thumbnail image in the output.
or:
-
Select the image's
mediaobjectelement in Element Structure Menu and choose Go to element. -
Add the
roleattribute Element Attributes Panel and set its value toimg-thumbnail.
Tip
If you already have a
roleattribute on the mediaobject, separate the values with a semi-colon.
-
-
Select Save.
When you publish your content, Paligo will display the image as a thumbnail. Your users can select the thumbnail to view a larger version (as long as you have enabled the lightbox feature on your Layout, see step 5).