Coveo Integration
Paligo's HTML5 Help Center output has a built-in search feature that is suitable for many of our customers. On the Enterprise plan, we also have integrations with more advanced search engine services, such as Coveo.
Coveo is an AI-powered search engine with support for faceted and federated searches. The integration is crawler-based, which means that in order to set it up with your Paligo output, you have to publish once. Then configure Coveo to crawl the published output and include the Paligo content in the search index.
 |
Prerequisites for the Coveo integration:
-
A Paligo account on the Enterprise plan. You will need to log in as an administrator.
-
A paid Coveo account
-
An API key with the proper permissions, see Connect Paligo to Coveo.
To set up Coveo as the search engine for your help center, use the Coveo settings in your HTML5 Help Center Layout. You will need to provide the credentials for your Coveo account and also make some choices about the search features. When set up correctly, Coveo replaces Paligo's default search and gives your help center a faster and more customizable search.
 |
Before enabling Coveo in the Layout Editor, make sure you:
-
Create your Coveo account. During the registration, you will receive an organization ID. You will need this when you come to set up the Coveo Organization ID in Paligo.
-
Add an API key in the Coveo Administration Console, see Manage API Keys. This is your Coveo Access Token.
-
The API key should grant the following privileges for your organization:
-
Execute Queries: Allowed
-
Analytics Data: Push
You should also limit the scope of the API key to a specific search hub. For example, you could set it to "search hub is default".
Caution
Avoid granting any additional privileges to this API key, as it will be exposed in client-side code.
-
To replace Paligo's default search:
-
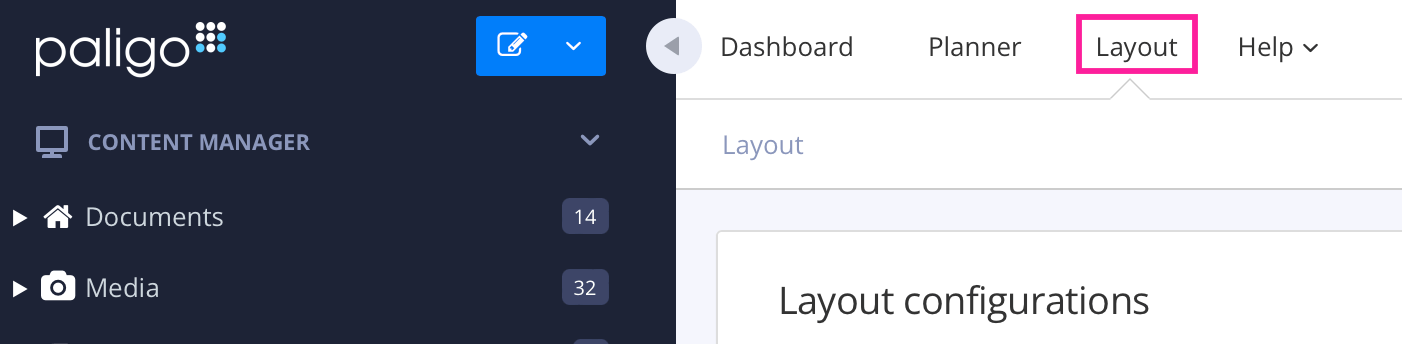
Select Layout in the top menu.
Paligo displays a list of Layouts. The list is empty if there are no custom Layouts in your Paligo instance.
-
Select the Layout you want to update or Create a Layout.
Tip
You can copy the URL of the Layout Editor and paste it into a new tab in your browser. This can be useful if you frequently switch between your Paligo content and the Layout settings.
-
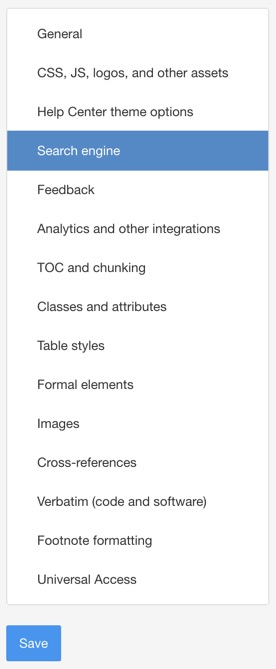
Select Search Engine in the sidebar.
-
Scroll down to Use Coveo Search Engine.

-
Select Enable from the menu.
-
Enable - Replaces Paligo's default search with Coveo as the search engine for publications using this layout.
-
Disable - Makes Paligo use its own built-in search engine. The Coveo search engine will not be used.
-
Default - Makes Paligo inherit the value for this setting from the base layout, which is either a built-in layout provided from Paligo or another custom layout. To find out more, see Layout Relationships - Base, New, Duplicate.
-
-
Enter your Coveo Access Token.

This is an API key that you added manually, see Manage API Keys.
-
Enter the Coveo Organization ID.

This is the organization ID that you got during the registration of your Coveo account.
-
Select Save.
By using Coveo with Paligo, you can provide federated search for your HTML5 Help Centers. This will allow your users to visit one of your Help Centers and perform a search that includes results from multiple sources, not just that Help Center. For example, if you have separate Help Centers for products A, B, and C, you could do a search in Help Center A and get results from Help Centers A, B, and C.
 |
If you want your Help Centers to use federated search and faceted search, follow the instructions in Faceted Search with Coveo. You will need to set up a separate source for each Help Center.
For Help Centers that only use federated search, complete the following stages.
The first step is to publish your Paligo HTML5 Help Centers. You need them to be published to a web server so that they can be set up as data sources in Coveo later.
Note
If you want to use Coveo for faceted search as well as federated search, follow the instructions in Faceted Search with Coveo for each Help Center. As part of the setup, you will add a source in Coveo for each Help Center, and by adding multiple sources in Coveo, you apply federated search too. Federated search is not a feature that you turn on or off—Coveo applies it automatically as soon as you have more than one source.
-
In the Content Manager, find the publication that you want to publish.
-
Select its dotted menu ( ... ) and then select Publish to display the Publish Document dialog.
-
Select HTML5 and choose the HTML5 Help Center Layout that you set up to use Coveo.
Note
If you are publishing multiple Help Centers and you want them to have different layout settings, use separate Layouts. Make sure each Layout is set up to use Coveo.
-
Apply the publishing settings that you want to use (languages, variables, and other settings).
For details on the publishing process and settings, see Publish Content.
-
Select Publish Document.
Paligo processes your content and generates an output zip file that downloads in your browser.
-
Unzip the output file and add the out folder to your web server. If you are unsure how to do this, contact your IT department or web administrator.
-
Open your help center in a browser and copy the URL to a text editor or similar note application.
In Coveo, you need to set up a Source for each HTML5 Help Center that you want to include in your federated search. For Paligo content, there are two types of Source that you can set up:
-
Sitemap
This usually provides a faster search than a Web Source and we recommend you try this type of Source first.
-
Web
Use this type of Source if you experience problems with a Sitemap source, such as pages not being found by Coveo search.
Note
You must publish your Paligo content and set it up to be hosted online before you add sources. Coveo needs to be able to crawl the output before the sources are built.
For each HTML5 Help Center that you want to include in your federated search, you need to set up a source in Coveo.
Note
If you are using a sitemap as a source, you must have Create sitemap set to Enable in your Paligo Layout. It has to be set to Enable before you publish. If it was not set to Enable, change it, republish your content, and then move the output to the appropriate hosting location.
-
Log in to your Coveo account.
-
In the sidebar, select Content and then Sources.

-
Select Add source. It is in the top-right corner, below your profile icon and the notifications bell icon.

-
Select Sitemap.

-
Enter a Source name. This can be any name, but we recommend you use a name that makes it easy for other people to understand the purpose of the source.
-
In the URL field, enter the address of the sitemap.xml file in your published output, for example: https://docs.paligo.net/sitemap.xml
You have now added the required settings for a sitemap source. If you wish, you can apply the other settings that are available in Coveo, such as optical character recognition and restricting access on the Content security tab. For information about these settings, see the official Coveo documentation.
-
Select Add and build source.
-
Repeat the procedure to add 1 source for each HTML5 Help Center that you want to include in the Coveo search.
If the sitemap source is not working as expected for your search, try using a Web source instead.
-
Log in to your Coveo account.
-
In the sidebar, select Content and then Sources.
-
Select Add source. It is in the top-right corner, below your profile icon and the notifications bell icon.
-
Select Web.

-
Enter a Name for your web source and copy and paste the URL of your HTML5 Help Center output into the Starting URL field.

Note
Make sure that you add the correct URL for your help center output. If you make a mistake, you cannot edit the Starting URL later (instead, you would need to delete this source and create a new source to use instead).
-
Select Next.
-
Choose who can view your source and then select Add Source.
Coveo displays the details of the web source on a source page.
-
Select Save and rebuild source.
Coveo will build the source.
-
In the list of Sources, select your Web source and then select Edit.
-
Select Web Scraping.

-
Select Edit with JSON.
-
Add the following JSON:
[ { "name": "RemoveNavElements", "for": { "urls": [ ".*" ] }, "exclude": [ { "type": "CSS", "path": ".site-header" }, { "type": "CSS", "path": ".site-sidebar" }, { "type": "CSS", "path": ".toolbar" }, { "type": "CSS", "path": "#top-pager" }, { "type": "CSS", "path": "#search-result-wrapper" }, { "type": "CSS", "path": "#bottom-pager" }, { "type": "CSS", "path": ".site-footer" }, { "type": "CSS", "path": ".footer-content" }, { "type": "CSS", "path": ".section-nav-container" }, { "type": "CSS", "path": ".feedback-panel" }, { "type": "CSS", "path": ".skipnav" }, { "type": "CSS", "path": ".portal-header" }, { "type": "CSS", "path": ".portal-body" }, { "type": "CSS", "path": ".portal-footer" }, { "type": "CSS", "path": ".titlepage" } ], "metadata": {} } ] -
Select Done.
The JSON tells Coveo to ignore various areas of the page, including the site header, site sidebar (TOC), toolbar, feedback, and footer. We have prepared this as a "common use case" configuration, but you may want to change it to meet your own requirements (we will explain how later in this procedure).
On the Web Scraping page, there is now a configuration called "RemoveNavElements".

-
Select RemoveNavElements.
-
Select the Elements to exclude tab.
Here you can see each CSS class or ID that Coveo is set to ignore (for the RemoveNavElements configuration). If you need to add extra classes to ignore, you can add them here by selecting the + Add element link at the bottom of the list. You can also remove classes from the exclusion list by selecting the minus icon at the right of each row.

Alternatively, you can go back to the Web Scraping page and edit the JSON.
The same applies for any other web scraping configurations. You can either update the JSON or select them on the Web Scraping page, and then use the Elements to exclude tab to add or remove classes.
-
Select Done.
-
Select Save and rebuild source.
Note
To help you find the classes and preview the effect of excluding them from a search, Coveo has a Web Scraper Helper extension for Google Chrome. There is a link to download it at the bottom of the Web Scraping page. To learn more, see Web Scraping Configuration in the official Coveo documentation.
-
Repeat the procedure to add 1 source for each HTML5 Help Center that you want to include in the Coveo search.
In this stage, you will get a Coveo access token and organization ID so that you can add them to your Layout in Paligo. This will allow Coveo to identify your content when you publish.
Note
You only need to set up one access token and organization ID for your organization. You can use the same token and ID for multiple HTML5 Help Center outputs.
In Coveo:
-
Select Organization and then API Keys.

-
Select Add Key.

-
On the Configuration tab, enter a Name for the key.

-
Select the Privileges tab.

-
Set Preset to Anonymous Search.

-
Select Search.
-
Set Limit the API Key Scope to Search hub is default.

Note
If there is no Search hub is default option, select the field and then enter "default" without the speech marks into the filter field. You can then choose default.
-
Select Add Key.
Coveo generates the key.
-
Copy the API key and select OK.
-
Open a text editor and paste the API key into it.
-
Select your username in the top-corner and then select the copy icon next to the organization ID. This copies the organization id to the clipboard.

-
Paste the organization ID into a text editor.
In this stage, you will set up the HTML5 Help Centre Layout you are going to use when publishing your Paligo content. It needs to be set to use Coveo. You will need the Coveo access token and organization ID that you created in the previous stage (Stage 3: Get a Coveo Access Token and Organization ID).
-
Create a new Layout based on an HTML5 Help Center Layout. Alternatively, you can edit an existing HTML5 Help Center Layout, if you already have one in your Paligo instance.
To learn how to make a custom Layout, see Create a Layout.
-
Edit your Layout.
To edit your Layout, select Layout from the top menu to display the Layout page. Select your Layout from the list.
-
Select Search Engine.
-
Set Use Coveo search engine to Enable.

-
Copy and paste your Coveo access token and Coveo organization ID into the relevant fields.


-
Select Save.
You need to republish your HTML5 Help Centers so that they have Coveo enabled and the access token and organization id in place. When you publish, Coveo will be able to identify them and provide federated search.
For each of your HTML5 Help Centers:
-
In the Content Manager, find the publication that you want to publish.
-
Select its dotted menu ( ... ) and then select Publish to display the Publish Document dialog.
-
Select HTML5 and choose the HTML5 Help Center Layout that you set up to use Coveo.
Note
If you are publishing multiple Help Centers and you want them to have different layout settings, use separate Layouts. Make sure each Layout is set up to use Coveo.
-
Apply the publishing settings that you want to use (languages, variables, and other settings).
For details on the publishing process and settings, see Publish Content.
-
Select Publish Document.
Paligo processes your content and generates an output zip file that downloads in your browser.
-
Unzip the output file and add the out folder to your web server. If you are unsure how to do this, contact your IT department or web administrator.
When you have published your HTML5 Help Centers:
-
Open one of your Help Centers in a browser.
-
On the portal (hub) page, search for a term that only exists in one of your other federated Help Centers.
Coveo should provide search results from your other federated Help Center.
If the search is not providing results from your other Help Centers, make sure that you have set up Coveo and your Paligo HTML5 Help Center Layout as described. Look out for common mistakes such as typing errors and copy and paste errors, especially with the access key and corporate ID.
If you are unable to solve the problem, contact customer support for help.
One of the main benefits of using Coveo with your Paligo HTML5 Help Center is that it supports faceted search. This allows your users to search for a term and then use facets (filters) to further filter the results.
For example, the following image shows search results for the term "system". The facets in the sidebar allow you to filter the results further. Here, they are filtered to show only the results that are relevant to "Acme Security". In this case, the facets are made by using taxonomies in Paligo and then setting Coveo to recognize them.

Note
Facets can be made by using Paligo taxonomies and other metadata that is crawled by Coveo.
To set up Coveo to work with your Paligo HTML5 Help Center, complete all the Paligo-Coveo setup stages.
The first stage is to set up taxonomies to represent your facets (filter categories) in Paligo. You need to create a "parent" top-level taxonomy tag for each category and then a second-level "child" tag for each different type. For example, let's say you wanted a faceted search like this:
 |
Here, "Acme BMS" is the filter category. Users can then filter the search so that it only returns results that have the "Acme Cooling" taxonomy tag or the "Acme Security" taxonomy tag. For this, you would need to create "Acme BMS" as a parent top-level taxonomy tag, with "Acme Cooling" and "Acme Security" as child tags.
 |
-
For each filter category, create a top-level taxonomy tag. It has to be at the top-level, a direct child of the Taxonomies tag.
-
For each type within a particular category, add a "child" tag. This is a second-level tag, nested at the next level down to a filter category tag.
-
Apply the taxonomy tags to the relevant topics. For example, if you have topics that are only relevant to cooling, apply the "Acme Cooling" tag to those. You can apply more than one tag to a topic.
To learn how to create taxonomy tags and apply them to topics, see: Create Taxonomy Tags and Add Taxonomy Tags.
Next: Stage 2: Enable Faceted Search in an HTML5 Help Center Layout.
For Coveo faceted search, you will need to use an HTML5 Help Center Layout for publishing your content. It has to have certain settings in place for faceted search.
-
Create a new Layout based on an HTML5 Help Center Layout. Alternatively, you can edit an existing HTML5 Help Center Layout, if you already have one in your Paligo instance.
To learn how to make a custom Layout, see Create a Layout.
-
Edit your Layout.
-
Select Classes and attributes in the sidebar.
-
Set Output Taxonomies to Enable.
This tells Paligo to include the taxonomies in the output when you publish.

-
Set Create HTML meta tags from taxonomies to Enable.
This tells Paligo to create meta tags for the taxonomy hierarchy. Coveo uses this information to index your taxonomies so they can be used in the search.

-
Select Save.
You will need to make some more changes to the Layout, but these have to be done later in the process.
For Coveo search to work with your content, you need to publish the content to a web server. This could be your organization's web server or a web server provided by a hosting service.
In Coveo, you need to set up a Source for each website that you want to include in your search. For Paligo content, this means you will need at least one Source for your HTML5 Help Center, but you can add Sources for other sites too. There are two types of Source that you can set up:
-
Sitemap
This usually provides a faster search than a Web Source and we recommend you try this type of Source first.
-
Web
Use this type of Source if you experience problems with a Sitemap source, such as pages not being found by Coveo search.
Note
If you add multiple Sources, Coveo will look in all of them for search results. For example, you could add a Paligo HTML5 Help Center, a website, and a YouTube channel as Sources and then the search will include relevant results from all of those. This is called federated search.
Note
You must publish your Paligo content and set it up to be hosted online before you add sources. Coveo needs to be able to crawl the output before the sources are built.
The following instructions are correct at the time of publishing. You can also find instruction on how to add or edit a source in the official Coveo documentation.
To add a sitemap source follow the instructions below.
Note
If you are using a sitemap as a source, you must have Create sitemap set to Enable in your Paligo Layout. It has to be set to Enable before you publish. If it was not set to Enable, change it, republish your content, and then move the output to the appropriate hosting location.
-
Log in to your Coveo account.
-
In the sidebar, select Content and then Sources.
-
Select Add source. It is in the top-right corner, below your profile icon and the notifications bell icon.
-
Select Sitemap.
-
Enter a Source name. This can be any name, but we recommend you use a name that makes it easy for other people to understand the purpose of the source.
-
In the URL field, enter the address of the sitemap.xml file in your published output, for example: https://docs.paligo.net/sitemap.xml
You have now added the required settings for a sitemap source. If you wish, you can apply the other settings that are available in Coveo, such as optical character recognition and restricting access on the Content security tab. For information about these settings, see the official Coveo documentation.
-
Select Add and build source.
-
Repeat the procedure to add 1 source for each HTML5 Help Center that you want to include in the Coveo search.
If your sitemap source does not work with your search, try creating web sources instead.
-
Log in to your Coveo account.
-
In the sidebar, select Content and then Sources.
-
Select Add source. It is in the top-right corner, below your profile icon and the notifications bell icon.
-
Select Web.
-
Enter a Name for your web source and copy and paste the URL of your HTML5 Help Center output into the Starting URL field.
Note
Make sure that you add the correct URL for your help center output. If you make a mistake, you cannot edit the Starting URL later (instead, you would need to delete this source and create a new source to use instead).
-
Select Next.
-
Choose who can view your source and then select Add Source.
Coveo displays the details of the web source on a source page.
-
Select Save and rebuild source.
Coveo will build the source.
-
In the list of Sources, select your Web source and then select Edit.
-
Select Web Scraping.
-
Select Edit with JSON.
-
Add the following JSON:
[ { "name": "RemoveNavElements", "for": { "urls": [ ".*" ] }, "exclude": [ { "type": "CSS", "path": ".site-header" }, { "type": "CSS", "path": ".site-sidebar" }, { "type": "CSS", "path": ".toolbar" }, { "type": "CSS", "path": "#top-pager" }, { "type": "CSS", "path": "#search-result-wrapper" }, { "type": "CSS", "path": "#bottom-pager" }, { "type": "CSS", "path": ".site-footer" }, { "type": "CSS", "path": ".footer-content" }, { "type": "CSS", "path": ".section-nav-container" }, { "type": "CSS", "path": ".feedback-panel" }, { "type": "CSS", "path": ".skipnav" }, { "type": "CSS", "path": ".portal-header" }, { "type": "CSS", "path": ".portal-body" }, { "type": "CSS", "path": ".portal-footer" }, { "type": "CSS", "path": ".titlepage" } ], "metadata": {} } ] -
Select Done.
The JSON tells Coveo to ignore various areas of the page, including the site header, site sidebar (TOC), toolbar, feedback, and footer. We have prepared this as a "common use case" configuration, but you may want to change it to meet your own requirements (we will explain how later in this procedure).
On the Web Scraping page, there is now a configuration called "RemoveNavElements".
-
Select RemoveNavElements.
-
Select the Elements to exclude tab.
Here you can see each CSS class or ID that Coveo is set to ignore (for the RemoveNavElements configuration). If you need to add extra classes to ignore, you can add them here by selecting the + Add element link at the bottom of the list. You can also remove classes from the exclusion list by selecting the minus icon at the right of each row.
Alternatively, you can go back to the Web Scraping page and edit the JSON.
The same applies for any other web scraping configurations. You can either update the JSON or select them on the Web Scraping page, and then use the Elements to exclude tab to add or remove classes.
-
Select Done.
-
Select Save and rebuild source.
Note
To help you find the classes and preview the effect of excluding them from a search, Coveo has a Web Scraper Helper extension for Google Chrome. There is a link to download it at the bottom of the Web Scraping page. To learn more, see Web Scraping Configuration in the official Coveo documentation.
In this stage, you will tell Coveo which taxonomies to use as facets in the search.
In Coveo:
-
Make sure you are on the Sources page (select Content and then Sources in the sidebar).
-
Make sure your HTML5 Help Center Web source's Status is OK. If it is not OK, you will need to wait until the rebuild is complete. This can take several minutes.
-
Select your HTML5 Help Center Web source and then select ... More to display a menu. Select the View metadata option.

Coveo retrieves the metadata (it may take several minutes). It then displays a list of the indexed metadata.
-
Now you are going to create a field for each top-level taxonomy . The top-level taxonomy is the filter category that contains the selectable options. For example, you could have "Acme BMS" as a top-level taxonomy with "Acme Security", "Acme Cooling" and "Acme Monitoring" as child taxonomies. So here you would create a field for the "Acme BMS" taxonomy.
-
Find the name of the top-level taxonomy tag in the Metadata Name column. There may be two entries, one for crawler and one for converter.
-
Select the taxonomy for the crawler and then select + Add to index (+ Add to index is in the header of the table, near the filter field).

-
Select Add field.
Coveo displays the Add a Field dialog.
-
Apply these settings:
-
Name
Give the field a name. The field name can only contain lowercase letters, numbers (0-9), and underscores.
-
Type
Set to String.
-
Description
Enter a description of the field (optional).
-
Multi-Value Facet
Check the Multi-Value Facet box.
-
Advanced Settings
Apply any Advanced Settings that you want to use. For details on these, see Advanced Settings in the official Coveo documentation.

-
-
Select Add Field.
Coveo displays the Apply a mapping dialog.
-
Select your newly-created field in the Field dropdown.

-
Make sure the mapping has All items (common) selected.
-
Select Apply mapping.

-
-
Select Content and then Sources in the sidebar to return to the Sources page.
-
Select your web source and then select ...More and then Manage mappings.
-
Select Save and rebuild source.
Next: Stage 6: Get a Coveo Access Token and Organization ID.
In this stage, you will get a Coveo access token and organization ID so that you can add them to your Layout in Paligo. This will allow Coveo to identify your content when you publish.
Note
You only need to set up one access token and organization ID for your organization. You can use the same token and ID for multiple HTML5 Help Center outputs.
In Coveo:
-
Select Organization and then API Keys.
-
Select Add Key.
-
On the Configuration tab, enter a Name for the key.
-
Select the Privileges tab.
-
Set Preset to Anonymous Search.
-
Select Search.
-
Set Limit the API Key Scope to Search hub is default.
Note
If there is no Search hub is default option, select the field and then enter "default" without the speech marks into the filter field. You can then choose default.
-
Select Add Key.
Coveo generates the key.
-
Copy the API key and select OK.
-
Open a text editor and paste the API key into it.
-
Select your username in the top-corner and then select the copy icon next to the organization ID. This copies the organization id to the clipboard.
-
Paste the organization ID into a text editor.
Next: Stage 7: Complete the Coveo Configuration in your HTML5 Layout.
Now you need to go back to your HTML5 Layout and complete the Coveo settings. You will need to:
-
Add the API key and organization ID details so that Coveo can identify your Help Center output
-
Set the taxonomies that will be used as facets in Coveo
-
Choose whether you want a Coveo search that is customizable.
In Paligo:
-
Select Layout.
-
Select the Layout you are going to use for publishing. This should be the same Layout that you edited in Stage 2: Enable Faceted Search in an HTML5 Help Center Layout.
-
Select Search Engine.
-
Set Use Coveo search engine to Enable.
-
Copy and paste your Coveo access token and Coveo organization ID into the relevant fields.
-
In the Coveo facets field, enter references to the top-level taxonomy tags (that represent the filter categories for your faceted search). By default, the field already contains:
language|LanguageAdd a semi-colon after
Languageto separate that facet from your new facet, and then enter your new facet using this syntax:<name of facet in Coveo>|<facet display name in Coveo>;For example:
language|Language;acme_bms|Acme BMS;Add this information for every top-level taxonomy tag that you have set up for faceted search. Use a semi-colon to separate each facet.

Note
The name of the facet in Coveo has to be an exact match to the name you defined in Coveo (see Stage 5: Set Coveo to Index Taxonomies as Facets).
-
Choose whether you want Paligo to create a separate search page for Coveo.
By default, the Coveo search is integrated into Paligo's search and you cannot style it separately. But you can choose to give the Coveo search its own web page. This search works in the same way, but has:
-
An advanced search link under the search field on the hub. Users can select the link to go to the Coveo search page.
-
The Coveo search page wrapped in a
divwithclass="advanced-searchbox"attribute. -
The Coveo search page results wrapped in a
divwithclass="advanced-search-result"attribute.
You can style the
divsandclassattributes separately by using CSS or by adding Coveo atomic components with a JavaScript.To make your choice, set Create separate search page to Coveo to:
-
Enable - To have a separate search page for Coveo. You can style this search.
-
Disable - To have the Coveo search as part of the Paligo search page, with no extra coding. You cannot style the Coveo search separately.
-
Default to inherit the value for this setting from the base Layout. The base Layout is either a built-in Layout provided by Paligo or another custom Layout, see Layout Relationships - Base, New, Duplicate.
-
-
Select Save.
Now you can publish your content again. This time, it should have the Coveo faceted search features in place.
-
In the Content Manager, find the publication that you want to publish.
-
Select its dotted menu ( ... ) and then select Publish to display the Publish Document dialog.
-
Select HTML5 and choose the HTML5 Help Center Layout that you set up to use Coveo.
Note
If you are publishing multiple Help Centers and you want them to have different layout settings, use separate Layouts. Make sure each Layout is set up to use Coveo.
-
Apply the publishing settings that you want to use (languages, variables, and other settings).
For details on the publishing process and settings, see Publish Content.
-
Select Publish Document.
Paligo processes your content and generates an output zip file that downloads in your browser.
-
Unzip the output file and add the out folder to your web server. If you are unsure how to do this, contact your IT department or web administrator.
-
Visit the URL for your HTML5 Help Center.
-
Enter a search term in the search field.
The Coveo search should appear, including the facets.

-
Test that the faceted search works.
Note
When you select a result, the browser will open that topic. If you select Back, the browser will display the search results again and your facet selections are still in place.
If the faceted search is not working, go through the set up stages again and make sure you have entered the correct details. Common mistakes include:
-
Typing mistakes in the names of facets
-
Typing mistakes in the organization id
-
Typing mistakes in the access key
-
Incorrect Source settings in Coveo.
-