Software and Code Documentation
The content model of Paligo has very good support for documenting software and code snippets. There are many elements you can use for marking up UI elements and code elements, and we describe the most commonly used ones in General Software Elements. Refer to the standard DocBook Element Reference for the full set of elements available.
 |
An example containing a code block as it appears in the published output. This code block has annotations.
In your Paligo content, you can add:
-
Annotations to add "hot spot" to parts of a code block that link to explanatory text.
-
Inline code elements for when you want smaller amounts of code inside a paragraph.
You can also Embed Code from an External Source, including Embed Swagger OpenAPI. It's also possible to Import Swagger OpenAPI into Paligo. With an import, the content is in Paligo, just like your other content. This is different to embedding content, where the content is inserted into a Paligo topic during the publishing process and only for the published output.
For publishing, there is also the HTML5 API layout, which is specially designed for documenting APIs. It has a three-panel layout, with navigation on the left, content in the center, and code examples on the right, with language tabs for switching between examples in different programming languages, see API Documentation Layout.
 |
Tip
Also see Software and Code Documentation Elements.
Even if you are not documenting much code, if you document software you'll often have to refer to parts of the software product, such as UI components, file names, tags, keyboard shortcuts, etc. Here are some common elements to use:
The easiest way to refer to UI components (buttons, menus, toolbars, etc) is to use one element as a generic UI element: guilabel. Here's an example:
Click on the Ok button.
Since this is so common (and recommended practice instead of using bold or italic for such terms), there is also a keyboard shortcut for it: AltG.
If you want to be more granular, you can use very specific elements instead, using guilabel only for labels, guibutton for buttons, guimenu and its sub elements for menus, etc.
Another common need is to write file names and paths, and for this you have the element filename.
To write keyboard shortcuts properly, and give you the option for how to style them now or change it later, or use different styling for different outputs, use the keycap element:
Hit AltK to add a keycap element.
As you can see, this element can be styled, and here it is styled as keyboard keys, and as the example shows this element has a keyboard shortcut itself for convenience.
If you want, you can use it separately, or in combination with the keycombo element. If keycap elements are wrapped in a keycombo element, by default it will output a "+" symbol between the keys (which can
be customized in stylesheets if needed).
One of the most common needs when documenting software is to write code blocks. The main element for this is programlisting.
To add a programlisting element:
-
Position the cursor at the start of the line where you want to add the code block.
-
Press Alt + Enter ⏎ (Windows) or Command ⌘ + Enter ⏎ (Mac) to display the Element Context Menu.
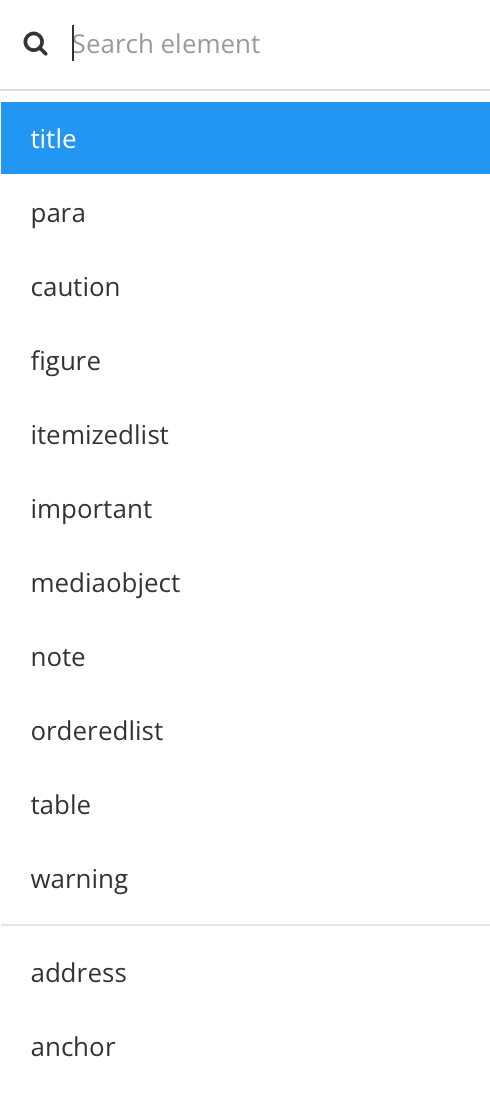
-
Search for the
programlistingelement and select it.
When you add a
programlistingelement, a code snippet box appears in the topic.
-
Add your code inside the code snippet box.

The programlisting element is sometimes referred to as "verbatim", as the code you add inside the element will be rendered exactly how it appears in the editor. For example, it will keep spaces and line breaks to represent the code properly. Some other elements also work like this,
such as screen and literallayout.
Here, a javascript function has been added inside a programlisting element. This is how the code looks in the output.
function myFunction() { 1
    var x = "", i;
    for (i=0; i<5; i++) {
        x = x + "The number is " + i + "<br>";
    }
    document.getElementById("demo").innerHTML = x; 2
}
In the sample shown , a code block is added inside the programlisting element. The javascript function contains (1) on the first line and (2) on the last line. These are callouts, which you can use to annotate code blocks.
You can annotate code blocks by using the calloutlist element and co elements. In the published output, the callouts act as clickable "hotspots" that highlight parts of the code. When someone selects a "hotspot", they are taken to the
callout text explanation for that "hotspot".
For example, in the image below, the code sample has two callout "hotspots" labelled 1 and 2. Below the code sample, there are numbers that match the hotspots, and next to each number is an annotation that explains the purpose of the corresponding code.

To annotate code using calloutlist:
-
Select a position in the code block where you want a callout "hotspot" to appear.
-
Press Alt + Enter ⏎ (Windows) or Command ⌘ + Enter ⏎ (Mac) to display the Element Context Menu.
-
Select the
coelement and give it anxml:id valuein the Element attributes section. Eachcoelement has to have anxml:idvalue that is unique in that specific topic. For example, you could give the firstcoelement thexml:idid_1, the secondcoelement thexml:idid_2 and so on. -
Add a
calloutlistelement after theprogramlistingelement that contains your code block.Tip
It can be a good idea to include the
programlistingandcalloutlistelements inside anexampleelement, so that they are all in a single "container" (theexampleelement). -
Give each
calloutin thecalloutlistanxml:idas well, different from the ones in thecoelements, e.g "callout_1", "callout_2". Again, these ids need to be unique. -
Associate the
coelements with thecalloutelements:-
For each
coelement, add alinkendsattribute. Set the value of thelinkendsattribute to thexml:idvalue of thecalloutthat you want to associate it with. -
For each
calloutelement, add thearearefsattribute. Set the value of the arearefs attribute to thexml:idvalue of thecothat you want to associate it with.
-
If you want to include a small snippet of code in a paragraph rather than as a full block of code, you can use an inline element. There are several elements you can use for this purpose, but perhaps the most commonly used is code.
But there are other elements you can use too. For example, for terminal commands, you might want to use the command element. There are also elements like synopsis, cmdsynopsis, userinput, varname, replaceable, constant, and many more that you can read more about in the standard Element Reference. The important thing is to be consistent when choosing elements for marking up code samples.
To add a code element (or any other inline element):
-
Highlight the text to which you want to apply an element.

-
Press Alt + Enter ⏎ (Windows) or Command ⌘ + Enter ⏎ (Mac) to display the Element Context Menu.
-
Select the element that you want from the list.
For example, choose
code. -
Enter your code inside the element.
-
Select Save.

Let's say you wanted to add the code ssh -1 username remote-address to a paragraph in your content. To do that, you place the cursor at the appropriate position in the para element, and then add the inline code element.
You type the ssh -1 username remote-address code inside the code element and when you publish, the paragraph contains a mix of regular text and code, like this:
To log into another machine type ssh -l username remote-address and hit Enter.
You can set your help content to use the latest code samples from a repository, such as GitHub or BitBucket. Once set up, your HTML5 help will be able to update code samples automatically, without being republished.
Note
The code samples need to be in an "https" URL.
Tip
For embedding Swagger/Open API code, see Embed Swagger OpenAPI.
To set up your HTML5 help to use "live" code snippets from a repository, use dynamic code snippets.
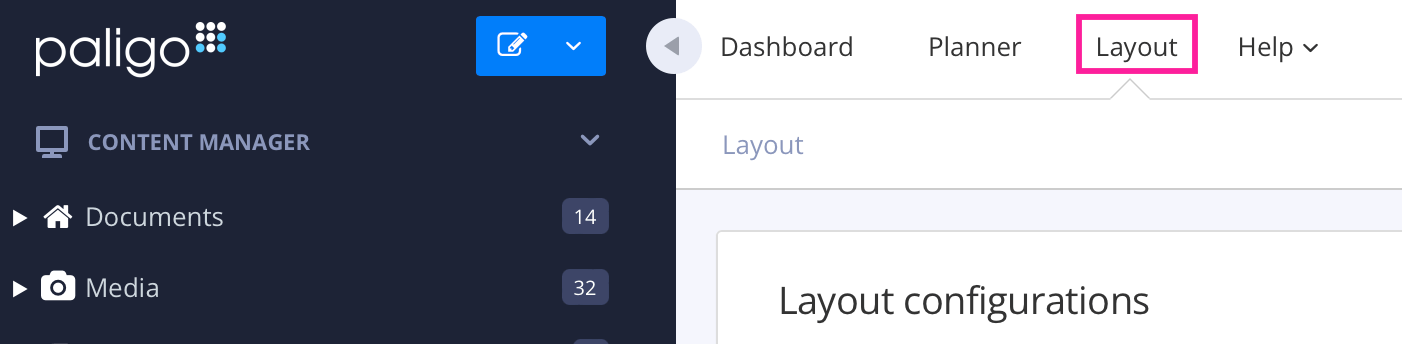
-
Select Layout in the top menu.
Paligo displays a list of Layouts. The list is empty if there are no custom Layouts in your Paligo instance.
-
Select the Layout you want to update or Create a Layout.
Tip
You can copy the URL of the Layout Editor and paste it into a new tab in your browser. This can be useful if you frequently switch between your Paligo content and the Layout settings.
-
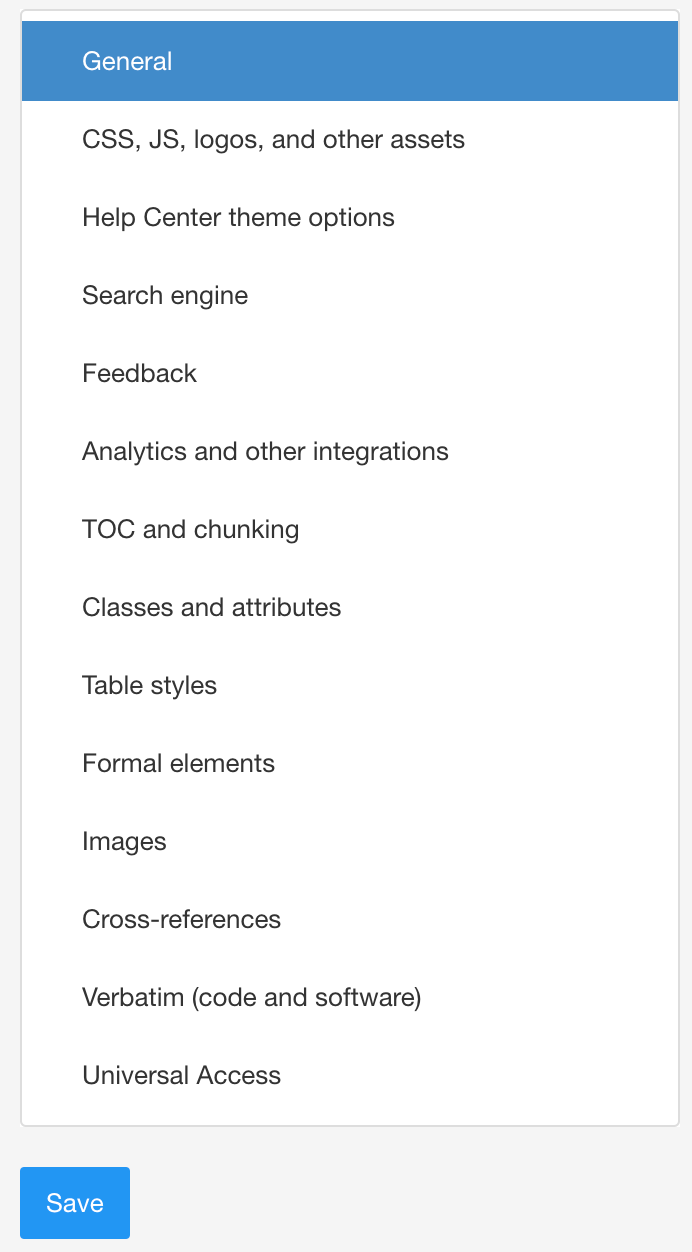
Select Classes and attributes in the sidebar.

-
Select Enable for Output 'role' attribute as class names.

-
Select Save.
-
Select the topic or component in the Content Manager to open it in the Editor.
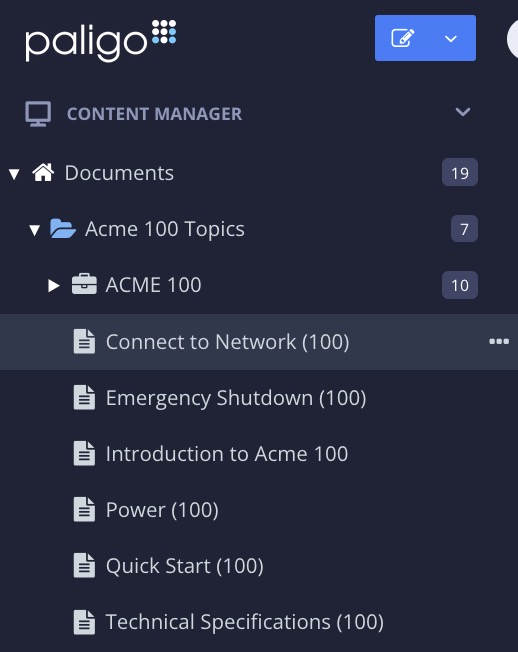
Alternatively, you can Create a Topic and edit that.
-
Select the position where you want the code to appear.
-
Press Alt + Enter ⏎ (Windows) or Command ⌘ + Enter ⏎ (Mac) to display the Element Context Menu.
-
Add a code block element, either
programlistingorscreen. -
Select the
programlistingorscreenelement in the topic.Tip
You can add a
programlistingelement with these attributes added by the shortcut Alt,. Then you just need to add the URL value. -
Add these attributes and values In the Element Attributes Panel:
-
roleattribute with the valueembedcode -
xlink:hrefattribute with the URL to the code snippet in your repository.
-
-
Optional: If you want or need fallback code for other output formats, add the code snippet in the
programlistingorscreenelement as well. -
Select Save.
When you publish, your code will be fetched from the repository and will be automatically updated if that code changes.
Note
If you also publish to other outputs such as PDF, the embedded code will still be fetched dynamically at publish time. But if you change the code samples in your repository, you will need to republish the PDF output to have Paligo fetch the latest changes.
Syntax highlighting is when code samples use color-coding and indentations to make it easier to differentiate between parts of the code. In the following code extract, syntax highlighting is used to apply different colors to elements. The background is dark and different colors are used to highlight the different types
of code element, for example, var declarations are light blue and the var names, such as icon1, are green.
 |
Syntax highlighting works differently for HTML5 and PDF, but there are some common characteristics:
-
You can enable and disable syntax highlighting on the layout you use for publishing.
-
You choose the theme to use for syntax highlighting on the layout. There are many themes, each offering different colors and syntax highlighting.
-
Paligo can usually detect a code language in a verbatim element, such as programlisting, automatically. But if it is not recognizing your code sample, you can apply a
languageattribute and set the language there.
To set up syntax highlighting for HTML5 outputs, use the settings on an HTML5 layout, and add attributes to the code sample if required:
-
Select Layout in the top menu.
Paligo displays a list of Layouts. The list is empty if there are no custom Layouts in your Paligo instance.
-
Select the Layout you want to update or Create a Layout.
Tip
You can copy the URL of the Layout Editor and paste it into a new tab in your browser. This can be useful if you frequently switch between your Paligo content and the Layout settings.
-
Select Verbatim (code and software) in the sidebar.

-
Use the settings to set up syntax highlighting:
-
Highlight verbatim elements - Set the syntax highlighting feature to Enable (on) or Disable (off).
-
Highlight theme - Choose a theme. Each theme provides a different color scheme for syntax highlighting and may highlight different parts of the code. There are many different themes to choose from and we recommend that you experiment until you find the theme that best meets your requirements.
-
-
Select Save.
-
Paligo will usually be able to recognize the language in a code sample automatically and will apply the chosen theme for syntax highlighting. If Paligo is not recognizing your code sample, you can give the sample a
languageattribute. Paligo will then be able to identify the sample by the value that's set for thelanguageattribute.To set the
languagefor a code sample:-
Edit the topic that contains the code sample and select the verbatim element for the sample, for example, the
programlistingelement. -
In the Element attributes section, add the
languageattribute and enter a supported language as the value. For example, javascript. To find out what values are acceptable, see Syntax Highlighting Languages for HTML5.
-
-
Select Save.
You can use the language attribute to give code samples a specific programming language. For example, you could give a programlisting element the language attribute and set its value to javascript.
To find out how to add the language attribute, see Syntax Highlighting for HTML5.
The following table shows the values that you can set for the language attribute. For some languages, you can use one of several values, and these are separated by a comma in the table. You should only enter one of the values, for example, for JavaScript you can enter either
js or javascript or jsx.
|
Programming language |
Value for the language attribute |
|---|---|
|
1C |
1c |
|
4D |
4d |
|
ABNF |
abnf |
|
Access logs |
accesslog |
|
ActionScript |
actionscript, as |
|
Ada |
ada |
|
Alan |
alan, i |
|
AngelScript |
angelscript, asc |
|
Apache |
apache, apacheconf |
|
AppleScript |
applescript, osascript |
|
Arcade |
arcade |
|
ARM assembler |
armasm, arm |
|
AsciiDoc |
asciidoc, adoc |
|
AspectJ |
aspectj |
|
AutoHotkey |
autohotkey |
|
AutoIt |
autoit |
|
AVR assembler |
avrasm |
|
Awk |
awk, mawk, nawk, gawk |
|
Axapta |
axapta |
|
Bash |
bash, sh, zsh |
|
Basic |
basic |
|
BNF |
bnf |
|
Brainfuck |
brainfuck, bf |
|
C |
h |
|
C# |
csharp, cs |
|
C++ |
cpp, hpp, cc, hh, c++, h++, cxx, hxx |
|
Cache Object Script |
cos, cls |
|
C/AL |
cal |
|
Cap’n Proto |
capnproto, capnp |
|
Clojure |
clojure, clj |
|
CMake |
cmake, cmake.in |
|
CoffeeScript |
coffeescript, coffee, cson, iced |
|
Coq |
coq |
|
Crmsh |
crmsh, crm, pcmk |
|
Crystal |
crystal, cr |
|
CSP |
csp |
|
CSS |
css |
|
Cypher (Neo4j) |
cypher |
|
D |
d |
|
Dart |
dart |
|
Delphi |
delphi, dpr, dfm, pas, pascal, freepascal, lazarus, lpr, lfm |
|
Diff |
diff, patch |
|
Django |
django, jinja |
|
DNS Zone file |
dns, zone, bind |
|
Dockerfile |
dockerfile, docker |
|
DOS |
dos, bat, cmd |
|
dsconfig |
dsconfig |
|
DTS (Device Tree) |
dts |
|
Dust |
dust, dst |
|
Dylan |
dylan |
|
EBNF |
ebnf |
|
Elixir |
elixir |
|
Elm |
elm |
|
Erlang |
erlang, erl |
|
Excel |
excel, xls, xlsx |
|
Extempore |
extempore, xtlang, xtm |
|
F# |
fsharp, fs |
|
FIX |
fix |
|
Fortran |
fortran, f90, f95 |
|
Gams |
gams, gms |
|
GAUSS |
gauss, gss |
|
G-Code |
gcode, nc |
|
GDScript |
godot, gdscript |
|
Gherkin |
gherkin |
|
GN for Ninja |
gn, gni |
|
Go |
go, golang |
|
Golo |
golo, gololang |
|
Gradle |
gradle |
|
Grammatical Framework |
gf |
|
Groovy |
groovy |
|
Haml |
haml |
|
Handlebars |
handlebars, hbs, html.hbs, html.handlebars |
|
Haskell |
haskell, hs |
|
Haxe |
haxe, hx |
|
HTML, XML |
xml, html, xhtml, rss, atom, xjb, xsd, xsl, plist, svg |
|
HTTP |
http, https |
|
Hy |
hy, hylang |
|
Inform7 |
inform7, i7 |
|
Ini, TOML |
ini, toml |
|
IRPF90 |
irpf90 |
|
Java |
java, jsp |
|
JavaScript |
javascript, js, jsx |
|
JSON |
json |
|
Kotlin |
kotlin, kt |
|
Lasso |
lasso, ls, lassoscript |
|
LaTeX |
tex |
|
LDIF |
ldif |
|
Leaf |
leaf |
|
Less |
less |
|
Lisp |
lisp |
|
LiveCode Server |
livecodeserver |
|
LiveScript |
livescript, ls |
|
Lua |
lua |
|
Makefile |
makefile, mk, mak |
|
Markdown |
markdown, md, mkdown, mkd |
|
Mathematica |
mathematica, mma, wl |
|
Matlab |
matlab |
|
Maxima |
maxima |
|
Maya Embedded Language |
mel |
|
Mercury |
mercury |
|
mIRC Scripting Language |
mirc, mrc |
|
Mizar |
mizar |
|
Mojolicious |
mojolicious |
|
Monkey |
monkey |
|
Moonscript |
moonscript, moon |
|
N1QL |
n1ql |
|
Nginx |
nginx, nginxconf |
|
Nim |
nimrod |
|
Nix |
nix |
|
NSIS |
nsis |
|
Objective C |
objectivec, mm, objc, obj-c |
|
OCaml |
ocaml, ml |
|
OpenGL Shading Language |
glsl |
|
OpenSCAD |
openscad, scad |
|
Oracle Rules Language |
ruleslanguage |
|
Oxygene |
oxygene |
|
Parser3 |
parser3 |
|
Perl |
perl, pl, pm |
|
PF |
pf, pf.conf |
|
PHP |
php, php3, php4, php5, php6, php7 |
|
Plaintext |
plaintext, txt, text |
|
Pony |
pony |
|
PostgreSQL & PL/pgSQL |
pgsql, postgres, postgresql |
|
PowerShell |
powershell, ps, ps1 |
|
Processing |
processing |
|
Prolog |
prolog |
|
Properties |
properties |
|
Protocol Buffers |
protobuf |
|
Puppet |
puppet, pp |
|
Python |
python, py, gyp |
|
Python profiler results |
profile |
|
Q |
k, kdb |
|
QML |
qml |
|
R |
r |
|
Razor CSHTML |
cshtml, razor, razor-cshtml |
|
ReasonML |
reasonml, re |
|
RenderMan RIB |
rib |
|
RenderMan RSL |
rsl |
|
Roboconf |
graph, instances |
|
Robot Framework |
robot, rf |
|
RPM spec files |
rpm-specfile, rpm, spec, rpm-spec, specfile |
|
Ruby |
ruby, rb, gemspec, podspec, thor, irb |
|
Rust |
rust, rs |
|
SAS |
SAS, sas |
|
Scala |
scala |
|
Scheme |
scheme |
|
Scilab |
scilab, sci |
|
SCSS |
scss |
|
Shape Expressions |
shexc |
|
Shell |
shell, console |
|
Smali |
smali |
|
Smalltalk |
smalltalk, st |
|
Solidity |
solidity, sol |
|
SQL |
sql |
|
Stan |
stan, stanfuncs |
|
Stata |
stata |
|
STEP Part 21 |
p21, step, stp |
|
Structured Text |
iecst, scl, stl, structured-text |
|
Stylus |
stylus, styl |
|
SubUnit |
subunit |
|
Supercollider |
supercollider, sc |
|
Swift |
swift |
|
Tcl |
tcl, tk |
|
Terraform (HCL) |
terraform, tf, hcl |
|
Test Anything Protocol |
tap |
|
Thrift |
thrift |
|
TP |
tp |
|
Twig |
twig, craftcms |
|
TypeScript |
typescript, ts |
|
Vala |
vala |
|
VB.Net |
vbnet, vb |
|
VBScript |
vbscript, vbs |
|
Verilog |
verilog, v |
|
VHDL |
vhdl |
|
Vim Script |
vim |
|
x86 Assembly |
x86asm |
|
XL |
xl, tao |
|
XQuery |
xquery, xpath, xq |
|
YAML |
yml, yaml |
|
Zephir |
zephir, zep |
Use a PDF layout to set up syntax highlighting for PDF:
-
Select Layout in the top menu.
Paligo displays a list of Layouts. The list is empty if there are no custom Layouts in your Paligo instance.
-
Select the Layout you want to update or Create a Layout.
Tip
You can copy the URL of the Layout Editor and paste it into a new tab in your browser. This can be useful if you frequently switch between your Paligo content and the Layout settings.
-
Select Verbatim (code and software) and choose Syntax Highlight.

-
Use the settings to set up syntax highlighting for your PDF output:
-
Turn syntax highlight on - Set the syntax highlighting feature to Enabled (on) or Disabled (off).
-
Default language when no language attribute has been set - If the code samples in your topics do not have a language set, Paligo will usually be able to identify the language automatically. But if it cannot identify the language, it will assume the code sample is in the default language. Use this setting to define the default language.
-
Default style for syntax highlight - Choose a theme. Each theme provides a different color scheme for syntax highlighting and may highlight different parts of the code. We recommend that you experiment until you find the theme that best meets your requirements.
Note
The default language and default style are only used if a code sample does not have its own attributes set for language and style.
-
-
Select Save.
-
You can use the
languageattribute to give a code sample its own language and style settings that will be used instead of the defaults. This is useful if Paligo is unable to recognize the language automatically.-
Edit the topic that contains the code sample and select the verbatim element for the sample, for example, the
programlistingelement. -
In the Element Attributes Panel, add the
languageattribute and enter a supported language as the value. For example, javascript. To find out what values you can use, see Syntax Highlighting Languages for PDF. -
Add the
roleattribute and enter a supported theme name as the value. For example,role:fruity. This is an optional step. Typically, you would want all code samples to use the same theme for consistency, and so would set a default theme on the layout and not use theroleattribute on individual code samples.
Note
You can set the value to any theme that is listed in the Default style for syntax highlight setting on the PDF layout editor.
-
-
Select Save.
When you publish to PDF using the layout you edited, the PDF output will use syntax highlighting. If a code sample has its own language and role set, Paligo will apply those. If a code sample does not have its own language and role set, Paligo will attempt to identify the language automatically and will use the default theme. If Paligo cannot identify the language automatically, it will use the default language that is set in the layout.
You can use the language attribute to give code samples a specific programming language. For example, you could give a programlisting element the language attribute and set its value to javascript.
To find out how to add the language attribute, see Syntax Highlighting for PDF.
The following table shows the values that you can set for the language attribute. For some languages, you can use one of several values, and these are separated by a comma in the table. You should only enter one of the values, for example, for JavaScript you can enter either
js or javascript.
|
Language |
Value for the language attribute |
|---|---|
|
ABAP |
abap |
|
ABNF |
abnf |
|
ActionScript |
as, actionscript |
|
ActionScript 3 |
as3, actionscript3 |
|
Ada |
ada, ada95, ada2005 |
|
ADL |
adl |
|
Agda |
agda |
|
Alloy |
alloy |
|
AmbientTalk |
at, ambienttalk, ambienttalk/2 |
|
ANTLR |
antlr |
|
ANTLR with ActionScript Target |
antlr-as, antlr-actionscript |
|
ANTLR with CPP Target |
antlr-cpp |
|
ANTLR with C# Target |
antlr-csharp, antlr-c# |
|
ANTLR with Java Target |
antlr-java |
|
ANTLR with ObjectiveC Target |
antlr-objc |
|
ANTLR with Perl Target |
antlr-perl |
|
ANTLR with Python Target |
antlr-python |
|
ANTLR with Ruby Target |
antlr-ruby, antlr-rb |
|
ApacheConf |
apacheconf, aconf, apache |
|
APL |
apl |
|
AppleScript |
applescript |
|
Arduino |
arduino |
|
AspectJ |
aspectj |
|
Aspx-cs |
aspx-cs |
|
Aspx-vb |
aspx-vb |
|
Asymptote |
asy, asymptote |
|
Autohotkey |
ahk, autohotkey |
|
AutoIt |
autoit |
|
Awk |
awk, gawk, mawk, nawk |
|
Basemake |
basemake |
|
Bash |
bash, sh, ksh, shell |
|
Bash Session |
console, shell-session |
|
Batchfile |
bat, batch, dosbatch, winbatch |
|
BBCode |
bbcode |
|
BC |
bc |
|
Befunge |
befunge |
|
BlitzBasic |
blitzbasic, b3d, bplus |
|
BlitzMax |
blitzmax, bmax |
|
BNF |
bnf |
|
Boo |
boo |
|
Boogie |
boogie |
|
Brainfuck |
brainfuck, bf |
|
Bro |
bro |
|
BUGS |
bugs, winbugs, openbugs |
|
C |
c: |
|
C# |
csharp, c# |
|
C++ |
cpp, c++ |
|
CA65 Assembler |
ca65 |
|
cADL |
cadl |
|
CAmkES |
camkes, idl4 |
|
CBM BASIC V2 |
cbmbas |
|
Ceylon |
ceylon |
|
CFEngine3 |
cfengine3, cf3 |
|
Cfstatement |
cfs |
|
ChaiScript |
chai, chaiscript |
|
Chapel |
chsprl, chpl |
|
Cheetah |
cheetah, spitfire |
|
Cirru |
cirru |
|
Clay |
clay |
|
Clojure |
clojure, clj |
|
ClojureScript |
clohurescript, cljs |
|
CMake |
cmake |
|
C-Objdump |
c-objdump |
|
COBOL |
cobol |
|
COBOLFree |
cobolfree |
|
Coffee-script |
coffee-script, coffeescript, coffee |
|
Coldfusion CFC |
cfc |
|
Coldfusion HMTL |
cfm |
|
Common Lisp |
common-lisp, cl, lisp |
|
Component Pascal |
componentpascal, cp |
|
Control, Debian Control |
control, debcontrol |
|
Coq |
coq |
|
Cpp-Objdump |
cpp-objdump, c++-objdumb, cxx-objdump |
|
CPSA |
cpsa |
|
Crmsh |
crmsh, pcmk |
|
Croc |
croc |
|
Cryptol |
cryptol, cry |
|
Csound Document |
csound-document, csound-csd |
|
Csound Orchestra |
csound, csound-orc |
|
Csound Score |
csound-score, csound-sco |
|
CSS |
css |
|
CSS+Django, CSS+Jinja |
css+django, css+jinja |
|
CSS+Erb, CSS+Ruby |
css+erb, css+ruby |
|
CSS+Genshitext, CSS+Genshi |
css+genshitext, css+genshi |
|
CSS+Lasso |
css+lasso |
|
CSS+Mako |
css+mako |
|
CSS+Mozpreproc |
css+mozpreproc |
|
CSS+Myghty |
css+myghty |
|
CSS+PHP |
css+php |
|
CSS+Smarty |
css+smarty |
|
CUDA |
cuda, cu |
|
Cypher |
cypher |
|
Cython |
cython, pyx, pyrex |
|
D |
d |
|
Dart |
dart |
|
Debian Sourcelist |
sourceslist, sources.list, debsources |
|
Delphi |
delphi, pas, pascal, objectpascal |
|
DG |
dg |
|
Diff |
diff, udiff |
|
Django/Jinja |
django, jinja |
|
D-Objdump |
d-objdump |
|
Docker |
dockerfile, docker |
|
Dpatch |
dpatch |
|
DTD |
dtd |
|
Duel |
duel, jbst, jsonml+bst |
|
Dylan |
dylan |
|
DylanLID |
dylan-lid, lid |
|
Dylan Session |
dylan-console, dylan-repl |
|
Earl Grey |
earl-grey, earlgrey, eg |
|
Easytrieve |
easytrieve |
|
EBNF |
ebnf |
|
eC |
ec |
|
ECL |
ecl |
|
Eiffel |
eiffel |
|
Elixir |
elixir, ex, exs |
|
Elixir iex session |
iex |
|
Elm |
elm |
|
EmacsLisp |
emacs, elisp, emacs-lisp |
|
ERB |
erb |
|
Erlang |
erlang |
|
Erlang ERL Session |
erl |
|
Evoque |
evoque |
|
Ezhil |
ezhil |
|
Factor |
factor |
|
Fancy |
fancy, fy |
|
Fantom |
fan |
|
Felix |
felix, flx |
|
Fish |
fish, fishshell |
|
Fortran |
fortran |
|
FortranFixed |
fortranfixed |
|
FoxPro, VFP, Clipper, XBase |
foxpro, vfp, clipper, xbase |
|
FSharp |
fsharp |
|
GAP |
gap |
|
GAS |
gas, asm |
|
Genshi |
genshi, kid, xml+genshi, xml+kid |
|
Genshi Text |
genshitext |
|
Gettext Catalog |
pot, po |
|
Gherkin |
cucumber, gherkin |
|
GLSL |
glsl |
|
Gnuplot |
gnuplot |
|
Go |
go |
|
Golo |
golo |
|
GoodData-CL |
gooddata-cl |
|
Gosu |
gosu |
|
Gosu Template |
gst |
|
Groff |
groff, nroff, man |
|
Groovy |
groovy |
|
Haml |
haml |
|
Handlebars |
Handlebars |
|
Haskell |
haskell, hs |
|
Haxe |
hx, haxe, hxsl |
|
Hexdump |
Hexdump |
|
HTML |
html |
|
HTML+Cheetah |
html+cheetah, html+spitfire, htmlcheetah |
|
HTML+Django/Jinja |
html+django, html+jinja, htmldjango |
|
HTML+Evoque |
html+evoque |
|
HTML+Genshi |
html+genshi, html+kid |
|
HTML+Handlebars |
html+handlebars |
|
HTML+Lasso |
html+lasso |
|
HTML+Mako |
html+mako |
|
HTML+Myghty |
html+myghty |
|
HTML+PHP |
html+php |
|
HTML+Smarty |
html+smarty |
|
HTML_Twig |
html+twig |
|
HTML+Velocity |
html+velocity |
|
HTTP |
http |
|
HXML |
haxeml, hxml |
|
Hy |
hylang |
|
Hybris |
hybris, hy |
|
IDL |
idl |
|
Idris |
idris, idr |
|
Igor |
igor, igorpro |
|
Inform 6 |
inform6, i6 |
|
Inform 6 template |
i6t |
|
Inform7, i7 |
inform7, i7 |
|
INI |
ini, cfg, dosini |
|
Io |
io |
|
Ioke |
ioke, ik |
|
IRC logs |
irc |
|
Isabelle |
isabelle |
|
J |
j |
|
Jade |
jade |
|
JAGS |
jags |
|
Jasmin |
jasmin, jasminxt |
|
Java |
java |
|
JavaScript |
js, javascript |
|
JavaScript+Cheetah |
js+cheetah, javascript+cheetah, js+spitfire, javascript+spitfire |
|
JavaScript+Django/Jinja |
js+django, javascript+django, js+jinja, javascript+jinja |
|
JavaScript+Genshitext, |
js+genshitext, js+genshi, javascript+genshitext, javascript+genshi |
|
JavaScript+Lasso |
js+lasso, javascript+lasso |
|
JavaScript+Mako |
js+mako, javascript+mako |
|
Javascript+Mozpreproc |
javascript+mozpreproc |
|
JavaScript+Myghty |
js+myghty, javascript+myghty |
|
JavaScript+PHP |
js+php, javascript+php |
|
Javascript+Ruby |
js+erb, javascript+erb, js+ruby, javascript+ruby |
|
JavaScript+Smarty |
js+smarty, javascript+smarty |
|
Java Server Page |
jsp |
|
JCL |
jcl |
|
JLCON Julia Console |
jlcon |
|
JSON |
json |
|
JSON-LD |
jsonld, json-ld |
|
Julia |
julia, jl |
|
Kal |
kal |
|
Kconfig |
kconfig, menuconfig, linux-config, kernel-config |
|
Koka |
koka |
|
Kotlin |
kotlin |
|
Lasso |
lasso, lassoscript |
|
Lean |
lean |
|
LessCSS |
less |
|
Lighttpd configuration |
lighty, lighttpd |
|
Limbo |
limbo |
|
Liquid |
liquid |
|
Literate Cryptol |
lcry, literate-cryptol, lcryptol |
|
Literate-Haskell |
lhs, literate-haskell, lhaskell |
|
Literate Idris |
lidr, literate-idris, lidris |
|
Literate Lagda |
lagda, literate-agda |
|
Live-Script |
live-script, livescript |
|
LLVM |
llvm |
|
Logos |
logos |
|
Logtalk |
logtalk |
|
LSL |
lsl |
|
Lua |
lua |
|
Makefile |
make, makefile, mf, bsdmake |
|
Mako |
mako |
|
MAQL |
maql |
|
Mask |
mask |
|
Mason |
mason |
|
Mathematica |
mathematica, mma, nb |
|
Matlab |
matlab |
|
Matlab session |
matlabsession |
|
MiniD |
minid |
|
Modelica |
modelica |
|
Modula-2 |
modula2, m2 |
|
MoinMoin/Trac Wiki markup |
trac-wiki, moin |
|
Monkey |
monkey |
|
MOOCode |
moocode, moo |
|
MoonScript |
moon, moonscript |
|
Mozhashpreproc |
mozhashpreproc |
|
Mozpercentpreproc |
mozpercentpreproc |
|
MQL |
mql, mq4, mq5, mql4, mql5 |
|
Mscgen |
mscgen, msc |
|
MSDOS Session |
doscon |
|
MuPAD |
mupad |
|
MXML |
mxml |
|
Myghty |
myghty |
|
MySQL |
mysql |
|
NASM |
nasm |
|
Nemerle |
nemerle |
|
nesC |
nesc |
|
NewLisp |
newlisp |
|
Newspeak |
newspeak |
|
Nginx configuration |
nginx |
|
Nimrod |
nimrod, nim |
|
Nit |
nit |
|
Nix |
nixos, nix |
|
NSIS |
nsis, nsi, nsh |
|
NumPy |
numpy |
|
Objdump |
objdump |
|
Objdump-nasm |
objdump-nasm |
|
Objective-C |
objective-c, objectivec, obj-c, objc |
|
Objective-C++ |
objective-c++, objectivec++, obj-c++, objc++ |
|
Objective-J |
objective-j, objectivej, obj-j, objj |
|
OCaml |
ocaml |
|
Octave |
octave |
|
ODIN |
odin |
|
Ooc |
ooc |
|
Opa |
opa |
|
OpenEdge ABL |
openedge, abl, progress |
|
PacmanConf |
pacmanconf |
|
Pan |
pan |
|
Parasail |
parasail |
|
Pawn |
pawn |
|
Perl |
perl, pl |
|
Perl6 |
perl6, pl6 |
|
PHP |
php, php3, php4, php5 |
|
Pig |
pig |
|
Pike |
pike |
|
PkgConfig |
pkgconfig |
|
plpgsql |
PL/pgSQL |
|
PostgreSQL |
postgresql, postgres |
|
PostgreSQL console |
psql, postgresql-console, postgres-console |
|
PostScript |
postscript, postscr |
|
POVRay |
pov |
|
PowerShell |
powershell, posh, ps1, psm1 |
|
PowerShell Session |
ps1con |
|
Praat |
praat |
|
Prolog |
prolog |
|
Properties |
properties, jproperties |
|
Protocol Buffer |
protobuf, proto |
|
Puppet |
puppet |
|
Python 3 |
python3, py3 |
|
Python 3.0 Traceback |
py3tb |
|
Python console session |
pycon |
|
QBasic |
qbasic, basic |
|
QML |
qml, qbs |
|
QVTO |
qvto, qvt |
|
Racket |
racket, rkt |
|
Ragel |
ragel |
|
Ragel - Embedded |
ragel-em |
|
Ragel in C Host |
ragel-c |
|
Ragel in CPP Host |
ragel-cpp |
|
Ragel in D Host |
ragel-d |
|
Ragel in Java Host |
ragel-java |
|
Ragel in Objective C Host |
ragel-objc |
|
Ragel in Ruby Host |
ragel-ruby, ragel-rb |
|
Raw token data |
raw |
|
RConsole |
rconsole, rout |
|
Rd |
rd |
|
REBOL |
rebol |
|
Red |
red, red/system |
|
Redcode |
redcode |
|
Reg |
registry |
|
ResourceBundle |
resource, resourcebundle |
|
reStructuredText |
rst, rest, restructuredtext |
|
Rexx |
rexx, arexx |
|
RHTML |
rhtml, html+erb, html+ruby |
|
Roboconf Graph |
roboconf-graph |
|
Roboconf Instances |
roboconf-instances |
|
RobotFramework |
robotframework |
|
RPMSpec |
spec |
|
RQL |
rql |
|
RSL |
rsl |
|
Ruby |
rb, ruby, duby |
|
Ruby irb session |
rbcon, irb |
|
Rust |
rust |
|
S |
splus, s, r |
|
Sass |
sass |
|
Scala |
scala |
|
Scalate Server Page |
ssp |
|
Scaml |
scaml |
|
Scheme |
scheme, scm |
|
Scilab |
scilab |
|
SCSS |
scss |
|
Shen |
shen |
|
Slim |
slim |
|
Smali |
smali |
|
Smalltalk |
smalltalk, squeak, st |
|
Smarty |
smarty |
|
Snobol |
snobol |
|
SourcePawn |
sp |
|
SPARQL |
sparql |
|
SQL |
sql |
|
sqlite3con |
sqlite3 |
|
SquidConf |
squidconf, squid.conf, squid |
|
Stan |
stan |
|
Standard ML |
sml |
|
SuperCollider |
sc, supercollider |
|
SWIG |
swig |
|
systemverilog |
systemverilog, sv |
|
TADS 3 |
tads3 |
|
TAP |
tap |
|
Tcl |
tcl |
|
Tcsh |
tcsh, csh |
|
Tea |
tea |
|
Termcap |
termcap |
|
Terminfo |
terminfo |
|
Terraform |
terraform, tf |
|
TeX |
tex, latex |
|
Text only |
text |
|
Thrift |
thrift |
|
Todotxt |
todotxt |
|
TrafficScript |
rts, trafficscript |
|
Treetop |
treetop |
|
Turtle |
turtle |
|
Twig |
twig |
|
TypeScript |
ts, typescript |
|
UrbiScript |
urbiscript |
|
Vala |
vala, vapi |
|
VB.net |
vb.net, vbnet |
|
VCTreeStatus |
vctreestatus |
|
Velocity |
velocity |
|
Verilog, v |
verilog, v |
|
VGL |
vgl |
|
vhdl |
vhdl |
|
VimL |
vim |
|
X10 |
x10, xten |
|
XML |
xml |
|
XML+Cheetah |
xml+cheetah, xml+spitfire |
|
XML+Django/Jinja |
xml+django, xml+jinja |
|
XML+Evoque |
xml+evoque |
|
XML+Lasso |
xml+lasso |
|
XML+Mako |
xml+mako |
|
XML+Myghty |
xml+myghty |
|
XML+PHP |
xml+php |
|
XML+Ruby |
xml+erb, xml+ruby |
|
XML+Smarty |
xml+smarty |
|
XML+Velocity |
xml+velocity |
|
XSLT |
xslt |
|
xsltXQuery |
xquery, xqy, xq, xql, xqm |
|
Xtend |
xtend |
|
XUL+mozpreproc |
xul+mozpreproc |
|
YAML |
yaml |
|
YAML+Jinja |
yaml+jinja, salt, sls |
|
Zephir |
zephir |
To use Swagger Open API content in Paligo, you can either embed it or Import Swagger OpenAPI. The best approach for you will depend on your requirements.
-
Embedding is useful if your Swagger Open API content exists elsewhere on the internet, external to Paligo. By embedding it, you add a "live" version of the content to a Paligo topic. However, there are some limitations with how you can format the content, as it is not in the Paligo database and so cannot be processed by Paligo during publishing.
-
Importing is useful if you need to be able to format the Swagger Open API content in Paligo. With an import, you bring the Swagger Open API content into the Paligo database, where you have more control over the formatting, just like regular Paligo content. But you will need to import the content manually each time it is updated.
CORS (Cross-origin resource sharing) defines a way for client web applications that are loaded in one domain to interact with resources in a different domain. For the Swagger embed to work, the host (where your Swagger content is located) must allow CORS. Either completely, or for the domain where you intend to host your content.
To be able to embed Swagger OpenAPI in your content, it must first be enabled in your layout.
-
Select Layout in the top menu.
Paligo displays a list of Layouts. The list is empty if there are no custom Layouts in your Paligo instance.
-
Select the Layout you want to update or Create a Layout.
Tip
You can copy the URL of the Layout Editor and paste it into a new tab in your browser. This can be useful if you frequently switch between your Paligo content and the Layout settings.
-
Select Analytics and other integrations in the sidebar.

-
Select Enable for Enable embedding Swagger content.

-
Select General in the sidebar.
-
Enable or Disable Use a short and flat URL structure for output files depending on where the content will be positioned in the publication structure (table of contents):
-
Enable this option if the content will be at second level or lower.
-
Disable this option if the content will be at top level. Disabled by default.

Note
Select Disable if the topic will be at top-level. Disabled by default.
-
-
Select Save.
To publish Swagger content, the topic must first be set as a swagger topic and include a link to the URL of the JSON or YAML file of your Swagger content.
-
Create a Topic that will contain the embedded Swagger content.
-
Select the
sectionelement in the Element Structure Menu.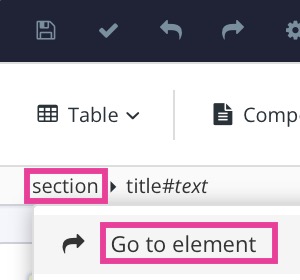
-
Select Go to element.
-
Add the
roleelement in Element Attributes Panel and set the value to swagger-topic.
-
Position the cursor to insert a
paraelement (or use an existing emptyparaelement). -
Press Alt + Enter ⏎ (Windows) or Command ⌘ + Enter ⏎ (Mac) to display the Element Context Menu.
-
Enter link and select it from the menu.

Add a
roleattribute to thelink, with the valueswagger-ui. -
Select the
linkelement in the Element Structure Menu and choose Go to element. -
Add the following attributes in Element Attributes Panel.
-
roleand set its value toswagger-ui -
xlink:hrefand set its value to the URL of the JSON or YAML file of your Swagger content.Tip
If you don't have your Swagger content available yet, but want to test the integration, you can use the standard Swagger "Pet Store" example, using the URL https://petstore.swagger.io/v2/swagger.json.

-
-
Select Save.
-
Publish the publication with the updated layout.

The output should look something like this: a sub navigation menu on the left for each of the endpoints in your Swagger content, and all of the interactivity of the Swagger content should work.
Note
If you get an error saying "No API definition provided", this is not an error on the Paligo side. It usually means that you have a "CORS" issue, which is a security setting on your server.
You can test if this is the issue by bypassing CORS. There are CORS bypass extensions that you can add to your browser for this purpose. If you are uncertain, please consult your development team.
If your testing shows that CORS is causing a problem, ask your developers to enable CORS on the server where you host your Swagger content.
Please note that Paligo takes no responsibility for how you test CORS issues.
If you experience problems embedding Swagger hosted in Amazon S3, refer to Amazon CORS configuration.
Paligo has a Copy to Clipboard feature that you can use with your code samples.
When the feature is enabled, a copy button appears for each programlisting element, and your readers can use it to copy the code sample inside the element to their computer's clipboard. This makes it easier for your readers to use the exact code from your samples as a starting point for their own programs.

Copy button for all programlisting elements.
To enable or disable the copy code feature:
-
Select Layout in the top menu.
Paligo displays a list of Layouts. The list is empty if there are no custom Layouts in your Paligo instance.
-
Select the Layout you want to update or Create a Layout.
Tip
You can copy the URL of the Layout Editor and paste it into a new tab in your browser. This can be useful if you frequently switch between your Paligo content and the Layout settings.
-
Select Analytics and other integrations in the sidebar.
-
Disable Enable MathJax equation rendering.

-
Select Verbatim (code and software) in the sidebar.

-
Use the Add copy to clipboard button to all programlistings to control whether the copy button is included:

-
Set it to 1 to include the copy button for every
programlistingelement in your HTML5 output. -
Set it to 0 or default if you do not want to include it.
-
-
Select Save.
When you publish your content using this layout, the programlistings will have a copy button if you chose to enable the feature.
Paligo has an API-style output that is designed especially for developer documentation. It provides a modern, appealing API documentation output, including navigation, your content and code examples tabbed by language in a sidebar on the right.
|
Tip
Learn more, see Paligo REST API and Paligo API.
To use the API-style output, you need to markup your content with certain elements, such as programlisting and code. You also need to publish to HTML5 and use an HTML5 API Style layout.
Programlisting and example elements on the top level (directly under the root section element) are automatically placed in the sidebar to the right and synced to the text in the main body.
Tip
As code samples and example elements are placed next to each section, it works best when the examples are not too long, and with separate sections or topics for each main example.
-
For code elements (
programlistingandcode) there is the built-in DocBook attributelanguage. Use that to set which programming language the code is for. -
For any other elements, there is a specialized Paligo attribute called
xinfo:proglang. You can use that on any element for filtering content, with the exception of table rows. You can also use it for switchingexampleandinformalexampleelements in the sidebar. -
If you need to exclude a specific example from the sidebar and show it inline in the body content, you can do so either by:
-
Putting it anywhere, but on the first level under section
-
Adding the
roleattribute on anexampleorinformalexample, and set it to "inline-example". For this to work, you also need to enable outputtingroleattribute as class names in your HTML5 layout in the Layout Editor.
-
-
If you have one programming language in your examples, the code switcher navigation bar will automatically be hidden.
-
Disable the code switcher if you want to display all language options.
Even if you have multiple languages in your examples, you may want to disable the code switcher and show all examples for all content.
This could be the case if what you are documenting is not an API with multiple versions for different languages, but developer or other software documentation where different programming languages are used for different features and all should be shown. This can be done by setting the parameter Use code switcher for API style output to 0 (disabled) in the Layout Editor under "Verbatim (code elements)".
Note
If you have more language options than the HTML5 Single page API style sidebar can fit, a dropdown menu is displayed with the languages not shown.
 |
When a language is selected from the dropdown menu, the selected language is shown as a label above the dropdown menu.
 |
Tip
If you do not have your own API content, but want to experiment with the API layout, you can use Swagger / Open API content from https://petstore.swagger.io/v2/swagger.json
Put the Swagger/Open API content in a folder on your computer and then zip it. Then import the zip file into Paligo using the Import Swagger OpenAPI.
Alternatively, you can import this sample project that we have made https://paligo.zendesk.com/hc/en-us/articles/360007352034-Download-API-Sample-Content. Use the Import Wizard to import the sample project as a Paligo Export File (PEF).