Top-Navigation for Help Centers
You can use the top-navigation feature to add a header to the top of your HTML5 Help Center outputs.
In the header, you can add quick links to important topics in your help center, such as "Getting Started", and you can also add links to external sites, such as your corporate website. You can choose to add links only to external sites, only to topics, or have a mix of both.
 |
Note
The top-navigation links are only available in HTML5 Help Center outputs.
You can use the top-navigation feature to add a header to the top of your HTML5 Help Center outputs.


In the above publication, "The Mission Control Center" has a link in the top-navigation header. The Top navigation depth is set to 3, which means that there is a sub-menu for topics two levels down from "The Mission Control Center". At level 2, there is "Command Center", "Guidance System", and "Ground Segment". At level 3, there is "Controls System" and "Control Room".
To enable top navigation in your HTML5 output:
-
Select Layout in the top menu.
Paligo displays a list of Layouts. The list is empty if there are no custom Layouts in your Paligo instance.
-
Select the Layout you want to update or Create a Layout.
Tip
You can copy the URL of the Layout Editor and paste it into a new tab in your browser. This can be useful if you frequently switch between your Paligo content and the Layout settings.
-
Select Classes and attributes in the sidebar.

-
Select Enable for Output taxonomies.

-
Select Enable for Output 'role' attribute as class names.

-
Select TOC and chunking in the sidebar.

-
Select Enable for Top Navigation.

-
Set the number of levels to show in Top navigation depth .

-
Set it to 1 to only include a link to one specific topic (parent topics).
-
Set it to 2 to include a link to the specific topic and subtopics (child topics).
-
Set it to 3 to also include links to "grandchild" topics".
-
-
Select Save.
With a customized JavaScript (JS) file, you can add a second drop-down menu in the top navigation for HTML5 output. This can be useful if you have several products with multiple versions of each product.
For this to work, it is required to create one layout per product. However, the same JS file (with a list of all the products) can be reused for all the layouts that share the same product selector. Each product's help centers will only show versions added to its layout, see Add Available Versions.
 |
To prepare the JS file to create a second dropdown menu that changes depending on selected product:
-
Use a code editor or text editor to create a JS file. Give it a name and save it with the
.jsextension.If you already use a custom JS for your layout, you should edit that JS file instead.
-
Add the following template code to your JS file:
$(document).ready(function () { // Create product dropdown using jQuery const productDropdown = $('<li class="product-dropdown">') .html(` <a><span class="caret"></span>Select product</a> <ul> // BEGIN - Add product versions <li><a href="#">Product A</a></li> <li><a href="#">Product B</a></li> <li><a href="#">Product C</a></li> // END - Add product versions </ul> `); // Select the right navbar const navbar = $('#navbar').last().children().first(); const versionDropdown = navbar.children().first(); // Placing productDropdown before versionDropdown versionDropdown.remove(); navbar.append(productDropdown); navbar.append(versionDropdown); // SmartMenus jQuery initialization navbar.smartmenus(); }); -
Update Product A with a URL and a proper name.
The following string is to be updated:
<li><a href="#">Product A</a></li>
with a URL and a proper product name, like this:
<li><a href="https://mydomain.com/docs/myproduct">My product</a></li>
-
Repeat this for Product B and C. Add or remove products if needed.
-
Save your JS file.
-
Upload your customized JS file to each layout that share the same product selector, see Upload Customized JavaScript.
To have the top-navigation showing available versions, you have to add them in the Help Center Theme Options in the Layout Editor.
To set a list of specific product versions in the version dropdown, you need separate layouts. You can reuse the same JS file for all the layouts that share the same product selector, see Enable Dual Top-Navigation Menus.
Important
To display the second top-navigation menu, you need to add at least one version in Versions for version dropdown in the Layout Editor.
If no versions have been added, it will not work to Enable Dual Top-Navigation Menus even if the JS file is uploaded.
-
Select Layout in the top menu.
Paligo displays a list of Layouts. The list is empty if there are no custom Layouts in your Paligo instance.
-
Select the Layout you want to update or Create a Layout.
Tip
You can copy the URL of the Layout Editor and paste it into a new tab in your browser. This can be useful if you frequently switch between your Paligo content and the Layout settings.
-
Select Help Center Theme Options in the sidebar.

-
Enter available versions in Versions for version dropdown for this specific product.
The
textis the visible part in the dropdown. Divide the versions with semicolon. For example:text:4.0, url:https://mydomain.com/docs/rpa/4.0/; text:3.0, url:https://mydomain.com/docs/rpa/3.0/; text:2.0, url:https://mydomain.com/docs/rpa/2.0/; text:1.0, url:https://mydomain.com/docs/rpa/1.0/;

Each version must be published. Version number and URL:s must be added in this field.
-
Select Save.
Tip
To show all product versions in the same top-navigation menu, the JS file is not needed and the the second top-navigation menu will not be used. This is only suitable if you have two or three products.
Add all versions to the same layout. Combine the version with the product name (for example "RPA 2.0" or "PD 3.0).
 |
This field is found under Help Center theme options in the Layout Editor.
This approach results in a dropdown menu like this:
 |
The dropdown will show all versions for all products.
If you publish to HTML5 Help Center, you can add links to external websites at the top of the display. This is a good way to guide your customers to other web pages that they might need, such as the product pages on your website or a link to open a new ticket. You can also use the top-navigation header to show links to selected topics in your help center.
In the following image, the Top-Navigation for Help Centers has external links for "Technology Center" and "Staff Log In".
 |
Tip
You can upload a customized Javascript file in the Layout Editor to add further functionality to the top navigation links, such as opening a widget to open a chat. For these links, add the link text,
enter # as the URL, and then add code for opening a new ticket in your JavaScript.
To add external links, use a HTML5 Help Center Layout:
-
Select Layout in the top menu.
Paligo displays a list of Layouts. The list is empty if there are no custom Layouts in your Paligo instance.
-
Select the Layout you want to update or Create a Layout.
Tip
You can copy the URL of the Layout Editor and paste it into a new tab in your browser. This can be useful if you frequently switch between your Paligo content and the Layout settings.
-
Select TOC and chunking in the sidebar.
-
Set Top navigation to Enabled.
-
Add the links to appear in the top-navigation in the External top navigation links like this:
text:link text, url: address;-
Link text is the text that will show in the top-navigation banner
-
Address is the URL of the webpage.

Use a comma to separate the text part from the URL and end the link with a semicolon.
To add links with different target language, specify the language at the start of the syntax. For this, use
langand the two-letter code for the language, for example:-
lang:de, text:link text, url:acme.de; -
lang:sv, text:link text, url:acme.se; -
lang:fr, text:link text, url:acme.fr;
Note
Any links that do not have the
langattribute will appear for all languages. -
-
Enable Supported Translation Strings for automatic translation of your link texts (into supported languages) in Use translation strings for external top navigation link text.
Select:
-
Enabled to use a translatable string as link text. Paligo will automatically translate your link texts into some supported languages.
-
Disabled if you do not use translatable strings for your top-navigation external links. Default

-
-
Add your "translation string" links to the External top navigation links section.
For example:
text:LegalNotice, url:https://yourwebsite.com;
Note
If a term is not translated automatically for your language, please contact Paligo support and provide the translation. If the term is likely to be useful to many Paligo users, we may add it to the list of Supported Translation Strings.
-
Select Save.
When you publish your help center using this Layout, the top-navigation header will be included and it will have the external links you provided.
 |
If you are using an HTML5 Help Center Layout, you can enable the top-navigation header and add links to selected topics. This is a good way to direct customers to areas of your documentation that contain important information that is used frequently, or topics that need to stand out, such as a tutorial.
 |
When you add a link to a topic, Paligo automatically detects if the topic has any "children" (i.e topics that are at a lower level in your publication). If there are "child" topics, Paligo creates a drop-down menu with links to them. In the image above, "The Mission Control Center" is the main topic for the link, and the drop-down menu has links for topics that are at level 2 In the publication ("Command Center", "Guidance System", and "Ground Segment", see the image below).
 |
To add top-navigation links, set up your HTML5 help center layout so that it has the appropriate settings. Then you can add add the links to your topics. There are two ways you can add links - by using taxonomies or by using the role attribute.
You can use the role attribute with the value set to top-nav-link to add a link to a topic in the Top-Navigation for Help Centers.
Tip
You can also Add Top-Navigation Links to External Sites.
Note
For this to work, you have to Enable Top-Navigation.
Open the topic that you want to add as a link in the top-navigation header.
-
Select the topic or component in the Content Manager to open it in the Editor.
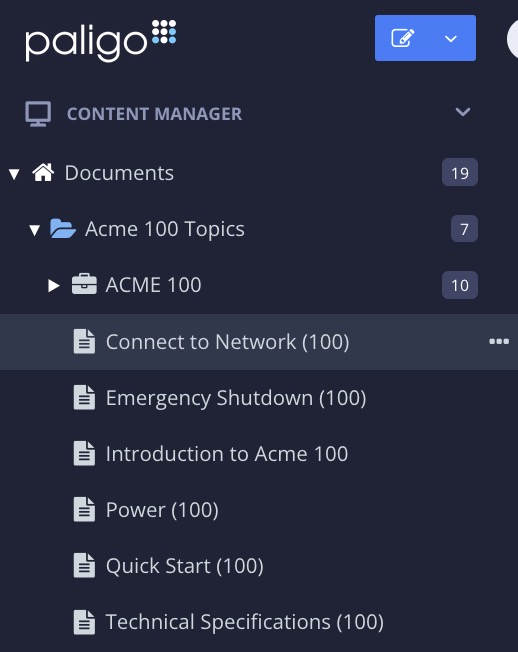
Alternatively, you can Create a Topic and edit that.
-
Select the
sectionelement in the Element Structure Menu.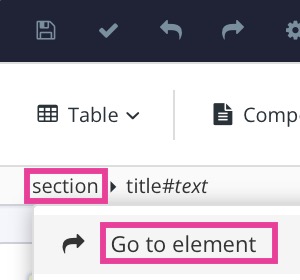
-
Select Go to element.
-
Add the
roleattribute in the Element Attributes Panel and set the value totop-nav-link.
-
Select Save.

-
Repeat this procedure for each topic that you want to add to the top-navigation header.
-
Publish your publication with the HTML5 Help Center Layout, see Base Layout Types for HTML and HTML5).
Paligo creates your Help Center output and it includes the top-navigation header with links to your selected topics.
Note
If you have set the top-navigation header to include links to topics and external links, the topic links appear on the left side of the pipe character | and the external links appear on the right side.
Important
If a topic's section element has the role attribute set to "notintoc", it will prevent that topic from being included in a top-navigation menu. This is because the top-navigation is built using information from the table of contents
(TOC), so anything that is missing from the TOC will also be missing from the top-navigation.
You can use taxonomy tags to mark the topics to be included in the Top-Navigation for Help Centers. This is an easy way of adding top-navigation links.
Note
For this to work, you have to Enable Top-Navigation.
To set up taxonomy links:
-
Create Taxonomy Tags and name the parent tag to "Top navigation".
-
Create a child tag (inside the parent tag) and name it: top-nav-link. This name is case-sensitive.

Important
Paligo will only be able to create the top-navigation links if you use a taxonomy tag named "top-nav-link". This tag must not be a top-level tag in the Taxonomies (which is why you have created two tags in this process).
-
Drag the
top-nav-linktag on to the topics that you want to have links in the top-navigation header. -
Select the
top-nav-linktag to display a list of the topics it is associated with.
Use the list to double-check that topics match those that you want in the top-navigation header.

You can remove a taxonomy by clicking on the X icon in the Taxonomies column.
-
Publish your publication with the HTML5 Help Center Layout, see Base Layout Types for HTML and HTML5).
Paligo creates your Help Center output and it includes the top-navigation header with links to to those topics that have the "top-nav-link" taxonomy tag.
Note
If you have set the top-navigation header to include links to topics and external links, the topic links appear on the left side of the pipe character | and the external links appear on the right side.
Important
If a topic's section element has the role attribute set to "notintoc", it will prevent that topic from being included in a top-navigation menu. This is because the top-navigation is built using information from the table of contents
(TOC), so anything that is missing from the TOC will also be missing from the top-navigation.
By default, your Top-Navigation for Help Centers also appears in the TOC sidebar and the Category Panel Section on your portal page. If you prefer, you can hide them to only appear in the Top-Navigation for Help Centers. This is useful if you want content in the top-navigation to appear separate from the "main" content in your publication.
Depending on your requirements, you can choose where these links should appear:
-
Top-Navigation for Help Centers, TOC sidebar and Category Panel Section
-
Only shown in the Top-navigation
-
Only shown in the Top-navigation and TOC sidebar
-
Only shown in the Top-navigation and Category Panel Section.
For example, the official Paligo documentation has "What's new in Paligo?" and "Paligo Glossary" links in the top-navigation. This content is included in the publication, but you can only access it from the top-navigation menu, as we have hidden it from the TOC sidebar and Category Panel Section.


In the images shown, the Paligo Help Center has links that are only available from the top-navigation. You cannot find these links in the TOC sidebar or Category Panel Section.
To control where the links appear:
-
Select Layout in the top menu.
Paligo displays a list of Layouts. The list is empty if there are no custom Layouts in your Paligo instance.
-
Select the Layout you want to update or Create a Layout.
Tip
You can copy the URL of the Layout Editor and paste it into a new tab in your browser. This can be useful if you frequently switch between your Paligo content and the Layout settings.
-
Select TOC and chunking in the sidebar.
-
Scroll to the Hide Top Navigation links from Category Panel setting.
-
Choose:
-
Enable to hide the links from the Category Panel Section on the portal page.
-
Disable to show the links in the Category Panel Section.
-
Default to inherit the value for this setting from the base Layout. The base Layout is either a built-in Layout provided by Paligo or another custom Layout, see Layout Relationships - Base, New, Duplicate.
-
-
Scroll to the Hide Top Navigation link from TOC setting.
-
Choose:
-
Enable to hide the links from the TOC Sidebar.
-
Disable to show the links in the TOC Sidebar.
-
Default to inherit the value for this setting from the base Layout. The base Layout is either a built-in Layout provided by Paligo or another custom Layout, see Layout Relationships - Base, New, Duplicate.
-
-
Select Save.
The table below shows examples of the translation strings supported by Paligo and useful for external links. These terms are translated into supported languages automatically by Paligo.
|
Translation String Identifier |
English term shown in top-navigation |
|---|---|
|
|
Legal Notice |
|
|
Frequently asked questions |
|
|
Q&A |
|
|
Notice |
|
|
Reference |
|
|
Featured content |
|
|
Contact support |
|
|
Sign up |
|
|
Log in |
Imagine that you want to add a "Contact support" link to the top-navigation header that is to be published automatically to English and French.
-
You set Top navigation to Enabled in the Layout Editor
-
In the External top navigation links section, you add:
text:contact.support, url:https://yourwebsite.com/contact;You use "contact.support" as it is one of the translation strings that are available in Paligo.
-
You set Use translation strings for external top navigation link text to Enabled.
-
When published to:
-
English, the link text added to your top-navigation header is Contact support
-
French, the link text added to your top-navigation header is Contactez le support
The
contact.supportlink is translated into French automatically, as you used a translation string. -