Filtering / Profiling
Learn how to use filtering, also known as profiling, to control which content is included in your outputs. Find out what you can filter and how the filtering works.
Filtering is also known as "profiling" or "conditional content" and you can use it to include or exclude content depending on certain conditions. For example, you can set a topic to be included in your publication if the intended audience is beginners, but excluded if the audience is experts.
You can use filtering to include or exclude:
-
Entire topics in a publication
-
Elements in a topic, such as paragraphs, procedures, or steps in a list.
Filtering gives you more control over your content and can also give you more opportunities for your topics. Let's say that you have a topic that could be reused, if only it did not contain a particular paragraph. By filtering that paragraph, you can make the topic suitable for reuse, as you can include or exclude the paragraph when needed.
Tip
Use a semi-colon to separate multiple filter values, see Add Multiple Values to an Attribute.
Paligo has several ways to apply filtering, see Regular Filters, Taxonomy Filters and Scoped Filters. But to begin with, we recommend you learn about "regular" filtering.
If you want to exclude content, create filter values for the conditions where it should be included and also for where it should be excluded, see Mark Up Elements for Filtering and Filter Topics.
Paligo does not have one generic filter for everything. Instead, it has a range of filter types, called Filter Attributes. There are different filter attributes for filtering by product name, by audience, by country, and by market, among others.
Tip
Variables is a smart way to swap out small content parts (such as product name, specifications, or images) during publishing.
The workflow for "regular" filtering is:
-
You mark the content you want to filter, with Filter Attributes and filter values. This tells Paligo what content should be filtered.
To filter a paragraph to only appear in a user guide for a Windows product version, you could set a filter attribute of
os(operating system) and a filter value of Windows.
-
When it's time to Publish Content, you select the filters (profiling attributes) you want Paligo to apply to the published output.

-
Paligo then searches through the elements to check the filter values. Unfiltered content will always be included in the published output.
The published output will:
-
Include content with matching filter attribute(s). Elements with the same filtering value as you selected for the output are included in the published output.
If you set an
osfilter attribute in the publication, Paligo will find all of the elements that are marked up to have anosfilter attribute. These are the "matching" elements. -
Exclude content with other filter attribute(s) than selected. Elements with different filtering values than you selected for the output are excluded in the published output.
-
Note
The process for setting up filtering is different for Scoped Filtering, Taxonomy Filters, and Filter by Language.
There are several ways of applying filters to your content in Paligo. They all involve marking up your content for filtering and then setting filters on the publication. But the process for doing this is different depending on which method of filtering you choose to use.
The two main types of filtering are:
-
"Regular" filtering, where you edit a topic and apply a filter attribute and filter value to one or more elements. You can use "regular" filtering for filtering entire topics or individual elements in a topic.
To get started with "regular" filtering, see:
-
Taxonomy filtering, where you set up taxonomy tags to represent the filter attributes and values, and you drag and drop them on to your topics. You can also set Paligo to use the taxonomy hierarchy for more complex filters, where Paligo uses the taxonomy hierarchy to determine which topics to include or exclude.
See taxonomy filtering for more details.
There is also scoped filtering. This is for when you want to use the same content in the same publication, but apply different filters depending on where the content appears.
You can use a mix of the different filtering types, if needed.
In Paligo, there are many different types of filters you can use. Some are defined by the DocBook standard and some are custom filters created for Paligo.
The filter attributes allow the user to create new profiling values, see Create Profiling Values. Filters and variables can be grouped into Favorite Profiles to make it easier to filter out the content about other products.
Tip
To find out how to use filters in your content, see Filtering / Profiling, Filter Elements , Filter Publications, Mark Up Elements for Filtering and Filter by Language.
Use a semi-colon to separate multiple filter values, see Add Multiple Values to an Attribute.
The following table shows the filters you can use in Paligo.
|
Filter attribute |
Source |
Description |
|---|---|---|
|
arch |
DocBook |
Filter by computer or chip architecture. |
|
audience |
DocBook |
Filter the content based on the intended users, for example, internal staff or customers. You could use audience for the knowledge level too, such as beginner or expert. But there is a |
|
condition |
DocBook |
This is a general-purpose filter attribute. Use this filter if the other filters do not meet your requirements. |
|
conformance |
DocBook |
Filter by conformance standards. |
|
os |
DocBook |
Filter by operating system, for example, Windows. |
|
outputformat |
DocBook |
Filter by the type of output, for example PDF. |
|
revision |
DocBook |
Filter by publication revision, for example, v.3.1. |
|
security |
DocBook |
Filter by security level, for example, Low. |
|
userlevel |
DocBook |
Filter by knowledge level of the intended audience, for example, expert. |
|
vendor |
DocBook |
Filter by product provider, such as a manufacturer or seller. |
|
xinfo:country |
Paligo |
Filter content by the country (for example USA) that the documentation is designed for. |
|
xml:lang |
Paligo |
Filter by natural language, for example, filter Swedish content. This filter attribute is a special case, as there is a different process for using language filters. To find out more, see Filter by Language. |
|
xinfo:market |
Paligo |
This is similar to |
|
xinfo:product |
Paligo |
Filter by product name or model. |
|
xinfo:proglang |
Paligo |
Filter by programming language or to publish to API style "on-the-fly" filtering HTML5. Paligo does not support using |
|
xinfo:version |
Paligo |
Filter by version. You can use this in combination with the version management features of Paligo, but this is not a requirement. The usage is up to you. |
Scoped filtering is a powerful feature in Paligo that allows you even more flexibility when it comes to profiling / filtering content. It is designed for when you want to reuse your content in multiple places within the publication and to be able to apply different filters depending on where it appears in the publication. Scoped Filtering can be used in combination with Taxonomy Filters.
The workflow for scoped filtering:
-
Make sure scoped filtering is enabled. It is enabled by default, but it may have been disabled on your Paligo instance, see Enable Scoped Filtering.
-
Organize your publication structure so that you have "parent" topics (high level) with the "child" topics (lower level) as subsections.
-
Apply filters to your "child" topic elements.
-
Apply the "scope filters" on "parent" topic elements. Typically, you should set the scope filters on the
sectionelement. -
Publish your content and include the filter attributes that are set on the "scope filters" and all of the filter values that should be used.
Note
Scoped filtering is advanced. Make sure you understand the basic profiling/filtering concepts before using scoped filtering, see Principles of Scoped Filtering
The important principles of scoped filtering are:
-
Scoped filtering applies to content that is reused in the same publication.
-
With scoped filtering you can reuse topics and set them to use different filter values, depending on where the topic is positioned in the publication structure.
-
You tell Paligo which filter values a "child" topic should use by setting a "scope filter" on the "parent" topic
-
When you publish, you set the filters and include all of the values that you want to use in the publication.
To show you how scoped filtering can be used, we'll guide you through an example.
Let's say you are documenting a product, for example, a fictional video conference software called ACME VCT. The software supports MacOS and Windows, and as most of the documentation is the same for both versions, you want to create a single user guide rather than two separate versions. The user guide will have a MacOS section and a Windows section.
In Paligo, you create the content and organize it in a publication structure like this:
 |
You have a "chapter" for Windows content, called "Installing on Windows", and you have "Installing on MacOS" as a chapter about MacOS.
You have also reused two topics. The "Prerequisites" topic and the "System Requirements" topic are both used in the Windows and MacOS chapters. For this example, we will focus on the "System Requirements" topic.
In the "System Requirements" topic, you have some information that is for Windows only, and some that is for MacOS only.
 |
In the image above:
-
This is for content that is only relevant to MacOS. You apply an
osfilter to this content and set the filter value tomacos. -
This is content that is only relevant to Windows. You apply an
osfilter to this content and set the filter value towindows.
If you published the content as it is, you would only be able to set the os filter to be either Windows only, MacOS only, or include Windows and MacOS.
This is where scoped filtering comes in. You can use it to tell Paligo to use an os:windows filter in some places, but an os:macos filter in others.
To set the scoped filtering, set a "scope filter" on the section element of a topic that is at a higher level than the topic you want to filter. In this scenario, the higher-level topic is called a "parent" and the lower-level topic is called a "child".
Note that the "scope filter" is not a type of filter, it is the term we use to describe the filter that is set on the "parent" topic.
 |
In this example, there are two "scope filters" to set (1 and 2 on the image above):
-
Set the "scope filter" for the Windows chapter on the section element of the "Installing on Windows" topic. The "scope filter" is the
osfilter with the value:windows.With this "scope filter" you are telling Paligo that if any "child" topics in this chapter contain
osfilters, Paligo should include any that have the value:windows. But it should exclude any that have different values. -
Set the "scope filter" for the MacOS chapter on the
sectionelement of the "Installing on MacOS" topic. The scope filter is theosfilter with the value:macos.
This "scope filter" tells Paligo that if any "child" topics in this chapter contain
osfilters, Paligo can include any that have the value:macos. But it should exclude any that have different values.
You now have your content marked up for scoped filtering. The final step is to set the filter and values when you publish.
You publish your content and you edit the Profiling attributes on the Publish document dialog. You choose to include the os filter. Importantly, for scoped filtering, you include all of the os values that
need to appear in the published output. In this case, you want the Windows filtered content to appear in one chapter and the MacOS content to appear in another chapter, so you include both values.
 |
The published output will now have reused the same topic "System Requirements" in two parts of the documentation, but it will appear differently in the Windows and MacOS sections respectively, even though it is in the same output:
|
Windows version |
MacOS version |
||
|---|---|---|---|
|
|


In the Layout Editor it is possible to enable scoped filtering for both HTML5 and PDF output. Make sure the option is set to Yes or Default.
Note
For PDF output, you find this setting under General / Filtering and taxonomies / Enable scoped profiling / filtering.
The following instruction shows how to enable this setting for HTML5 output:
-
Select Layout in the top menu.
Paligo displays a list of Layouts. The list is empty if there are no custom Layouts in your Paligo instance.
-
Select the Layout you want to update or Create a Layout.
Tip
You can copy the URL of the Layout Editor and paste it into a new tab in your browser. This can be useful if you frequently switch between your Paligo content and the Layout settings.
-
Select Classes and attributes in the sidebar.

-
Select Yes to Enable scoped profiling / filtering.

-
Select Save.
When you mark up your content for filtering, you can use the preview feature to see the effects of the filters. This is a good way of making sure that the filters work as expected, and is especially useful if you have used a combination of filters.
The filter is applied to the preview applies to any content that is:
-
Not marked up to use the types of filter you have applied is included in the content.
-
Marked up to use the filters you have applied, with the same values you have set, is included in the content.
-
Marked up to use the filters you have applied, but with different values, is excluded.
If you set the preview to show the Market filter attribute with a value of Europe, the topic would show any content that is:
-
Not marked up to use the
Market filterattribute -
Marked up to use the
Market filterattribute and a value ofEurope
The preview would exclude any content that has the Market filter attribute and any other value, such as Asia, North America or Australasia.
To preview the filters:
-
Select the topic or component in the Content Manager to open it in the Editor.
Alternatively, you can Create a Topic and edit that.
-
Select the Preview tab in the Toolbar.

-
Select Profile settings.

-
Select the Profiling tab.

-
Select the filter to be applied for each filter attribute for the preview.

If you do not want to apply a particular filter, leave its field blank.
-
Select Apply.
Paligo updates the topic to show the filters that will be used with the variant you have selected.
-
Repeat steps 4 and 5 to change the filters for the preview and see how they affect the content.
Tip
To stop applying the filter preview, display the Profile settings dialog select the Profiling tab, and then select Reset.
You can use the xml:lang attribute to filter content by (natural) language for HTML and PDF outputs. This means you can mark an element as being appropriate for a language, and the element will only be included if the content is published to that language. If you publish to different
languages, the element is excluded.
The xml:lang attribute works a little differently to the other filter attributes. Firstly, to use it, you need to enable the feature on the layout that you will use for publishing. Then you can add it to elements that you want to filter, and finally, you publish and choose what
languages to publish to. Paligo applies the language filters automatically, based on what languages you are publishing to.
Tip
Use a semi-colon to separate multiple filter values, see Add Multiple Values to an Attribute.
-
Select Layout in the top menu.
Paligo displays a list of Layouts. The list is empty if there are no custom Layouts in your Paligo instance.
-
Select the Layout you want to update or Create a Layout.
Tip
You can copy the URL of the Layout Editor and paste it into a new tab in your browser. This can be useful if you frequently switch between your Paligo content and the Layout settings.
-
Select Classes and Attributes for HTML layouts OR General > Filtering and Taxonomies for PDF layouts.
-
Select Enable for Use xml:lang as profiling attribute.

-
In your content, select an element that you want to filter by language.
-
Use the Element Attributes Panel to add the
xml:langfilter attribute and set its value to the appropriate language. For the language values, use the two-letter language codes, for example,enfor English andsvfor Swedish.Important
Use the two-letter codes shown in the Languages section (see step 6). Only these two-letter codes are supported. You cannot use alternative language codes.

-
Repeat steps 3 and 4 for other any other elements you want to filter by language.
-
Publish your content and choose the layout you edited in step 1 and the language(s) that you want to publish to:

-
If you publish to a language that matches the value of the
xml:langfiltered content, that content is included in the output. -
If you publish to a language that does not match the value of the
xml:langfiltered content, that content is excluded from the output.
-
-
Set any variables and other profiles as required and then publish.
You can use the phrase element to apply filters to inline elements. This is useful when you need to filter part of a block element, for example, if you wanted to filter one sentence in a paragraph rather than the entire paragraph.
To filter inline elements:
-
Select the content you want to filter.

-
Press Alt + Enter ⏎ (Windows) or Command ⌘ + Enter ⏎ (Mac) to display the Element Context Menu.
-
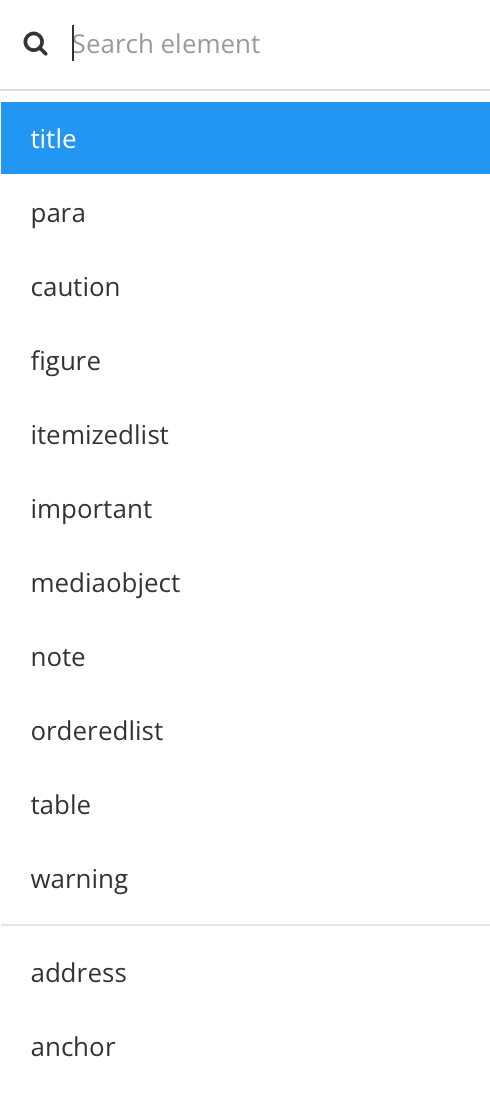
Enter
phraseand select it.Paligo inserts your selected content into the
phraseelement. -
Click in your selected content so that the
phraseelement is shown in the Element Structure Menu.
-
Add the filter condition that you want to apply to the phrase In the Element Attributes Panel.
This works in the same way as filtering any other element, for example, you could set an xinfo:country attribute if you wanted to be able to include/exclude the phrase based on the country. To find out about filter types, see Filter Attributes.

-
Set the value for the filter and apply it to your
phraseelement.To find out about filter values, see Filter Elements.
-
Select Save.

When you publish, you can choose which filters to apply to your content. As the inline content is now wrapped in a phrase element, it can be filtered in the same way as any other element. The settings you choose when you publish will determine whether the phrase is included or excluded from the published content.
In this section, you can learn how to apply filters to block elements, such as paragraphs, lists, and images. These filters apply to an entire block of content. If you want to filter inline content, such as one sentence or one word in a paragraph, see Filter Inline Elements.
Filtering block elements is useful when you have entire elements that you want to include or exclude, depending on certain criteria. For example, you could have a paragraph that is only relevant to Mac users, so you could add a filter to include or exclude it, depending on whether the publication is for Windows or Mac.
Note
To apply filters to elements in a topic, use the "regular" type of filtering (you cannot use taxonomy filters for filtering elements in a topic).
To learn how to set up filters on block elements, watch the video or read the following sections. The video shows a list item being filtered, and you can use the same technique to filter other block elements.
To filter elements in a topic:
-
Mark Up Elements for Filtering. For filtering elements in a topic, use the "regular" type of filtering. You cannot use taxonomy filters for filtering elements in a topic.
-
Apply Preview Filters to see how the filters will affect your content (this is an optional step).
-
Apply Publishing Filters and then publish.
Before you can apply filtering to your publications, you need to tell Paligo what elements can be filtered, and what filter conditions apply. You can do this by "marking up" the elements that you want to filter.
To mark up your content, you can select an element and then apply a filter attribute and a filter value. The filter attribute tells Paligo which type of filter to use, and the filter value sets the condition for the filter.
 |
Element (1), filter attribute (2), filter value (3).
Paligo does not have one generic filter for everything. Instead, it has a range of filter types, called Filter Attributes. There are different filter attributes for filtering by product name, by audience, by country, and by market, among others.
Note
Marking up the content tells Paligo what content can be filtered. It does not apply the filter. You apply the filter in the publishing settings when you publish the content.
-
Edit the topic that contains the element you want to filter. Select any part of the element so that it is shown in the Element Structure Menu.
-
In the Element Structure Menu, select the element you want to filter and then select Go to element.

Tip
If you want to filter text inside a paragraph, and not the entire paragraph, highlight the text and add the
phraseelement to it. You will then be able to apply the filter attribute and value to thephraseelement so that it can be included/excluded when you publish. -
In the Element attributes section, select Add attribute and search for the filter attribute you want to use. Note that the Add attribute list includes all attributes, not just filters
There are many different types of profile attribute (filter) that you can use, including product name, country, and audience. To find out about the different profile attributes, see Filter Attributes.

-
Use the Profiling values dialog to set the filter value. Think of setting the value as a way of telling Paligo where the content is applicable.
For example, if you have a paragraph that is only applicable to a product named "ACME 1050", you could give it the
xinfo:productfilter attribute and set the filter value to ACME 1050.You can have single values or you can add multiple values, where Paligo will include the content if either of the values are a match.
Choose from any of the available values or use Add value to create more values if needed.

Note
We have included some more detailed examples of how you can use filter conditions to include and exclude content at the end of this section.
-
Repeat steps 2-4 inclusive to apply filters to as many elements as needed.
You have now set the profile attributes and values for the content you want to filter. We recommend that you preview the filters to see how they work before you publish.
Let's say you have a paragraph that is only applicable for customers in North America and the EU. You want to include the paragraph when you are publishing to those markets, but want to exclude it when you are publishing to the Middle East, Australia, and other markets. This is where you need an OR filter, as you want the content to appear when the market is North America OR the EU.
To mark up the paragraph, you:
-
Select the
paraelement. -
Add the
xinfo:marketattribute in the Element Attributes Panel. -
Set the attribute value.
 |
When you publish the content, you can choose the filters for the publication.
 |
-
If you set the publication's market filter to North America, EU, or both North America and EU, the filtered paragraph is included.
-
If you set the publication's market filter to another region, such as Australia, the filtered paragraph is excluded.
-
If you do not set a market filter for the publication, the filtered paragraph is included. It is only excluded from the publication if the market filter is applied and the value for the market filter does not match North America or EU.
Paligo's filtering is inclusive, which means that when you set a filter, you are telling Paligo what content you want to be included in the output. But there may be times where you want to exclude certain content rather than include it. For these situations, set up filter values for:
-
The conditions where you want the content to be included
-
The conditions where you want the content to be excluded.
Then, when you publish, you can tell Paligo which content to include. By including one condition, you automatically exclude the other possible conditions.
Note
The "inclusive" filtering strategy may take a while to wrap your head around if you are new to filtering or if you come from another environment where you used filters for both including and excluding specifically. But once you get the idea, the inclusive strategy is very powerful in that it can accomplish exactly the same, but with a much cleaner structure, so you will have a more robust long-term solution.
Let's say you have three types of users: administrators, engineers, and operators. You have a paragraph that you want to be included for the engineers and operators, but excluded for the administrators. To set this up you:
-
Select the
paraelement. -
Add the
audienceattribute. -
Select the value for the audience attribute and create these values: "administrators", "engineers", "operators".
Note that it is important to create values for where you want the content to be included and also for where you want it to be excluded.

-
Set the audience attribute value to "engineers" and "operators".

When you publish the content, you can choose the filters for the publication.
To publish for the administrator audience, you set the audience to "administrators".
 |
The published output will then include:
-
Any content that has an audience filter with a value of "administrators". The paragraph that you marked up has an audience filter with a value of "engineers" and "operators", and so it is not included in the published output.
-
All content that does not have an audience filter
To publish for the engineers or operators, you set the publication's audience filter to "Engineers" and "Operators".
 |
The published output will then include:
-
Any content that has an audience filter with a value of "Engineers" or "Operators". So the paragraph that you marked up is included in the published output.
-
All content that does not have an audience filter.
When you mark up your content for filtering, you can use the preview feature to see the effects of the filters. This is a good way of making sure that the filters work as expected, and is especially useful if you have used a combination of filters.
The filter is applied to the preview applies to any content that is:
-
Not marked up to use the types of filter you have applied is included in the content.
-
Marked up to use the filters you have applied, with the same values you have set, is included in the content.
-
Marked up to use the filters you have applied, but with different values, is excluded.
If you set the preview to show the Market filter attribute with a value of Europe, the topic would show any content that is:
-
Not marked up to use the
Market filterattribute -
Marked up to use the
Market filterattribute and a value ofEurope
The preview would exclude any content that has the Market filter attribute and any other value, such as Asia, North America or Australasia.
To preview the filters:
-
Select the topic or component in the Content Manager to open it in the Editor.
Alternatively, you can Create a Topic and edit that.
-
Select the Preview tab in the Toolbar.
-
Select Profile settings.
-
Select the Profiling tab.
-
Select the filter to be applied for each filter attribute for the preview.
If you do not want to apply a particular filter, leave its field blank.
-
Select Apply.
Paligo updates the topic to show the filters that will be used with the variant you have selected.
-
Repeat steps 4 and 5 to change the filters for the preview and see how they affect the content.
Tip
To stop applying the filter preview, display the Profile settings dialog select the Profiling tab, and then select Reset.
When you publish your content, you can choose which Filter Attributes to be applied to the output. Recommended is to choose one profiling value for each profiling
attribute (available filter attributes). However, it is possible to choose multiple values for a profiling attribute. The filter then works as an OR filter, where Paligo will filter topics that contain any of the profiling values
set.
When you choose profiling attributes, Paligo knows what content to include in the published output. But sometimes, you may want to exclude content rather than include it. For example, you might want to publish content for all audience types except administrators. To do this, you need to mark up the content so that the content you want to:
-
Include has a filter attribute and a profiling value
-
Exclude has the same filter attribute, but a different profiling value for the topics you want to exclude.
When you publish, you choose which condition value to include. Paligo will then:
-
Include any content that has the filter attribute and profiling value.
-
Include any content that does not use the matching filter attribute
-
Exclude any content that uses the matching filter attribute, but has a different profiling value.
To apply publishing filters:
-
Select the dotted menu (...) for the topic or publication in Content Manager.

-
Select Publish.


Paligo displays the Publish document dialog.
-
Select an Output type (PDF, HTML, HTML5, Word, XML, eLearning or SCORM).
-
Set the Languages, Variables and Optional Parameters.
Tip
These are common publishing settings, see Publish Content.
-
Select Edit in the Profiling attributes section.


The Profiling attributes dialog contains a field for all available filter attributes.
-
Select one or multiple profiling value from the menu in the fields to be applied to your publication.

To create more profiling values, see Create Profiling Values.
Note
Leave the fields blank for attributes not to be used. When there is no attribute set, Paligo ignores that type of filter.
-
Repeat step 5 and 6 for each profiling attribute you want to apply.
-
Select OK.
-
Select Publish document to publish your content.
You can filter topics to include or exclude them in your published output.
For example, if you have a topic only relevant to Mac users, you could set an os (operating system) filter on the topic, with a filter value of macos. Then, when you publish, you can set Paligo to include the topic if you publish a Mac user guide
or exclude it if you publish a Windows user guide.
In this section, we explain how to filter topics using the "regular" way of filtering. But you can also filter topics using Taxonomy Filters, where you apply the filter attributes and values by dragging and dropping taxonomy tags.
Watch this video or read the following instructions to find out about filtering topics.
This section describes how to add a new profiling value to an attribute.
Note
In this procedure, a profiling value is added to a single procedure step to show that It is possible to Filter Inline Elements, Filter Elements and Filter Topics.
-
Select the element in the topic.
-
Place the cursor in the Element Structure Menu below the toolbar.

Note
When you select an element in the Element Structure Menu, Paligo highlights it in yellow.
-
Select the element and choose Go to element to show the attributes for this particular element.

The Element Attributes Panel. now shows the attributes for the selected element.
-
Select a profiling value to the right of the attribute (for example Beginner or Business).

-
Select Add value in the lower left corner.

-
Enter a name for the profiling value.

-
Select OK.
-
Check the box in front of the new profiling value to add it to the attribute.
-
Select Apply.
-
Select Save.
It is possible to Filter Inline Elements , Filter Elements as well as topics. If you want to filter entire topics, you need to add the profiling values to the top section element (1). This tells Paligo which topics can be filtered and what filter attributes (2) and
profiling values (3) to apply. The filters are applied when the content is published, see Apply Publishing Filters.
 |
1 = Section element, 2 = Filter attribute, 3 = Profiling value
To filter a topic:
-
Select the topic or component in the Content Manager to open it in the Editor.
Alternatively, you can Create a Topic and edit that.
-
Select the
sectionelement in the Element Structure Menu.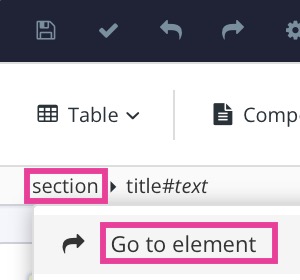
-
Select Go to element.
-
Select Add attribute in the Element Attributes Panel.

-
Search for the Filter Attributes you want to use.
Note
Note that the Add attribute menu includes all attributes, not just filters.
-
Select one or multiple checkboxes in front of the profiling values to be used.
Or use Add value to create more profiling values if needed.
Paligo will include the topic if either of the profiling values are a match.
-
Add as many Filter Attributes as needed.
Note
The filter attributes that you add will appear as Profiling attributes when you publish.
-
Repeat this process for all topics to filtered.
-
Select Save.
If you add the xinfo:market attribute to a section element to a topic, it is possible to filter a topic or publication for different markets (like America, EU, Middle East, Australia and other markets). The markets are added as
profiling values. When you publish you select the profiling attribute (market) and the profiling attributes (America and EU) to be used. The markets not selected during the publish will be excluded.
Tip
To learn more about available filter attributes (for example xinfo:product, audience), see Filter Attributes .
To filter topics for different markets:
-
Select the
sectionelement in the Element Structure Menu. -
Select Go to element.
-
Add the
xinfo:marketattribute in the Element Attributes Panel. -
Add one profiling value for each market.

-
Select Save.
-
When you publish, you choose market as profiling attribute and the profiling values to be used for the publication.
-
If you set the profiling attribute to North America, EU, or both North America and EU, the filtered topic is included.
-
If you set the profiling attribute to another region, such as Australia, the filtered topic is excluded.
-
If you do not set a market filter for the publication, the filtered topic will be included. It is only excluded from the publication if the market filter is applied and the value for the market filter does not match North America or EU.
-
-
Select Publish document.
To filter topics for different audience, you add the audience attribute to the topic.
Let's say you have three types of users: administrators, engineers and operators. You have a topic that you want to be included for the engineers and operators, but excluded for the administrators.
To filter a topic for a specific audience:
-
Select the topic or component in the Content Manager to open it in the Editor.
Alternatively, you can Create a Topic and edit that.
-
Select the
sectionelement in the Element Structure Menu. -
Select Go to element.
-
Add
audienceattribute in the Element Attributes Panel. -
Select Add value to add new profiling values.

Available profiling values in this case: Administrators, Engineers and Operators.
Note
Note that it is important to add profiling values to be able to include and exclude content.
-
Enter a name for the profiling value.
-
Select OK.
Add as many profiling values as needed.
-
Select the checkbox in front of one or multiple profiling values.
-
Select Apply.

Selected profiling values are shown in the Element Attributes Panel.
-
Select Save.
-
When you publish, you choose audience as profiling attribute and the profiling values to be used for the publication.
Any topics with administrator as profiling value will be included and topics without audience as profiling attribute. All others are excluded.
When you publish your content, you can choose which Filter Attributes to be applied to the output. Recommended is to choose one profiling value for each profiling
attribute (available filter attributes). However, it is possible to choose multiple values for a profiling attribute. The filter then works as an OR filter, where Paligo will filter topics that contain any of the profiling values
set.
When you choose profiling attributes, Paligo knows what content to include in the published output. But sometimes, you may want to exclude content rather than include it. For example, you might want to publish content for all audience types except administrators. To do this, you need to mark up the content so that the content you want to:
-
Include has a filter attribute and a profiling value
-
Exclude has the same filter attribute, but a different profiling value for the topics you want to exclude.
When you publish, you choose which condition value to include. Paligo will then:
-
Include any content that has the filter attribute and profiling value.
-
Include any content that does not use the matching filter attribute
-
Exclude any content that uses the matching filter attribute, but has a different profiling value.
To apply publishing filters:
-
Select the dotted menu (...) for the topic or publication in Content Manager.
-
Select Publish.
Paligo displays the Publish document dialog.
-
Select an Output type (PDF, HTML, HTML5, Word, XML, eLearning or SCORM).
-
Set the Languages, Variables and Optional Parameters.
Tip
These are common publishing settings, see Publish Content.
-
Select Edit in the Profiling attributes section.
The Profiling attributes dialog contains a field for all available filter attributes.
-
Select one or multiple profiling value from the menu in the fields to be applied to your publication.
To create more profiling values, see Create Profiling Values.
Note
Leave the fields blank for attributes not to be used. When there is no attribute set, Paligo ignores that type of filter.
-
Repeat step 5 and 6 for each profiling attribute you want to apply.
-
Select OK.
-
Select Publish document to publish your content.
Paligo uses a blue filtering symbol to show that content has a profiling attribute, see Filtering / Profiling.
This section describes how to add or remove a profiling value from an attribute. A removed profiling value will not be deleted, only not used on the attribute.
-
Select the element in the topic.
-
Place the cursor in the Element Structure Menu below the toolbar.
Note
When you select an element in the Element Structure Menu, Paligo highlights it in yellow.
-
Select the element and choose Go to element to show the attributes for this particular element.
The Element Attributes Panel. now shows the attributes for the selected element.
-
Select a profiling value to the right of the attribute (for example Beginner or Business).
-
Use the checkboxes in front of the profiling values to decide whether to use it on the attribute or not.
-
Check the box to add it to the attribute (for example Expert).
-
Clear the box to remove it from the attribute (for example Beginner or Business).

Available profiling values are shown.
-
-
Select Apply.
-
Select Save.
You can edit or delete a profiling value if needed. Before you do, make sure that all content that uses it is checked in. To find topics that use a specific profiling value, see Search for Attributes.
If you regularly delete outdated profiling values, it will be easier to know which ones to use.
Note
When a profiling value is deleted it will be removed from all content that uses it. The action is irreversible.
Tip
If you only want to deselect a profiling value from an attribute, see Add or Remove Profiling Values.
To edit the name or delete a profiling value:
-
Select the element in the topic.
-
Place the cursor in the Element Structure Menu below the toolbar.
Note
When you select an element in the Element Structure Menu, Paligo highlights it in yellow.
-
Select the element and choose Go to element to show the attributes for this particular element.
The Element Attributes Panel. now shows the attributes for the selected element.
-
Select a profiling value to the right of the attribute (for example Beginner or Business).
-
Hover over the profiling value to be edited or deleted.

-
Select one of the options to the right of the profiling value:
-
 Select the X to delete the profiling value from your Paligo instance. You will need to confirm the deletion.
 -
 Select the pen to edit the name of the profiling value.
-
-
Select Apply.
-
Select Save.
You can use taxonomy filters to control whether a topic is included in a publication. For example, you could use them on a topic so that it is included when you publish a Mac version of a user guide, but excluded when you publish a Windows version.
Some Paligo users prefer to use taxonomy filters instead of the "regular" filters, see Filter Publications, as they are quick and easy to use. All you need to do is create your taxonomy tags, drag and drop them onto your topics and choose which tags to include when you publish. Taxonomy filters can be used in combination with Scoped Filtering.
Another benefit of taxonomy tags is that you can use them to create more complex filters, similar to Scoped Filtering. For this, you organize the tags into a hierarchy. You can then set Paligo to include all of the tags in a branch of the hierarchy, rather than one specific taxonomy tag.
For example, let's say you have set up the following taxonomy tag hierarchy:
 |
1 is the tag that represents the type of filter you want to use, in this case, the filter is called "Market". This is known as the filter attribute.
2 are all tags for individual filter values. Note that the value tags can be organized into a hierarchy too. Here we have a value tag for the overall market, "USA", and then at a lower level, value tags for the different sub-markets. In this case, the sub-markets are states of the USA.
You can then set Paligo to use the hierarchy in different ways. For example, you can set Paligo to only include those topics that have the "Arizona" tag. Or you could set Paligo to include topics that have the "USA" tag and/or the "Arizona" tag.
To find out about using taxonomy filters, watch the video or read the following instructions.
Note
You only need to Add Filter Values for Taxonomy Tags and Set Up the Taxonomy Tags when you first set up taxonomy filtering or when you want to add a new filter or filter value.
Before you create taxonomy tags for filtering, you should add the filter values you need. Then, when you create your taxonomy filter tags, you can give them the same names as the filter tags. This is how Paligo recognizes the relationship between a taxonomy tag and a filter value - they have to have the same name.
Note
If your Paligo instance already contains the filter attributes and values that you need to use, ignore this procedure. Your next step is to Set Up the Taxonomy Tags.
-
Select the Publish option for any publication or topic, and then edit the Profiling attributes.

When you select Edit, Paligo displays the Profiling attributes dialog, which contains a list of the filter attributes that are available. The filter attributes define the types of filter, for example, there is a Market attribute for filtering by different regions.
-
Select the field for each profiling attribute to see what values are available.

-
If you need to add values, create a new topic and select an element in it, such as a
paraelement. Then use the Element attributes section to add a new filter attribute, for example,xinfo:product. Paligo displays the Profiling values dialog and you can use that to add new values for the element.
Repeat this step for each filter attribute and value that you need for your publication.
When Paligo has all of the filter values that you need, you can Set Up the Taxonomy Tags.
When you have added the filter values you need to Paligo, you Create Taxonomy Tags to mark your content for filtering.
You should create a taxonomy tag to represent:
-
Each filter attribute that you want to use. The filter attributes define the type of filter, for example, PRODUCT.
-
Each filter value that you want to use. The filter values define the condition, for example, ACME 1050 could be a condition for a PRODUCT filter.
The filter value tags have to be at a lower-level than the filter attribute tags in the taxonomy hierarchy.
The taxonomy tags you create need to have the same names as the filters and filter values that they represent.
For example, if you have a topic that is only relevant to an "ACME 1050" product, you could use an xinfo:product filter. For this, you would create a tag called "product" and then add a lower-level tag for "ACME 1050". (When setting the taxonomy tag names, do not include the
xinfo prefix).
 |
Note that the taxonomy tags for filter attributes should be named to match the filter attribute name.
To set up taxonomy tags for filtering:
-
Select the Taxonomy Manager in the Content Manager to open the structure.


-
Create Taxonomy Tags for the Filter Attributes and the filter values needed.
-
For filter attribute tags, the tag name has to match the attribute name (but do not include any
xinfoprefix). For example, if you want a taxonomy filter for thexinfo:marketfilter attribute, create a tag named:market. -
For filter value tags, set the name to match the value. For example, if you have a
marketfilter with a value of "USA", the taxonomy tag for this should also be named "USA".
-
-
Arrange the taxonomy tags, by drag and drop, into a logical hierarchy.
The filter attribute tags must be the "parent" and the value tags must be "children" in the hierarchy.
-
Filter attribute tags are at the highest level (below the taxonomies tag, but above all other tags)
-
Value tags are at a lower level than the filter attribute that they relate to.
In the image "Market" (1) is the filter attribute tag. All of the other tags are filter value tags (2). Note that you can have many levels of filter value tags, so that you can have greater control when filtering.
-
Tip
When you have set up the taxonomy tags, you can Apply Taxonomy Tags to Topics.
When you have the appropriate tags and hierarchy in place, you can apply the taxonomy filter tags to your topics.
-
Select the dotted menu ( ... ) for the Taxonomies tag in the Content Manager, and choose Taxonomy Floating Content Panel.

-
In the Taxonomy Floating Content Panel, find the tag that you want to apply to a topic. Drag the tag onto the topic in the Content Manager.

-
Repeat step 2 for each topic that you want to filter.
When you have applied the taxonomy tags to your topics, the next step is to choose how Paligo uses the taxonomy hierarchy when it applies the filters.
For taxonomy filters, Paligo gives you the option to choose a filter strategy. The strategy affects how Paligo matches the filters and determines what topics should be included or excluded from your publication.
To choose the taxonomy filter strategy:
-
Select Layout in the top menu.
Paligo displays a list of Layouts. The list is empty if there are no custom Layouts in your Paligo instance.
-
Select the Layout you want to update or Create a Layout.
Tip
You can copy the URL of the Layout Editor and paste it into a new tab in your browser. This can be useful if you frequently switch between your Paligo content and the Layout settings.
-
Select Classes and attributes.
Note
For PDF layouts, they are in the General > Filtering and Taxonomies settings.
-
Select Enable for Output taxonomies.

This setting has to be enabled for taxonomy filtering to work.
-
Select Exact Value or Descendants for Taxonomy filtering strategy.

This setting is labelled as Taxonomy filtering on some layouts.
-
Exact value
If you choose Exact value, Paligo will ignore the taxonomy hierarchy. When you publish and choose what filters to apply, Paligo will only include topics that:
-
Have a taxonomy tag that matches the filter attribute and filter value that you set for the publication.
-
Are not marked up to use the filter attribute that you set for the publication.
-
-
Descendants
If you choose Descendants, Paligo will use the taxonomy hierarchy to determine which topics should be included or excluded.
When you publish and choose what filters to apply, Paligo will only include:
-
Topics that have a taxonomy tag that matches the filter attribute and filter value. We will call this tag the "descendant" tag.
-
Topics that have a tag that is a "parent" of the "descendant" tag in the taxonomy hierarchy. Note that Paligo includes not only the immediate "parent" tag, but also the "parent" of that tag and so on, until the top-level is reached.
-
Topics that are not marked up to use the filter attribute that you set for the publication.
-
Note
There is also a Disabled option, which turns off the taxonomy filter feature.
-
-
Select Save.
When you have set a taxonomy strategy, you can publish your content and set the filters that you want it to use.
This example gives a detailed look at how the exact value and descendant value taxonomy strategies affect the results of a filter.
Let's say you have the following hierarchy for a Product filter, and you filter the publication to include Product: ACME 1050. This is how the filtering strategies will work:

Exact value filter strategy applied

Descendants filter strategy applied
The first image shows how the Exact value filter strategy works.
Paligo will ignore the structure of the taxonomy hierarchy. This means that the published output will include:
-
Topics that have the "ACME 1050" tag. Note that it has to be a "child" of the "Product" tag.
-
Topics that do not have any "Product" taxonomy tag
Paligo will exclude any topics that have a "Product" tag but with a different value to "ACME 1050".
The second image shows how the Descendants filter strategy works. Paligo uses the taxonomy hierarchy and includes topics that have the matching tag ("ACME 1050") or are "parents" of the matching tag. This means that the published output will contain:
-
Topics that have the "ACME 1050" tag. Note that it has to be a "child" of the "Product" tag.
-
Topics that have the "ACME 1000" tag or "ACME" tag, as these are "parent" tags of the "ACME 1050" tag in the taxonomy hierarchy.
-
Topics that do not have any "Product" taxonomy tag
Paligo will exclude any topics that have a "Product" tag but with a different value to "ACME 1050".
When you publish your content, you can choose which Filter Attributes to be applied to the output. Recommended is to choose one profiling value for each profiling
attribute (available filter attributes). However, it is possible to choose multiple values for a profiling attribute. The filter then works as an OR filter, where Paligo will filter topics that contain any of the profiling values
set.
When you choose profiling attributes, Paligo knows what content to include in the published output. But sometimes, you may want to exclude content rather than include it. For example, you might want to publish content for all audience types except administrators. To do this, you need to mark up the content so that the content you want to:
-
Include has a filter attribute and a profiling value
-
Exclude has the same filter attribute, but a different profiling value for the topics you want to exclude.
When you publish, you choose which condition value to include. Paligo will then:
-
Include any content that has the filter attribute and profiling value.
-
Include any content that does not use the matching filter attribute
-
Exclude any content that uses the matching filter attribute, but has a different profiling value.
To apply publishing filters:
-
Select the dotted menu (...) for the topic or publication in Content Manager.
-
Select Publish.
Paligo displays the Publish document dialog.
-
Select an Output type (PDF, HTML, HTML5, Word, XML, eLearning or SCORM).
-
Set the Languages, Variables and Optional Parameters.
Tip
These are common publishing settings, see Publish Content.
-
Select Edit in the Profiling attributes section.
The Profiling attributes dialog contains a field for all available filter attributes.
-
Select one or multiple profiling value from the menu in the fields to be applied to your publication.
To create more profiling values, see Create Profiling Values.
Note
Leave the fields blank for attributes not to be used. When there is no attribute set, Paligo ignores that type of filter.
-
Repeat step 5 and 6 for each profiling attribute you want to apply.
-
Select OK.
-
Select Publish document to publish your content.