Branching
Branching is designed for creating multiple versions of related content. It is similar to copying, but has more features and gives you more options when working with your content. With a branch, you create a new version of a publication or topic that acts like a copy, but Paligo understands it is related to the original version. This means that the original and the branch can be used separately as parallel versions or be merged back into a single version later. Choose one of Paligo's two branching modes, see Select Branching Mode.
Break the relationship between a branch and its original version, see Convert Branch to Main Branch.
The most common use cases to work with branches:
-
Work during a release - You are working on a version for a specific product that is still in development and being updated. But then the next release of the product is due and you need to start working on the documentation for that version, see Create Branches.
-
Experiment with the content - You are considering some major changes to the documentation and its structure and you want to experiment before abandoning the old version. Merge a branch into another branch, see Merge Branches.
-
Work on major changes that will take some time - You are working on a major change for the documentation that will take some time, but the development team is making many small continuous updates that require updates in the live documentation. So you need to be able to publish intermittently until the major overhaul of the documentation is done.
-
Have two different versions that live concurrently and need changes to be applied easily in both.
-
Work during a translation project - Branching is necessary to be able to work on further developments while content is being translated. Also read Update Content when Translation is Not Finished.
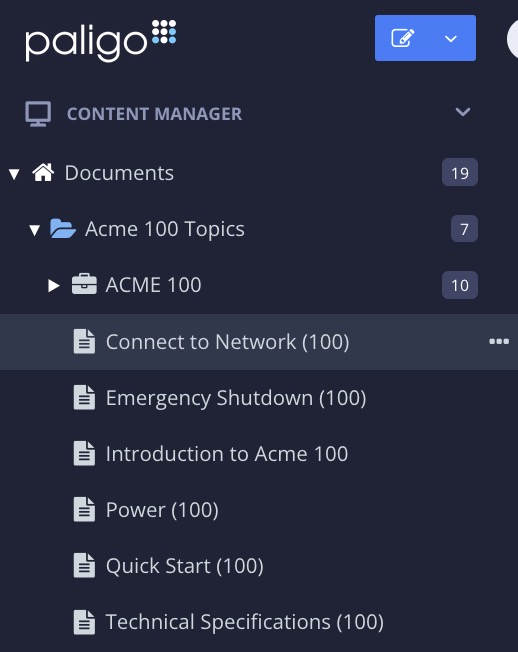
For example, in the following image, the "Acme HomeHub User Guide" has been branched. The original (1) and the branched version (2) both exist as separate publications with separate topics. You could continue to use them as separate versions or merge them together to create one publication.
 |
1 = Original, 2 = Branched version
Note
When you branch a topic, Paligo will attempt to maintain any content reuse from the original version. It will also continue to use the same image files. For details, see What Happens When a Branch is Created?.
Caution
Branching can be very powerful, if used for the right reasons and with care. It is important to avoid overly complex scenarios.
When you create a branch in Paligo, the result varies, depending on:
-
The type of content you branch
-
The branching options you choose
-
Where the branch is created. Branching a topic from the Content Manager is different from branching a topic from the Structure View.
We also explain how content reuse, cross-references, and images are handled when branching content.
You can Create a Publication Branch). When you do this, Paligo will:
-
Create a branch of the publication

-
Let you choose how you want reused publications to be handled.
With automatic branch creation, Paligo will create branched versions of any reused publications, but only for those at the top-level of the original publication. If there are reused publications that also contain lower-level reused publications, those lower-level ones will not be branched automatically.

If you do not use automatic branching, your branched publication will use the original versions of any reused publications (sub-publications).
-
Let you choose how you want reused topics to be handled.
If you choose to use automatic branching, Paligo will create a branched version of every topic in the publication. Any changes you make in the branched topics will not affect any other branches or publications.

If you do not use the automatic branching, Paligo will create a branch of the publication only, not its topics. The branched publication will reuse the original versions of the topics.
Note
Auto-branching of topics is designed for particular scenarios, and in most cases, we recommend that you leave it disabled (clear checkbox). This is because auto-branching can result in unnecessary branches of topics where reused topics would be more appropriate.
If you Create a Fork Branch for a topic, Paligo will:
-
Create a branch of the topic
-
Set the publication fork to link to the branched version of the topic instead of the original version of the topic.

-
Check the original topic for reused text fragments. These text fragments will also be reused in the branched version of the topic, so the IDs will be the same. If you change them in the branched version, those changes will also apply in all of the other topics where those text fragments are used.
-
Check the original topic for text fragments that are not reused. These are "regular" paragraphs and content structures and Paligo will give these new IDs in the branched version. So if you change them in the branched version, your changes will not affect the original branch.
-
Check the original topic for any reused components, such as topics inserted inside other topics. These components will also be reused in the branched version and so do not get new ids.
-
Check the original topic for references to other files, such as images. The branched version will use the same files as the original version. Paligo will not create a new, separate file. For example, if the original topic contains an image, the branched version will contain the same image (they both reference the same image file in the Media library). If you edit the image, those changes will apply wherever that image is used.
If you Create a Topic Branch in the Content Manager (rather than from a fork in the publication structure), Paligo will:
-
Create a branch of the topic
The branch is a stand-alone branch and is not used in any publications. Any publications that use the topic will continue to use the original version.

-
Check the original topic for reused text fragments. These text fragments will also be reused in the branched version of the topic, so the IDs will be the same. If you change them in the branched version, those changes will also apply in all of the other topics where those text fragments are used.
-
Check the original topic for text fragments that are not reused. These are "regular" paragraphs and content structures and Paligo will give these new IDs in the branched version. So if you change them in the branched version, your changes will not affect the original branch.
-
Check the original topic for any reused components, such as topics inserted inside other topics. These components will also be reused in the branched version and so do not get new ids.
-
Check the original topic for any reused components, such as topics inserted inside other topics. These components will also be reused in the branched version and so do not get new ids.
-
Check the original topic for references to other files, such as images. The branched version will use the same files as the original version. Paligo will not create a new, separate file. For example, if the original topic contains an image, the branched version will contain the same image (they both reference the same image file in the Media library). If you edit the image, those changes will apply wherever that image is used.
If you have reused content in your publications and topics, this is how Paligo will handle it when you Create Branches:
-
Text fragments
Paligo will check the original topic for any text fragments that are reused. These text fragments will also be reused in the branched version of the topic, so the ids will be the same. If you change them in the branched version, those changes will also apply in all of the other topics where those text fragments are used.
In the branched version, Paligo will only give new ids to those text fragments that were not reused in the original version.
-
Components
Paligo will check the original topic for any reused components, such as a topic that has been inserted into another topic. These components will also be reused in the branched version. If you change them in the branched version, those changes will also apply in all of the other topics where those components are used.
-
Reused publications inside a publication
If you branch a publication that contains reused "sub publications", you can set Paligo to automatically create branches for the reused publications.
For example, if you have a "Documentation" publication that contains "Getting Started" as a sub-publication, you could branch "Documentation" and set Paligo to automatically branch the "Getting Started" sub-publication too. The resulting "Documentation" branch would contain the branched version of the "Getting Started" sub-publication.
For more details, see Create Branches.
When you Create a Fork Branch, Paligo recognizes that the branch has a relationship with the original version of the topic and other branches from that topic. As a result, Paligo is able to resolve any cross-references between the original topics even when these topics are branched into new topics.
When you add a cross-reference to a topic, you should normally add the link to the origin topic, not the fork (topic reference inside a publication). Paligo can then resolve the cross-references even if topics have been branched multiple times. There is one exception to this rule, which applies in a particular scenario when publishing to external systems such as Zendesk, SalesForce, and ServiceNow (see the note below).
To learn how to add cross-references to topics, see Add Cross-Reference to Topic.
Let's say you have an "Installation" topic and you branch it.
Then, in a "Getting Started" topic you need to add a cross-reference to the branched version of the "Installation" topic.
For that, you add a link to the origin topic (component) "Installation", not its publication fork.
 |
When you publish, Paligo processes the cross-reference and looks for the target. It knows that "Installation" and "Installation (branch 1)" are different versions of the same topic, so as long as there is a branch of that topic in the publication, it can resolve the cross-reference.


Cross-references will work even if you branched topics as long as any branch of that topic exist in the publication.
Note
Cross-reference a publication "fork" to the topic instead of the actual topic if both of the following apply:
-
You publish multiple publications to different categories in an external support platform, such as Zendesk
-
You have reused the same topic in multiple publications, and those are being published to separate categories
In this specific scenario, you need to cross-reference to the fork in the publication instead of the topic. This is needed so that Paligo can resolve the link and maintain the mapping of the content when it is published to the external support platform.
When you Create Branches, Paligo checks to see if the original version of the topic contains images. If it does, Paligo will keep the same references to the image file in the branched version. Paligo will not create a branched version of the image file.
If you edit an image, those changes will apply wherever that image is used, and that includes other branches.
If you want a branched version of a topic to use a different image, add the new image to the media library and insert it in the branched topic.
To learn how to add images, see Add an Image.
When you merge a branched publication or branched topic, Paligo moves changes made in one branch into another version of the content. For example, if you choose to merge a branch with the source version, Paligo will place content from the branch inside the source.
You choose which parts of the content will be updated, added, or removed when you set up the merge process (see Merge Branches. Paligo has a merge dialog where you can see what is going into the publication/topic that receives the merge content.
 |
The dialog shows the different versions and a preview of the end result:
-
The "merge from" branch contains the content that is being used to update the "merge to" branch
-
The "merge to" branch receives the changes made during the merge.
If the merge adds a new element, such as a paragraph, to the "merge to" version, the new element uses its id from the "merge from" version. So the "merge to" content gets a new element with a new ID.
If the merge updates an existing element in the "merge to" version, the content keeps its original ID. The id from the "merge from" is ignored. This applies to the publication id and topic ids as well as the individual components for paragraphs, lists etc.
Note
As Paligo keeps the original ID for content that already exists, it means merging will not disrupt any mapping you have in place for publishing to support systems, such as Zendesk Integration and Salesforce Knowledge Integration.
If you create a branch of your content, Paligo adds a branch symbol to those publications and / or topics. There is also a number to show which version each branch is, for example, if you have "Topic A" and branch it twice, the first branch that is created is numbered one and the second branch is numbered two.
-
Gray branch icons show that the content has branches.
-
Blue branch icons show that the content is a branch of some other content.
-
The branch numbering is handled automatically by Paligo and cannot be changed manually.
-
Add branch labels if you want to give each branch a more meaningful identity.
 |
If you have Consecutive branching mode enabled there can be additional numbering in parenthesis, see Select Branching Mode.
 |
The numbering in parenthesis shows the version number of the main origin branch. For example, in the following image:
-
The top "Topic A" has a gray branch icon to show it is the origin branch.
-
The middle "Topic A" has a blue branch icon numbered 1. This shows it is the first branch of the main origin branch (the top "Topic A"). The middle "Topic A" also has a gray branch icon to show that it is also the origin branch of another branch.
-
The bottom "Topic A" has a blue branch icon numbered 2. This shows it is the second branch of the main origin branch (the top "Topic A"). It also has the number 1 in parenthesis. This shows that it is a branch of the middle "Topic A" branch (the middle "Topic A" branch is numbered branch 1 and so 1 is shown in the parenthesis).
 |
Paligo has two different modes for branching:
-
Simplified branching - With simplified branching, you can only have one main branch. All branches must be created from that same branch. This means that you cannot create branches from other branches.
-
Consecutive branching - Consecutive branching lets you create a new branch from any content, even from other branches.
Tip
Paligo recommends that you use Consecutive branching as it provides more functionality and allows both simple branching and more complex branching scenarios.
To choose the branching mode for your Paligo instance:
-
Log in to Paligo via a user account that has administrator permissions.
-
Select the avatar in the top-right corner.

-
Select Settings from the menu.

-
Select the System Settings tab.

-
Use the Consecutive branching slider to toggle between the modes:
-
Slider to the right - Consecutive branching is enabled.
-
Slider to the left - Simplified branching will be used.

-
In Paligo, you can create branches of your publications and topics. Each branch is a copy, but can also be merged back into earlier branches.
This is useful for creating different versions of content for similar products, working without affecting the live version, and also for having concurrent versions of your documentation. For more examples of use cases for branching, see Branching.
The original version has a gray branch symbol and branches have a blue branch symbol with a number. The number represents the version. For consecutive branching (set in the System Settings), the numbering will also show the origin branch number in parentheses.
During the branching process of the publication, you can:
-
Add a branch label shown next to the name of the publication. It makes it easier to differentiate between the branches.
-
Generate branches for both topics and subpublications. You can also apply the branch label to all generated branches.
Left image, the publication labeled Version 2.1 has a blue branch symbol numbered 1. This means that it is the first branch of the original Getting Started publication.
Right image, the branch labeled UPDATE is numbered 2 (1). This shows it is the second branch from the original publication, but is generated from the first branch. The first branch now has a gray branch symbol due to this.


To create a branch of a publication:
-
Locate the publication in the Content Manager.


-
Select its the dotted menu ( ... ) and choose Branching and New Branch.

-
To enter a Label name is optional. Leave it blank If you do not want to use it.

Paligo displays the Create Branch dialog
-
Choose whether to create subpublication branches.

-
Clear the Publications box to not branch the subpublications. Changes will affect the originals.
-
Some of the subpublications need to be updated, but you want to branch those separately instead of branching all of the them, see
-
Reused publications (sub-publications) need no update.
-
Does not contain reused publications (sub-publications).
-
-
Check the Publications box to create subpublication branches.
To use new branches as a "work in progress" versions. Any changes made in the branches will not affect the originals unless they are merged back.
-
-
Choose whether to create topic branches.
-
Clear the Topics box to not branch the topics. Changes will affect the originals.
If there are topics you do need to change, you can branch those topics separately, see Create a Topic Branch.
-
Check the Topics box to create topic branches.
To use new branches as a "work in progress" versions. Any changes made in the branches will not affect the originals unless they are merged back.
Important
Auto-branching of topics is designed for particular scenarios, and in most cases, we recommend that you leave it disabled (clear checkbox). This is because auto-branching can result in unnecessary branches of topics where reused topics would be more appropriate.
-
-
Select Create.
Paligo creates a branched version of your publication. It is shown next to the original version of the publication in the Content Manager. You can now work on the content in your branched version.
Note
If your branched publication has:
-
The same topics as the original, then the changes you make will affect those topics wherever they are used.
-
Branched topics will be independent of the originals. You can make changes to the branched topics without affecting the original version or other branches. But note that if a topic Reuse Text Fragments, that fragment is always reused, even in branched versions of the topic.
To find out more, see What Happens When a Branch is Created?.
If you branch a fork, this branch will use the same fork ID as the origin fork. This is important for resolving cross-references and when mapping to external systems such as Zendesk, SalesForce and ServiceNow.
The publication is updated automatically and references the branched fork instead of the original fork. Paligo stores the branched topic in the same folder that contains the original version of the topic.
For branched topics, you can change the content in the branched version without affecting the original version or other branches. But note that if a topic Reuse Text Fragments, that fragment is always reused, even in branched versions of the topic.


To the left - The publication is updated with the branched fork. To the right - The branch is stored in the same folder as the original topic.
Note
There are alternative ways to create a branch of a topic. You can get Paligo to create a branch for every topic in a publication automatically, and this will keep the same fork IDs too, Create a Publication Branch.
You can also create a topic branch directly from the topic. This is completely independent of any publications, see Create a Topic Branch.
To create a topic branch from inside a publication:
-
Find the publication in the Content Manager and expand it to see the included topics.

The topics you see are links from the publication to the topics that it references called forks.
-
Select the dotted menu ( ... ) for the topic choose Branching > New branch.

-
Adding a branch label is optional.

Tip
You can add branch labels afterwards as well, see Add or Edit Branch Labels
-
To start working, select the checkbox Open new branch in editor.
-
Select Create.
Paligo creates a branch of the selected fork.
Tip
To find out more, see What Happens When a Branch is Created?.
When creating a branch directly from a topic in the Content Manager, it becomes a "stand-alone" branch not used in any publications. The result is that the publication will continue to use the original version of the topic and the branched version will exist in the Content Manager.
This makes it possible to work on it, even if the publication is to be published during the update. Once you have made the required changes, you merge it with the main branch and it will replace the old version in the publication.
For branched topics, you can change the content in the branched version without affecting the original version or other branches. But note that if a topic Reuse Text Fragments, that fragment is always reused, even in branched versions of the topic.
Tip
To find out more, see What Happens When a Branch is Created?.
To create a stand-alone branch of a topic:
-
Locate the topic in the Content Manager.
Important
Not the publication fork. Learn the difference, see Topic or Fork.
-
Select its the dotted menu ( ... ) and choose Branching and New Branch.
-
Adding a branch label is optional.
Tip
You can add branch labels afterwards as well, see Add or Edit Branch Labels
-
To start working, select the checkbox Open new branch in editor.
-
Select Create.
Branches make it possible to update without affecting the original content. They are handled almost the same way for topics, publications, informal topics and admonitions.
However, Forks from informal topics cannot be branched from inside a publication or topic because they are only a collection of reusable elements inside a topic. They are not standalone components like regular topics.
Therefore, you have to branch the informal topic in the Content Manager. Then manually replace the inserted informal topic with the branch in affected topics, see Replace an Informal Topic Branch.
Tip
If an informal topic serves as a reusable component in a publication, you can filter the content in your informal topic instead of branching it, see Filtering / Profiling and Publish Multiple Versions of Content.
To create a branch of your informal topic:
-
Select the dotted menu (...) to the right of the
informal topicin the Content Manager. -
Select Branching and choose New branch.

The branch will appear below the file it originates from.
-
Adding a branch label is optional.
Tip
You can add branch labels afterwards as well, see Add or Edit Branch Labels
-
To start working, select the checkbox Open new branch in editor.
-
Select Create.
When you create a branch, Paligo adds a branch symbol and a number to the publication or topic automatically. But it is also a good idea to add a label, so that it is easier to understand the difference between branches. For example, you could add a label for the product version, a release date, or to show the content is part of an update.
The label is shown next to the publication or topic name in the Content Manager, Dashboard, Resource View and other displays where the name is included.
When you create a branch for a publication, the create branch dialog has a Label field where you can create a label (see Create Branches).
 |
To add or edit an existing label:
-
Select the Dotted Menu (...) for the topic, component or publication in Content Manager.

-
Select Branching and choose Edit Label.


-
Enter the text for the label or change existing text.

-
Select the checkmark to save label.

If you want to break the relationship between a branch and its original version, use the Convert to Main Branch option. This removes the branching and turns your branched publication/topic into a regular unbranched publication/topic.
Let's say you create some documentation for a product called "Acme 1000". A special version of the product, called "Acme 1000X", is scheduled for release so you create a branch that you can use to work on its documentation.
Some way into the project, it is decided that the "Acme 1000X" was going to become a completely different product called "Acme SmartHub". At this point, you decide that the documentation needs to be separate and so you want to break the "branch relationship" between the branch and the original version. To do that, you use Convert to Main Branch.
-
Select the branched publication or topic in the Content Manager.
Note
You can select multiple branched topics at once. Press and hold Alt (Windows) or Cmd ⌘ (Mac) and then select each topic. Alternatively, use Shift key and select the first and last topics in a range of topics.

-
Select the dotted menu ( ... ) to the right of one of the selected publications or topics.
-
Select Branching and choose Convert to Main Branch.

Paligo removes the connection between the branched content and the original version of the content. Your selected content is now separate and cannot be merged back into the original version.
To keep it easy to find the correct content, you should only keep the branches that are in use. The most common way to remove a branch is to Merge Branches. But if there is a branch with content that you do not want to merge, you can delete it instead.
Before removing a branch, make sure to:
-
Check if any topics, components or publications reuse the branch, see Find Where Topics and Publications are Reused.
-
Replace the branch where reused, see Replace a Branch and Replace an Informal Topic Branch.
To delete a branch:
-
Select the Dotted menu (...) to the right of the branch in the Content Manager.

-
Select Delete.

-
Select Delete items.
Note
If you try to delete a branch that is reused in a publication, the following messages appear:
-
An error message "One or more resources or any of the child resources could not be deleted".
-
A message " Some resources were not deleted" with a link to locate where it is reused. It can still be deleted, but might result in broken links.
Our recommendation is to replace the branch, see Replace a Branch or Replace an Informal Topic Branch before deletion.
 |
You can merge a branch back into its original source (or any "earlier" branch from the same source. For example, let's say you have a topic about "Temperature Sensors" and you branch it into two different topics. You now have the original "Temperature Sensors" topic and a branched version of it. These branches are completely separate, and you now have the choice to:
-
Let the multiple branches exist concurrently in Paligo as separate, but related, publications or topics
-
Merge the branches into a single publication or topic (the result of a merge is called a "single branch")
-
Merge parts of the branches. The branches will still exist concurrently as separate publications or topics, but some of their content will be merged so that it is identical in all versions. You can choose which parts you want to merge and which parts you want to remain separate.
The process for managing merges is slightly different depending on whether you want to Merge a Topic Branch or Merge a Publication Branch.
Note
Merging branches will not affect any mapping you have in place for publishing to other systems, such as Zendesk and Salesforce. To find out how Paligo manages the ids of the content, see What Happens When a Branch is Merged?.
You can use Paligo's merge feature to combine content from two different branched topic versions. This is useful when you have an existing "live" topic and you need to work on some updates separately.
If you move existing content into a new section element and making it a subsection. Paligo will recognize the moved content as deleted content in its original position and the new position as new
content.
To merge a branched topic into a "Live" version:
-
Make sure that the "Live" version and the branch are checked in and have the status Work in progress.
-
Select the Dotted menu (...) for the "merge from" branch in Content Manager
-
Select Branching and choose Merge Branch.

-
Select the Merge target from the menu. This can either be the main topic or other topics created from the same branch.

Tip
By using the checkbox Change release status and check in, Paligo will automatically change the release status of the topic or publication and check it in.
-
Select Next.
-
Paligo provides you with a preview of the changes divided in two columns. Left column shows the Merge target and right column shows the Merge from branch.
Color highlights show the changes:
-
Red - This content will be deleted from the "Merge target" and is grayed out in the "Merge from" column.
-
Green - This content is new or changed that will be added to the "Merge target". It only exists in the "Merge from" branch at the moment.

Note
Use the checkbox Delete branch when done to decide whether to keep or remove the "Merge from" branch after the merge.
-
Check the box to delete the "Merge from" branch.
-
Clear the box to keep the "Merge from" as a separate branch.
-
-
Choose what to include or exclude from the merge.
-
Accept the change by leaving it highlighted.
-
Reject the change by selecting the text fragment. It is possible to toggle the change on and off.
-
Do nothing if you only want to view the changes. You can close the window by selecting the X in the top right corner.
-
-
Select the Preview button in the lower right corner to see how the changes affect the content.

-
Select Close to end the preview.
-
Select Merge to complete the merge process.
You can use Paligo's merge feature to combine content from two different branched versions of a publication. This is useful in many different scenarios, but is commonly used when you have an existing "live" publication and you need to work on some updates separately.
In this situation, you publish the "Live" publication and create the "In progress" branch, see Create Branches. This makes it possible to work on updating the "In progress" branch. When the update is ready to be published, you merge it with the "Live" version, to create one up-to-date version and then publish it.
-
Make sure that the "Live" version and the branch are checked in and have the status Work in progress.
-
Select the Dotted menu (...) for the "merge from" branch in Content Manager.
-
Select Branching and choose Merge Branch.

-
Select the Merge target from the menu. This can either be the main publication or other publication created from the same branch.
Tip
By using the checkbox Change release status and check in, Paligo will automatically change the release status of the topic or publication and check it in.
-
Select Next.
-
Paligo displays a Preview (Simple Merge) of what the "Merge target" will look like after the merge has taken place. Color highlights show the changes:
-
Red - This content will be deleted from the "Merge target".
-
Blue - This content will be updated with content from the "Merge from" branch that is different to the content in the "Merge target".
-
Green - This content will be added to the "Merge target". It only exists in the "Merge from" branch at the moment.

Note
The Preview is the same in both Simple Merge and Advanced Merge. You can toggle between Simple Merge and Advanced Merge with the button in the lower left corner. Depending on which view that is activated, the button name switches between Simple Merge and Advanced Merge.

The advanced merge has three columns:
-
Left column shows the content in the "Merge from" branch in its current state.
-
Middle column shows the content in the "Merge target" branch in its current state.
-
Right column (same as Simple Merge) shows a Preview of the "Merge Target" branch if the merge is done.
-
-
Use the Preview column to control which changes that will be applied to the "Merge target". When you choose which content you want to merge, the preview is instantly updated.
-
 Restore a deleted topic by selecting the red topic. It will be
marked as "added" (green).
Restore a deleted topic by selecting the red topic. It will be
marked as "added" (green). -
 Remove an added topic by selecting the Green topic. It will be
marked as "deleted" (red).
Remove an added topic by selecting the Green topic. It will be
marked as "deleted" (red). -

-
Accept topic changes by selecting the Checkmark to the right of
the blue topic. The changes will be merged into the "Merge target".
-
Reject topic changes by selecting the Cross to the right of
blue topic. The changes will not be merged into the "Merge target".
-
 View the topic changes and accept or reject them individually by selecting the Pen to the right of the blue topic . This opens the Merge document dialog that highlights the content changes and makes it possible to choose what to include or exclude from the
merge.
View the topic changes and accept or reject them individually by selecting the Pen to the right of the blue topic . This opens the Merge document dialog that highlights the content changes and makes it possible to choose what to include or exclude from the
merge.
Tip
This can also be done from the Merge to and Merge from columns in the Advanced Merge. By hovering over content in these columns, you can Add (+) and Remove (-) content.

-
-
-
Select the Pen to view the changes individually.
Important
If the Publication Topic has been updated, it will be highlighted in blue and the pen will appear to the right of the publication icon.

To merge these changes into the merge target, you have to select the pen and choose merge to accept them. Otherwise these changes will not be seen as accepted for the merge.

-
Choose what to include or exclude from the merge.

-
Accept the change by leaving it highlighted.
-
Reject the change by selecting the text fragment. It is possible to toggle the change on and off.
-
Do nothing if you only want to view the changes. You can close the window by selecting the X in the top right corner.
-
Select the Preview button in the lower right corner to see how the changes affect the content.
-
-
Select Merge to save the changes and return to the Preview (Simple Merge).
Note
It is possible to return and redo the changes again by selecting the Pen.
-
Select Settings in the top right corner.
-
Use the checkboxes to decide what happens with the branches after the merge is done:
-
Check the "From" branch box to delete the "Merge from" branch.
-
Check the Unchanged inner branches box to delete any reused topics or publications that are identical in the "Merge From" branch and the "Merge To" branch.
-
Clear the boxes if you want to keep the "From" branch and / or the unchanged inner branches.

-
-
Select Merge to complete the merge process.
If you have branched topic Forks in a publication, they can be replaced with another branch of that topic. This feature is only available in the Content Manager.
-
Expand the publication in the Content Manager.

-
Select the Dotted menu (...) to the right of the branched fork to be replaced.

-
Select Branching and choose Replace Branch.

-
Select the replacement branch from the menu.

-
Select Replace.
The replacement branch is now part of the publication.
The option to Replace a Branch is not available for informal topics. They have to be manually replaced and the easiest way is to use the Search and replace feature in the Source Code Editor.
 |
Tip
Another method is to first remove the informal topic from the regular topic and then insert the branch, see Remove Inserted Component and Insert Component.
This cannot be done from the Structure View.
Before the replacement:
-
Find the UUIDs for the branch to be replaced and the replacement branch, see Search for the UUID.
-
Check if any topics, components or publications reuse the branch, see Find Where Topics and Publications are Reused.
To replace an informal topic branch:
-
Select the topic or component in the Content Manager to open it in the Editor.
Alternatively, you can Create a Topic and edit that.
-
Select the Edit tab in the toolbar.

-
Select Edit source code.

-
Place the cursor inside the Source Code Editor.
-
To open the Search and Replace widget, press:
-
Ctrl + H (Windows)
-
Cmd ⌘ + Option ⌥ + F (Mac)
Note
If you hit Ctrl + F (Windows) or Cmd ⌘ + F (Mac) you only open the Search widget.
-
-
Enter the UUID to be replaced in the Search for field.
-
Use the arrows to toggle between Next and Previous search hits.

Select ALL to show all results at the same time.
Note
When an option is chosen, it gets a blue square around it. To deselect it, click it once more.
-
Enter the replacement UUID in the Replace with field.
-
Select Replace to only update the selected search hit.

Select ALL to update all search hits at once.
-
Select Update in the lower right corner to save the changes.
Select Cancel to ignore them.

-
Close the Source Code Editor with the X in the top right corner.
-
Select Save.

-
Repeat this for each topic that reuse the informal topic branch.
A "fork" is a special type of link between a publication and its content. This means that it's not the topic or subpublication itself, but a reference (link) that is used in a publication. Learn more, see Forks.
 |
-
Fork, only a reference (link) to the actual topic
-
Actual origin topic, where you write your content