Back to Paligo Academy
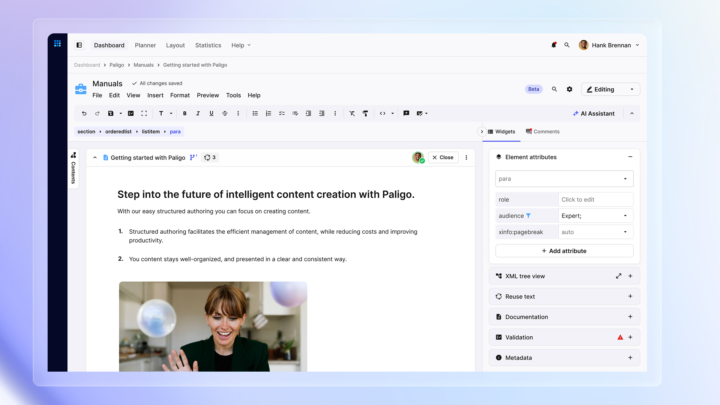
Collaboration in Paligo is the name of this recording, but really it's collaboration in your organization. We collate and curate content for so many different people. We have content reviewed by different people in the organization. Collaboration is critical to any organization in getting the content out through the door in the best possible way. Let's just compare for a second. When I started writing, thirty years ago, I used to go with a pen and a pad of paper. I used to interview the SME, the subject matter expert, and get information from them. That was the way that I would do my process and then get a printout, a Word copy for people to put their comments on and generally illegible. Nowadays, it should be, but it's not. It should be very different. It should be working a bit like Google Docs. The collaboration team should use the same tool as the authoring team. The comments go there and back. They can be managed, assigned, planned. That's what we're gonna talk about today. We're gonna talk about how to set up and how to get the collaboration process working, the different types of users we have for collaboration and also obviously how it works. Then maybe it's easier for you to explain to your collaboration team how to use collaboration in Paligo for your organization. Let's move on. If you've been watching our other videos, you should be familiar with this screen already. It goes to the main parts of your authoring workflow. The main parts in Paligo. And we would recommend to watch the other videos if you need to brush up on other skills. things like authoring, reusing, translating and pulishing. As part of this Paligo solar system, we are concentrating today on collaboration. So before moving on, I think it's really important to understand the different types of users we have in Paligo and where they fit into the big picture. So the first 2 types of users, admins and authors, they are full rights. An admin just has access to various settings that an author doesn't. But all the things we've learned in terms of reuse and authoring, cross-references, publishing, etc., etc... that's what authors can do. They have access to the complete set of features that Paligo has for managing your content. The two users for collaboration are called contributors and reviewers and the label on the right basically showing that the authorization level goes down this list. So admin can do everything. Authors can do everything apart from various settings like we said. Contributors in the collaboration, they can add, edit and delete content. The reviewers can just put comments on the side. That's the difference and we are going to explain and show how contributors and reviewers work in this video. And just to emphasize, a contributor and reviewer can only access the content when they have actually been provided access whether either by sharing or an assignment from an author. So they can't just go into the system and access what they want, only what they have specifically been given access to. There's 2 different ways that you can give a contributor or reviewer access to the content in order to do their reviewing your contribution job. We share and we assign. I will show you in a second inside Paligo, sharing means that you're giving them access, but it's not really managed. It doesn't go in a planner. You can't track the status. An assignment is the opposite. When you track status, it goes into a planner and you can manage and see when people have signed of on them. Let's take a look. Before we actually share an assigned content, let's discuss what could you share. What can you assign? So obviously, you can share or assgin a specific topic. We could also share an assignment in a particular publication. Worth knowing, you can also assign and share a fork in a publication. So, for example, I have this publication, let's say, of a hundred topics. I don't wanna share them all. I just wanna share the installation chapter, for example, let's say it's this one where my mouse is. So I can also assign and share here. So it will only share that particular point of that publication rather than for the whole publication. Makes life a lot easier. Just assign what you need to assign. This will be any superfluous information. Maybe another question we need to think about for a second. What about if I've got three completely separate topics? So I could do one of 2 things. I could have 3 separate shared or assignments for those topics and do them separately. Or I could create a temporary publication. A regular publication just by going to a folder and a publication. Create content. And give the publication whatever name. And then I could actually share that with 3 topics in, rather than sharing three separate topics. Just an option for you should you need it. So if I want to share my whole publication in this example, so I click on the dots alongside what I want to share and click on share document. So I can put in here one or more users or groups, I'll mention more about groups in a second, For example, to this person. I could put a message in, and I could put a date or without a date. If I don't put a date in, essentially it means it's shared forever, or I could put a date in by clicking on the checkbox over here and that would then allow me to put a different date in. That's how I share content. Let's have a little conversation for a second about this idea of groups. So an administrator, I'm going to go into settings, has access to the settings, and you can create groups. Click on the groups tab, and you can create a new group. You give it a name and then a description and then you would put in the different users that you'd want to put in here. So rather than send to multiple people at once, you can create a group with multiple people at the same time. So that can be really useful and it's a lot quicker and can save you time. So we've spoken about sharing content, we've spoken about groups. Now assigning content. So I can click on the 3 dots again, create assignment, and review all contribution - I'll choose review. And I can assign again 1 or multiple people. I'm going to assign it to my Gmail address. When does it start, when does it end? And I can leave a message if I like. So where does this message go? The same thing with the share, where do they go? By default they go to email, but you also can integrate with Teams, Microsoft Teams or Slack if you want a notification. So Paligo fits into the normal corporate workflow. It's up to you if you want to do it that way. And in your own profiling, you can decide how you want to get your messages and how often you get them. I'm also going to click into default settings just for a couple of comments and if you look at these in more later, because there are various important processes that can happen, automatically or manually and we are creating assignments. For review assignments, you can define if the release status changes or when it's considered finished. You can also define what happens to comments when you create an assignment. When they get archived. Because if you don't archive your comments, you're essentially gonna have potentially hundreds or comments, they are all historical, so cleaning out, that doesn't mean deleting, just archive those comments so you can have a clean interface for new comments for a new version and there's also a restore version that we'll see later but if you want to bring older comments back you absolutely can. And for contributions, you can decide what is really improtant here - creating a snapshot. We'll discuss later when we do comparisons, when we are comparing against a snapshot, in other words a point in time. So when you create a contribution assignment, does the snapshot get created automatically? Or do you asas the author need to create it manually? These are just worth looking at in a bit more detail later on in your own time. For now, I'm going to click okay and make this assignment. The assignment has been sent out. Let's continue and see what happens next. As we said before, when you create an assignment you can manage that assignment later. One of the places is in the project planner. Let's look at the project planner. To open the project planner, we just click on planner at the top of your Paligo. The planner is a bit like a Gantt chart if you know what they are. Basically, it just shows you all the different assignments you have and the dates so you can browse through to see what's happening in your system. And you'll also see whether it's been signed off or not. Now it's got a question mark because no one has responded. There will be a green tick or a red cross if it's been accepted or rejected, so you can easily see here. If you, for example, let's say you've sent it off, to five different people for review and 2 of those people are critical, you'll know when those people have signed off and you can move on with the next stage of your workflow. In addition to that, you can also edit the assignment, add reminders, change the dates, etc. etc. So for those of you with multiple writers, multiple documents, multiple assginments. So the projects are not just in the air, you can come directly to the planner and see the status of everything and manage it accordingly like you would manage any professional project. This makes a big differece in relation to some other systems where you don't have an option like this and it's really hard to manage those assignments, the statuses of them. Let's also have a look at the dashboard - what happened with the assignments. So I'm clicking on the dashboard, and your contributors and reviewers will also have their own reduced version of the dashboard because they are not full-on authors. So here, for me, you see I've got an assignment and I've also created a couple as well. And if I click on one of these it opens the assignment as well. Whether I created it, whether it was assgined to me, or assigned to someone else in the system, you can always open them as a full author. And I'm gonna open this now using my other email address so you can see what it looks like for your contributors or your reviewers. I'm now logged in using my own personal Gmail and you can see that I have an assignment here, which is the one that I sent myself. Let's click and open it. This is the reviewer and contributor interface. First thing to notice is this little checkbox here. If I click on it, it show me the assignments I've been given, and this is where I can mark it as being approved or needs work. And you'll see the results of those in the project planner as we showed just recently as well. So this is where, if you can encourage your team to use the approve and needs work buttons, you know the status of every assignment you've sent. I won't click anything for now. Let's have a look if we are a reviewer, how to put comments in to something you've shared or assigned. I'm now logged in as my private email. I've assigned myself a document, which is this one here, and you can see it here underneath assignments. I'm gonna click to open it. And this is the same link as you can see in the url that I would have received by email or by Slack or by Teams. And to put comments in is actually very simple but let's first have a look at the table of contents. You can actually browse through the documents - small, large document - so you can get to the place that you want using the regular heirarchy. If I want to put a comment in, I will for example click on here and write a comment. So I could just write 'this is not correct' but I could also bring someone else into the discussion using a regular 'at' and I'll send it to myself. And click save. So Steve Wiseman, my other user, will be informed about this comment. If I want to have a further discussion or someone else puts in, we do add. Very simple, normal way of working. If you remember, by the way, before we spoke about archiving. So if I want to archive this I could do so from here. If I want to restore old comments, I can do so by just putting the dates in. So that's how you bring in the old archived comments if you want to so you don't need to have a messy instance, so you don't have messy topics we can archive old comments to keep things nice and clean for us. Another thing as an author that you can do, I can mark this comment as done or rejected or marked as read. So if the reviewer wants to come in later and okay, what did Steve the author do, with this comment I gave him? And you can see what I did with it and what I thought of it. Very useful tool as well. If I want to just put a comment on a certain word, then I could just select the word, and then put the comment in. Simple as that. And if I click on the button here, it goes to the comment or if I go to the previous one, it goes to that comment as well. Very simple to put the review comments in. You don't just see review comments with the reviewer interface, you also can see them in the regular authoring interface that you will probably spend most of your day in writing your amazing content. Let's have a look because it saves you from switching between different tabs or even different documents. See everytihng in one place. Let's look. I've now switched back to my regular Paligo as myself, as an author. Let's have a look at the topic that we just put comments in which is using my app. Let's have a look what happens. If you see here, there's a blue button. The blue button is telling me that I've got comments that I need to deal with. I clicked here and it shows me the place where the comment is, if I click on the button alongside it shows comments, and if I click here you can see the same comment that we had before. Very simple to do. And I can add etc., etc., to those comments. I can even go here to a different place and add my own comment as well. But another button that's worth pressing sometimes that we've not mentioned before is the distraction free mode. Watch what happens. It basically cleans everything out puts the comments on the righthand side. So if I've got a whole bunch of comments it's a much easier way to look at them, and again, if I click on the button here, it will go directly to the place in the topic where that comment is located. So just another idea for you. You can also use distraction free mode when you're writing. Literally if you want less distraction in the window and work in a cleaner interface with other content manager. Some additional buttons worth looking at, I'm actually in my own environment here, very similar. This button here only appears if you're an author. It will actually open a different tab with the topic in the regular environment. This button here that everyone has allows you to share the document like we saw before so the reviewer can share the document with somebody else. Or this button here which focuses on this topic, in other words you'll just see that topic rather than everything else in the publication that you've been assigned to. And just back to return to the page we were before. Those 3 buttons that might be useful for you. Now we're going to go to the contributor. This is a step above the reviewer because you can add edit and delete content. So it could be 2 different parts of your worflow. Maybe you want to curate, get parts of your content from someone else, so we could hand them an empty topic, we could hand them a templated topic with maybe a table ready for them to fill in, whatever it could be, the beginning of the workflow to acquire that content. Or it could be later on having the engineer or project managers, or whatever it may be reviewing content, making changes. And then later you can track and compare the changes. We are now in the reviewer mode you saw before. To switch it into the contributor mode, you just click edit mode. Now we can edit content and you choose a particular topic. In this case I'm going to choose "about this product". And I'm just going to make some changes. This is a wonderful product. Maybe I want to put a bulleted list under, so I just click enter, click on the bullet icon, and for the sake of speed, I just call first and second. I want to get out of this, so I just click enter, enter again, just like Google Docs. That's the environment, that's the experience that this interface gives you. You don't need and the contributors don't need really training to learn how to use this. They should be able to write relatively naturally in the content. And they can add code, they can add images, video, etc. etc. I also want to show you something else which is interesting, is if you want to paste content from somewhere external to Paligo, Google Docs, Word file, spreadsheet, whatever it may be into the regular environment, you'd need to paste it line by line. In the contributor environment, which by the way you can also use as regular authors, and there are times when I go into this environment because it's sometimes quicker to write in here than in the regular environment, especially for copying and pasting. So it's for you, not just for your contributors. So I can go to another page which I've got lined up here, and some content here, there's a list, it's got some bold and bit of code, copy that. Now I can go back into my contributor here and anybody can, and paste it in. There's my content, with the list, with the code. Very simple to do and when I finished I will save. Close that. Now as I'm a regular author, like I said, I'm gonna look at it as a regular author and lets have a look what happened. It's come in as a regular ordered list. Also with the code appropriately set with the code element. Let me just quickly teach something really quickly especially while we're here, maybe this shouldn't be a list, it should be a procedure, I just move my cursor to the top of the ordered list, I click on the procedure icon and watch. That list because a procedure. It's very simple to move between the different types of lists. And I'll save this. So what we've done is we've shown you, really very quickly, how to add edit and delete content as a contibutor. Nothing to it really. So something else you can do is you can also add new topics. So if I click this button here, insert a topic, I can add a new topic. I've called it a new topic for recording and it has a special folder that's been defined already in terms of document contributions with my name on it. So if I click on that, which a contributor can do, it'll create a new piece of content. And you can see the new topic for recording is here, which I can double click and edit like anything else, and its also placed in the appropriate place in the publication for where I entered it and if we have a look at the content manager, under contributions Steve Wiseman, you can actually see it's here and all I need to do is then drag it back into my regular topics folder. Or wherever I want to maintain it, nothing gets broken as I discussed before because database IDs, all the links to everything works and that allows you to manipulate that content that's been added by the contributor. So what's possibly the last thing you want to? So your SME's, your collaboration team have made their changes. You want to compare the changes. You want to see what's changed. You want to decide what goes out to the users and what doesn't. Let's have a look. So comparing changes is very simple, I go to the icon over here, I go compare versions against a certain time and date, which as we've discussed before how to make the snapshots, and I click. Paligo shows me what's been edited and deleted. What's been deleted is great. I've added this additional content as you can see. So as we do I also put in what I call a fun extra. Maybe again, fun is being a bit too flexible with the word but it doesn't matter. Setting profiles and variables for assignments, what do I need? A piece of content. And the SME wants to see it with its variable name or the product name or specifically for the audience that SME is responsible for rather than seeing everything with these genetic variable names. You can actually set that and send it for an assignment with the information already set for those profiling and variables. Let's see how to do that. I'm now back in my topics folder. For those of you who have seen the reuse video you'll see that we've created this welcome to, it has a variable with the product name and you'll also see some filters, conditions, profiling, whatever you want to call it all mean the same inside this topic. And what we could do, we'd go to preview, profile settings, and we could say the variable for Apple is Apple TV, the profiling lets say is for beginners, and the version was for version 2 and we could apply that to see the results. I can actually save these as favorites so I'll just call it beginners 2.0 for now. So if I have that, if I have to reset and click on this again, it allows me to see this ready with those variables and filters. What it also allows me to do do, so when I create an assignment for this particular topic, I can go create assignment, review or contribution, and I can choose that profile so when that contributor opens that page they'll see it with this information already set for them. The question just remaining is for a publication. So how do you do it for publication? For those of you who have seen the publication video, you can actually go to edit, open editor for a publication. This is where it will set all previews for the profile settings. Let's see. Let's just quickly do one. Mac, we'll call it Mac. So when I send the publication for an assignment, create assignment review and I can pick up the one I created in there, or if I do the assignment from a fork which we discussed before, somewhere inside the publication, exactly the same it will pick up from the edit publication side. So if I can create assignment, again I can choose the map that I created. If a contributor or reviewer actually wants to do it themselves, and set those values, they are able to. Maybe it's not so common that they would do. But you can click the options and then profile settings and they can set it manually for themselves. But that's really useful information because you can send to an SME with the specific profile content that they need. As we said at the start, collaboration is key for every single company. It's really important you have a piece of functionality that's seamless, clean, easy for everybody to use. Doesn't need your collaboration team to go on twenty four hours of intensive training. So use the collaboration with Paligo. Bring everybody in. Bring all different departments in. You can understand the process simply. You can assign content. They can provide and edit the content that you need to help you make the most amazing content using Paligo. Have a great time everybody.