Back to Paligo Academy
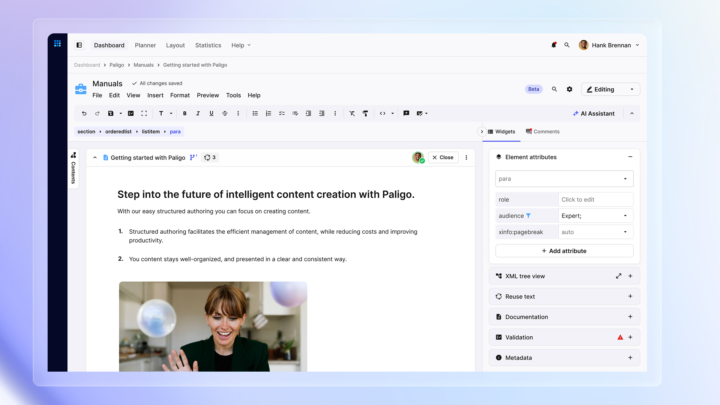
So now it's time to start creating new content. I'm gonna go to the pubs folder here, click on the three dots, go to create content. So we're called a component content management system, a component CMS if you like. Sometimes the word component scares people. So now's the time to reduce that fear. Take away the fear completely. These are all components. A publication. That's my table of contents, my structure that normally contains topics and other components. A topic is the most common type of component. For those of you who have used the help authoring tools, you'll be familiar. A topic is essentially a heading, with stuff underneath and instruction material, explanatory material, whatever it could be. And then formal topics, some might call these snippets. It's content that can't go into a publication. This can't sit on its own, but they say it sits in a topic. It could be a reusable table, a bunch of paragraphs. Anything at all will fit in something else, and appendix for those of you who are using PDFs. And these below: dangers, warnings, etc, they're what we call admonitions. And they're reusable in different places. So for example, you've got a piece of machinery. You'll often wanna have a warning that says, 'please ensure it's turned off before opening the system up'. So that'd be a reusable admonition that you could use. In this case, I'm gonna create a new publication. So we're gonna create our new first publication in Paligo. I'm gonna call it creating a SaaS product. I'm finished. I'm happy with this name. I'm gonna click on okay. So we can see here that we have our new publication. I can see the structure by either clicking on edit open structure, or by just clicking on the words of the publication itself, it automatically opens the open structure. When I do it for a topic, it opens the authoring environment for publication. It opens the structure. I want to create some new new content. So I can go to new topic, and I'm gonna create three new topics. Opening the app as my first one, I clicked new topic again. Getting started, new topic again, and adding users. When I finished, I'll click the save button. If I wanted to change the folder where I put those topics, I could have chosen a different folder. For now, that content is here. I actually want to move them to the topics folder. So I just click on the icon of one. I'm gonna shift + click. To click on all of them, I could also do control, or the equivalent on the Mac, if I just wanna select various ones and keep on the icon and move them into topics. So I have a tidy structure. Again, this is all optional. Do as you like. Just as a hint, if you want to move things around the content manager, you could always go to what's called the floating control panel, and you can move things much easier. So if you want to do a major restructure of your content or just move from different folders, you can have up to five of these open at the same time, makes it much easier and quicker to move the content around. We can also see the structure of the publication. By clicking on this left icon here alongside the publication, and it's always exactly the same structure as we have over there on the right in the proper structured view. Let's just have a little look as well at this structured view of different things we can do with it. So first of all, If I click on a piece of content, in this case, adding users, if I click on this icon, it allows me to go straight to the editor. This would remove it from this publication, which I don't want to do. And I've got these buttons to move it up or to move it down. I could move it to the right, move it to the left. So you can play with the hierarchy that way. In fact, let's take getting started and put it inside of opening the app. I can also show you a quick example of reusing content. I can take a topic from somewhere else and just drag it into here. And let's move that to the right by clicking on it and moving to the right. And there we have a pretty nice structure of a publication, and I click on save. Couple of things that might be of interest to you in addition. If you have lots of topics in your publication, if I click on the search button and say look for the word 'getting', it'll highlight the content. It'll go you go straight to it in a larger publication. And I've also got revisions here if I want to go back to different revisions should I need to. That's a quick review of what you can do in the structured view. I now wanna teach you something a little bit technical, but it's quite important and it's worth understanding. Like I did before, just open this icon here, as we see it's the same structure as the structure view. If you notice that the actual topic that says 'adding users' looks slightly different in terms of its color and shading to adding users when I open this icon to see inside the publication. The reason being, this is what's called adding users here. This is called the origin topic. Adding users inside the publication is actually called the Fork, f-o-r-k. Maybe the term is used slightly different in other systems. I'm teaching you how we use the term here. What it basically is, it's not complicated. It's the reuse of adding users in the publication of creating a SaaS product. So that one origin has one fork. Let's say I used 'adding users' in three different publications. So that one origin topic of adding users would be being used in three publications, in other words, have three forks of that topic. And if I were to click on this, or any of the forks, it essentially opens the same origin topic because it's reusing that same content. Let me just ask you two questions to think about. And you can answer for yourselves. Is this true or false? A single topic can have multiple forks. Think about it? That's true. A single fork can have multiple origins, true or false, So if I've done my job properly, you all shouted out, "that's false Steve", and you were all absolutely correct. So if we quickly summarize what we've just done and we've actually made some really good progress, we've created a publication. We've created some topics. We've played with the hierarchy of their topics. We even brought a reused topic into that hierarchy. And we've also done some hygiene and moved those topics to a different folder. Let's go to the next stage. So I'm now ready to start writing. Let's go. I'm gonna work on the 'getting started' topic first. I could open it in a couple of places. I could open it directly from the topic. I could open it from here, which is the fork where I'm using it in this publication. I could click on the three icons and go 'edit open editor', or I could even go in the publication and 'getting started' and click this icon to open it to it from there. All end up at the same place. And this, for many of you, might be the first time you the authoring environment in Paligo. Just notice no XML tags. It's not scary. Typical cloud based application. There's a toolbar here at the top. We've got some menus. We have the structure. Breadcrumbs to tell us what's going on, and we have lots of white space. And let's go and start learning how to use this relatively simple authoring environment. First of all, notice this structure has a title inside the section. It's not a heading 1 or a heading 2 or a heading 3. It's actually part of the reuse and in HATs, for example, you don't have this flexibility because I can end up using this topic in any publication at any level of the hierarchy. So it could be the heading 1,2 or 3. When Paligo publishes, it assigns the appropriate hierarchy according to what is in the publication. So it enhances its potential for reuse. And we have a paragraph under here as a para inside a section. And please keep an eye on the breadcrumbs, on the structure, because this is really the source of structured authoring. And if you bear with me for the next few minutes, you're going to know structured authoring. So even if you didn't know anything about structured authoring before, because Paligo doesn't demand that you learn the the rules behind the structure, in other words, Docbook and the standard, like, for example, a different system, will enforce you to learn DITA before you learn the product, learn theory before you learn practice. We're just gonna learn how to use all of it inside Paligo. No extra knowledge is necessary. So let's write some content inside the paragraph. This topic explains how to get started. And now I wanna put a procedure underneath this paragraph. So I go down one level. I could also use either my cursor, my mouse. And you see, I have this little icon here. If I start typing, Paligo says you can't do it. You need at least a paragraph. You can't just type inside the section. So I could either click on the paragraph or the shortcut or whatever. I don't wanna put a paragraph in. I want to use a procedure. There's three ways to put in the same procedure. This icon here, so I could click on the icon or the shortcut, Windows or Mac, or alt+enter, sometimes enter, will bring up my list of elements. As you can see here, These are all my elements. And if I type in procedure, well it's actually already at the top of the list because I've already bookmarked it as one of my favorites, and I'll click procedure. And let's look at the breadcrumbs again. This is a paragraph. Inside that first step, you can always see by the yellow background, of the procedure, of the section. They're all connected together. They're not separate, dispersed elements as we call them. By the way, we call them elements rather than styles, and you'll get used to how they work. So let's put in some text for the first paragraph. I'll also add some another couple of steps as well. I just click enter at the end of each step to create a new step. Click on the dashboard, click the view menu. I've got three steps. By the way, I just wanna show you something else. We have three different, four different icons regarding lists. An ordered list, that's a bulleted list. We have a ordered list, a numbered list, a procedure, and a checklist. Sometimes I'm asked what's the difference between a numbers list and a procedure. Well, essentially they are kind of very similar. They look different in the output as we may see later. But it's also logical with a semantic type of way of thinking. A procedure is something where you have tasks, a, b, c, d, e. A numbered list is more you have a list of things you just want to list in a particular order, but it's not procedure. But it's up to you how you use them. There's also different elements inside procedures. There are lists, there no time to go into it, but it's something I wanted to relate to because sometimes we'll ask that question. Now let's say, I want to put a paragraph under log in to the system. Now if you were in a HAT or in Word or Google Docs, you'd often have to go down, create a new paragraph that's not actually... it's not connected to the step. You just make it look the same by tabbing or playing with the formatting, which makes life difficult. In Paligo, let's see what happens. You go down a level. I'll click on the para, and I'll put some text in. Speak to admin. Watch the para is actually connected to the step. It's not a separate paragraph. It's actually all connected. This means they go together. I don't need to have a separate style called para end one, para end two, which some of you might be familiar with. This is part of structured authoring. Very simple to do. I'd like to show you something else. I wanna put a title at the top of this list. So I'm going to the top of the title. As you can see, my bread crumbs, my structure is moving, telling me always where I am. And if I click on alt + enter, it shows what elements I'm allowed to do here, allowed to put in here, and here's the title. And so I'll put some texting. And now let's say I want to be really naughty. I want to put the title in, for example, here. So if I go alt + enter and I type title, it doesn't exist. In other systems, you could put a heading 1 in the middle of a table, do whatever you like. This is part of structured authoring. This is part of the rules you just learn as you go along. And when I click save now, click on saving it and validating that everything's okay. If I just click on validation at the bottom here, you can see it passed. The XML scheme of validation, which is essentially Docbook. So you don't need to learn rules because the rules were made by technical writers, for technical writers, and they're really not difficult to get used to as you could see with a title at the top, but I'm not allowed to put a title where it makes absolutely no sense. I now want to show you something that you don't normally need to do. I'm going to go in the source code. I'm gonna show you the source XML, not because you need to, but because I want to show you something. There's an icon over here. And here is the source code. Just look how clean it is. There's no formatting. It's not messy. Even if you don't know any coding, you can see this is quite tidy. Again, different to some other types of systems. All we have, for example, for the title, is the beginning, the end, the database ID, which Paligo needs, and the text in the middle. What this means is we're separating the authoring and the layout. You work inside this authoring environment. We don't care if something is blue, green, yellow, and what size the font it is. What we care about just now is getting the text in a reliable structured way that we know later when we create layouts, we'll create a PDF, HTML score, whatever type of layout is, it's going to work. That joke I made, you might have heard about the tweaking, breakfast, lunch, dinner, and tweaking. You see, there's no tweaking here because the content is reliable. Because when we save this, and when we later click on layout and we create a layout, it's gonna create the PDF, HTML just exactly as I want because I kept the rules as I authored. Saving essentially hours and hours of the tweaking and all the different things you do to get PDFs out and HTML and some other types of systems. Let's have a look at what's called the element menu. The element menu, if I click on any element, and I click at the top here, I get various options. So I can move it up. I can move it down. You can try that yourselves. I could lock content, which means It it can't be changed anymore. You wouldn't be able to edit that content easily. If I try editing it, Paligo doesn't let me. I'm going to click para and unlock it. You could also disable the translation. You can play that yourselves later. We'll get to look at this when we do the versioning, We can also copy and paste. For example, I could copy this paragraph. For example, go here, click on the step and insert. Just insert, not as reused, just in but insert as reuse, and that actually becomes reused content, actually in the same topic. I don't want that, so I'm gonna click on the undo button, click on it here, and we're back to where we were. But it's very important to know, especially, for example, regarding delete. I can do various things with my content using the element menu. Be aware. We're seeing how to copy and insert, paste, using the element menu. It's actually much quicker and really useful using the XML tree view. If I click on the tree view, I can actually see the content that I have and I can open it up. I can see the procedure. I could copy something. I could also delete it if I wanted. I don't want to delete it. I'm gonna say cancel. So let's say I want to move, speak to admin, to under the click the view menu. So all I need to do is drag it like this. I put it just above, down below, and there it is. I want to put it back again. So I'll go up here. There we go. That's a much quicker way of moving, but as paras, any element you can move using the XML tree view. Now, I want to put in a bulleted list into my content. So I'm gonna go to speak to admin, go down one level again, just like that. I'm in the right place at the step, and click on the bullets. And let me just call them Bul one and Bul two. Let's go to the structure again. It's a para inside the list item, meaning the bullet. Of that full itemized list of that first step in the procedure of the whole section. If you understand that, please nod at the camera, even though I can't see you. Cause if you've understood it, you've understood Paligo. Everything is based on what we just did. This is structured authoring. So new to it or not new to it. Hopefully, if you followed it all, then you are in a great place to move ahead with Paligo because we now all know structured authoring. Well done, everybody. Before we move on, let's do a quick preview just so you know it exists. If I go to preview here and let's do as a a PDF, so I click on PDF. And there's our content as a PDF for us. And it's using currently, the default layouts, but you can also use your own layouts. I'll quickly show you. If we click on this icon here, edit the settings, and we go to preview. Later when you know how to create your own layouts, you can actually set 'select the layout.' So you got your own company layout and the branding and the fonts and whatever it may be, you could set those. So always the preview will be with your branding, and they can do a preview in HTML five as well. So there we have our content inside the preview as HTML file.